Backup and Restore Procedures
Introduction
The backup and restore procedures allow you to transfer valuable information and configuration data between two Eyeglass VMs.
This backup and restore process is the only supported method to move to a new appliance, and it restores the license keys that were applied to the previous appliance.
Back up the appliance before deleting it from vCenter. If a new appliance is deployed and the previous appliance was not backed up, sales@superna.net must validate your licenses. Sales is available Monday to Friday, 9-5 EDT. Support is unable to assist with license keys and does not have access to any license key system; they mark the case as solved and hand off to sales to follow up with you.
You will need to:
- Retrieve a backup file from the "active" Eyeglass VM.
- Transfer this file to the Backup Eyeglass VM.
- Activate functionalities.
- Connect the new Eyeglass VM to the Cluster(s).
How to Retrieve a Backup File
- Log into your active Eyeglass VM through the Web UI.
- Click on the About/Contact icon.
- Navigate to the Backup tab.
- Here, you will find two buttons which generate different zip files:
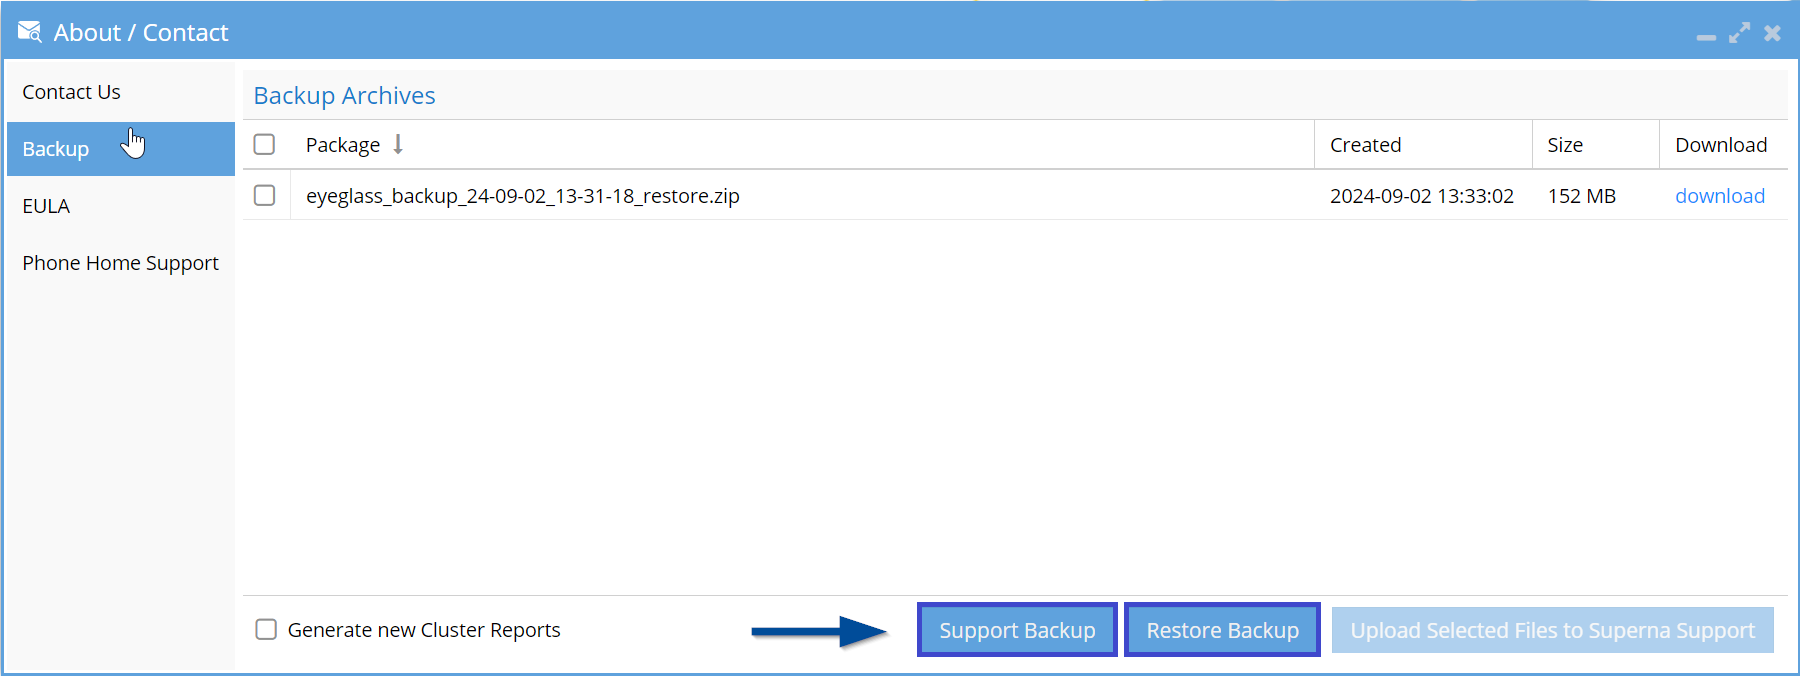
- Support Backup: Usually used by our Support team. This file includes information about Clusters, Eyeglass Configuration, and Logs.
- Restore Backup: Includes information about Application Processes, License, Clusters, Inventory, and Failover Configuration.
- Click on Restore Backup (for configuration restoring purposes). Use only the Restore Backup so that all private keys for SSL are restored. The Support Backup does not include any private keys needed for SSL certificates.
- Wait for the Job to complete and you will find the Download links in the Backup tab.
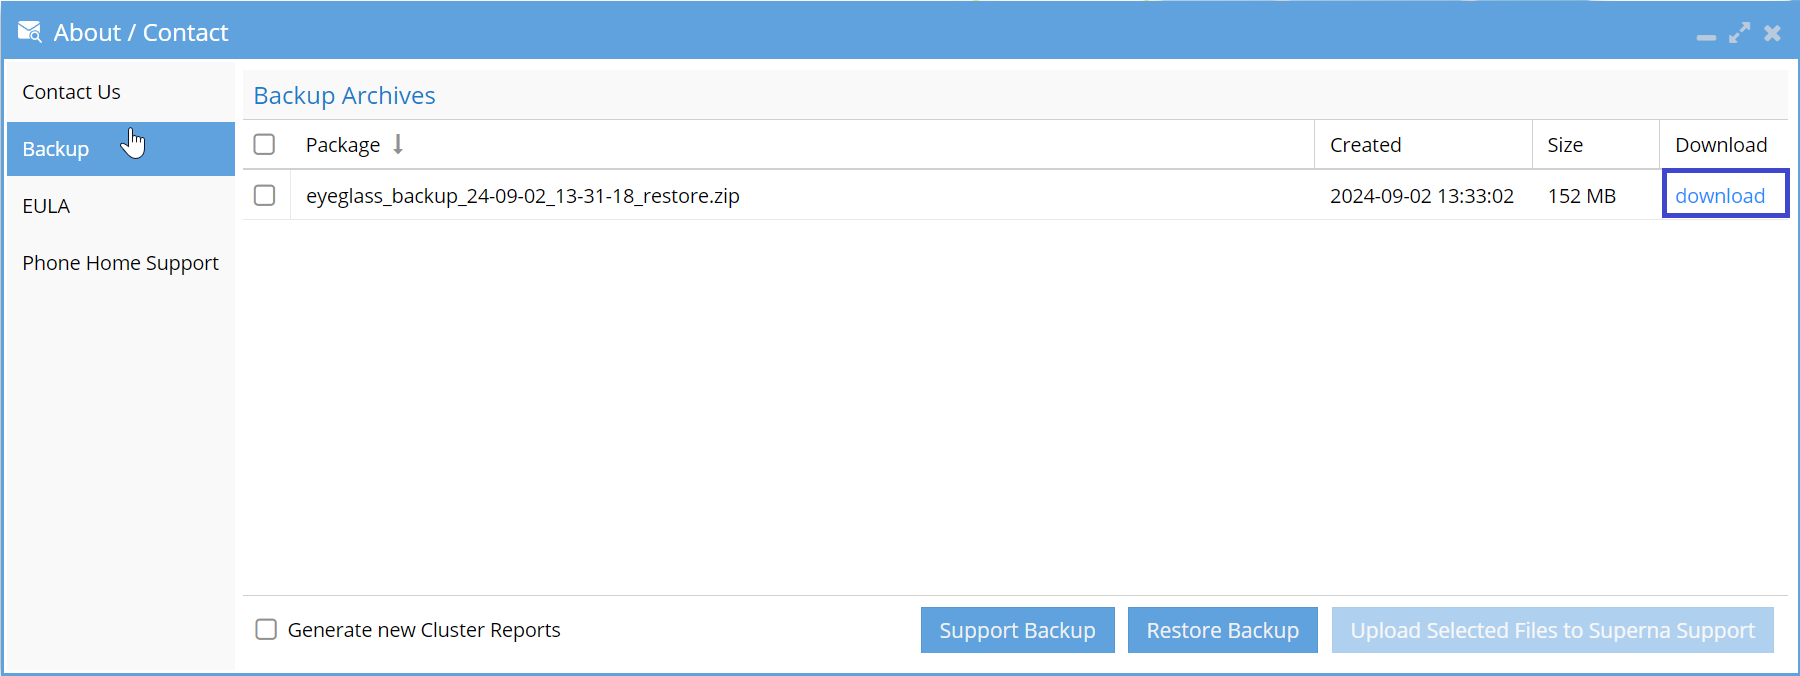
- The size of the files depends on the complexity of the Clusters (they can range from about 10MB to 600MB)
- Download the Restore zip file.
- Once it's downloaded, locate it on your PC.
Backup files are created by Eyeglass daily at 2:00 am. To access these you must SSH into the Eyeglass VM and navigate to the Backup directory using
cd /opt/superna/var/backup
There, you may consult the files using
ls -l
All files in this directory have the same information as the restore file that you can create on demand. This is an alternate way to get the information.
The daily automated backup keeps 7 days of backups in this path. You can copy these backups from the appliance for a restore, or remount this path to external storage on PowerScale with NFS to store a copy of the backup external to the appliance.
Restore Procedure
- The Eyeglass version at the time the backup was taken must match the Eyeglass version to which the backup is being restored.
- There is an Eyeglass service interruption while the restore is in progress.
Before you begin, ensure that the Backup File is readily available for upload (perhaps in your Downloads folder). Use scp or WinSCP to copy the zip file to the newly deployed Eyeglass appliance (for example, to /tmp), or use one of the daily backups located in /opt/superna/var/backup on the previous appliance.
Power off the old Eyeglass appliance before restoring. It is not supported to have multiple Eyeglass appliances managing the same clusters.
How to Upload the Backup File to the Backup VM
- Log into the Backup VM as admin, using a file transfer client that supports SFTP. (Input Port 22 wherever applicable)
- Upload the Backup file to the admin folder (or the top-level folder that applies).
The Backup VM should be "clean", without a license, nor connection to Clusters.
How to Use the Uploaded Backup File
-
Login through SSH to the Backup VM
-
Switch directory to the root.
-
Run the following command:
sudo su - -
Enter your password when prompted.
-
Run the following command:
igls app restore /full_path_to_your_file.extension/
If there are multiple Backup Files in the directory, Eyeglass will take the newest file. If you need a specific one, you must type it out in its entirety.
Choose the restore command that matches your scenario. Replace /tmp/<eyeglass_backup.xxxx.zip> with the name of the Eyeglass archive file, always including the full path. You are prompted to continue; enter y and monitor the restore process for errors.
| Scenario | Command | Result |
|---|---|---|
| Different version between the backup file and the new appliance | igls app restore /tmp/<eyeglass_backup.xxxx.zip> --anyrelease | Limited restore of settings. Only the cluster login credentials and license keys are restored; all other history is lost. Use this option only if you are prepared to reconfigure the new appliance jobs and schedules. |
| Same version between the backup file and the new appliance | igls app restore /tmp/<eyeglass_backup.xxxx.zip> | Full support for settings restore. The backup and the new appliance must be the same Eyeglass version. |
| Restore settings to the same appliance | igls app restore /opt/superna/var/backup | Full support for settings restore. Displays the most recent backup found in the internal daily backup path and asks you to confirm using it. Requires 2.5.6 or later. |
If any release flag (such as --anyrelease) is used, all job types are set to user disabled. They must be configured again, along with the task schedules that were configured on the old appliance.
If you have an open Eyeglass Web UI, it will restart and you will be able to see all of the newly uploaded data.
How to Verify Functionality Post-Restoration
In the Eyeglass UI for the Backup VM:
- Open Inventory → Manage Devices, and verify that the expected clusters are present.
- Open Inventory → License Management and verify the licenses shown there.
Next Steps
- Advanced Restore and Rediscover Operations – Additional restore syntax, and the
igls appliance rediscovercommand for rebuilding the Eyeglass database when no backup is available. - Appliance Check – Confirm overall appliance health, version, and disk space after a restore.