User Role Guide
Introduction
Welcome to the User Role Guide! This guide is essential for managing user permissions and access within Superna Eyeglass. Below, you can find the information regarding requirements, quick start steps, adding groups, and logging in with RBAC(Role Based Access Controls) in Superna Eyeglass. Use the navigation below to explore each section of the guide.
The steps and screenshots below describe the legacy Eyeglass desktop's User Roles icon. In the 2.15.0 GUI, the same RBAC functionality — roles, a per-role permissions table, and Users/Groups tabs — lives under the gear icon (top-right of any page) → Settings → General → User Roles & Permissions. See Settings for the redesigned page. The requirements, permission definitions, and AD group naming conventions below are unaffected by this navigation change.
Requirements
Before setting up user roles in Superna Eyeglass, ensure the necessary prerequisites are met.
-
Confirm Permissions:
- Administrative rights are required to set up and manage user roles.
- Ensure that the account used for setup has full admin privileges in Eyeglass.
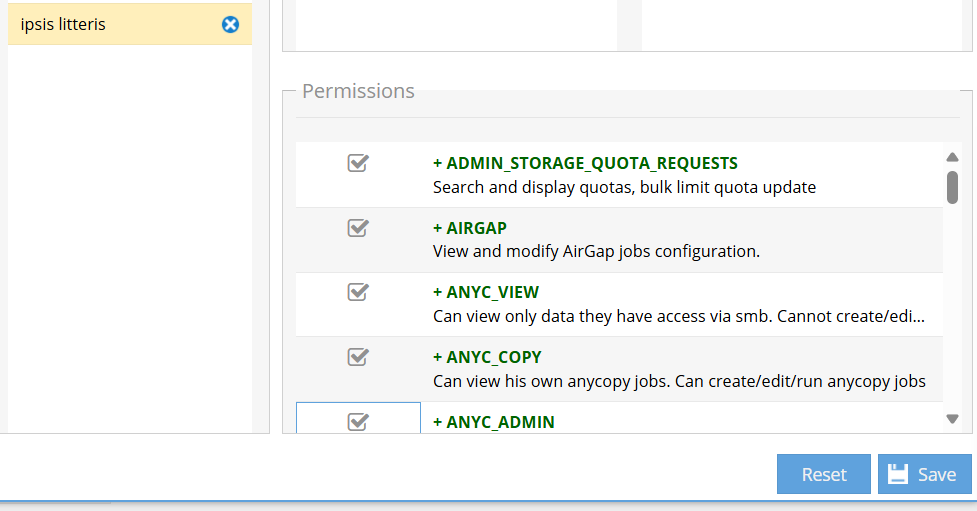
Administrator Access
ADMIN_STORAGE_QUOTA_REQUESTS: Search and display quotas, bulk limit quota update.
AIRGAP: View and modify AirGap jobs configuration.
ANYC_ADMIN: View anycopy jobs for all users. Can create, edit, and run anycopy jobs.
ALARMS: View and clear alarms.
APP_REGISTER: Register appliance on the cloud dashboard.
BACKUP: Create and view backups of the Eyeglass appliance.
CLUSTER_REPORTS: Create cluster, RPO, and CSM reports and view cluster reports.
CLUSTER_STORAGE: View the cluster storage dashboard.
DATA_CONFIG_MIGRATION: View the data config migration dashboard.
DR_READINESS: View the DR Readiness of the managed devices.
EASY_AUDITOR_MODIFY: Add and update reports, queries, schedules, and wiretaps.
FAILOVER_HISTORY: View previous failovers.
FILE_LOCK_PORTAL: Remove lock from locked files.
INVENTORY_MODIFY: Add new managed devices or delete existing managed devices.
JOBS_MODIFY: Start and modify Eyeglass jobs.
LAUNCH_FAILOVER: Initiate Access Zone, SyncIQ, or DFS failovers.
LICENSES: View, add, and remove Eyeglass licenses.
LOGS: View Eyeglass logs.
LOG_PARSER: Parse user backups.
NOTIFICATIONS: Configure email, Twitter, Slack notifications.
PHONEHOME: Modify phone home settings and run phone home jobs.
RANSOMWARE_DEFENDER: View and configure Ransomware Defender.
REMOTE_SERVICES: View and update remote Eyeglass services (probes).
REST_API: Add or delete REST API tokens and define new widgets.
USER_ROLES: Manage user roles and authentication.
PERFORMANCE_AUDITOR: View Performance Auditor window.
-
Active Directory (AD) Authentication Provider:
- The PowerScale OneFS's system zone must have an AD authentication provider added to validate passwords and retrieve AD group membership from AD.
-
Verify PowerScale OneFS's Active Directory Integration:
- Ensure Active Directory (AD) is properly configured and accessible.
-
PowerScale OneFS's SMB Protocol Configuration:
- Ensure that port 445 for the SMB protocol is open between the Eyeglass VM and the cluster.
- SMB protocol must be enabled in the system zone.
- SMB2 protocol is required for AD authentication of users with an SMB share in the system zone.
-
Trusted Domains:
- Trusted domains can be used when adding users or groups. The trusted domain must trust the AD domain added to the system zone.
-
System Zone Authentication:
- System Zone authentication is the only supported proxy login method and requires an AD provider in the system zone.
- The login process will attempt to validate passwords on all clusters added to Eyeglass using SMB and system zone authentication requests over SMB.
Setup Steps
A quick guide to setting up user roles in the environment
- Create Roles: Use predefined roles or create new ones based on specific requirements.
- Assign Permissions: Assign appropriate permissions to the roles.
- Assign Roles to Users: Map AD groups or individual users to the roles created.
Detailed Steps
Create Roles
- Go to the User Roles section.
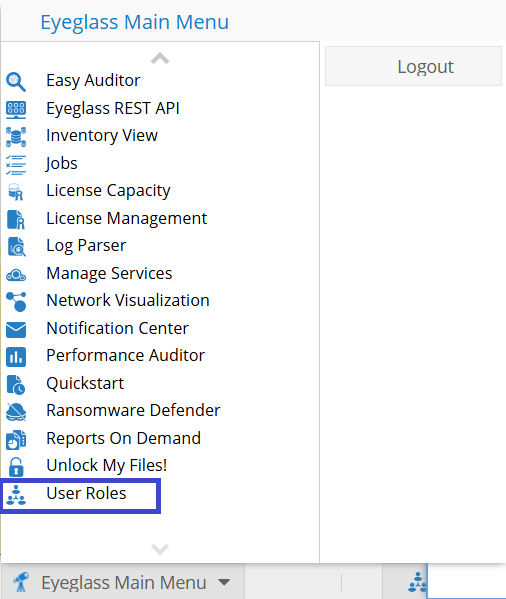
- Choose Create New Role.
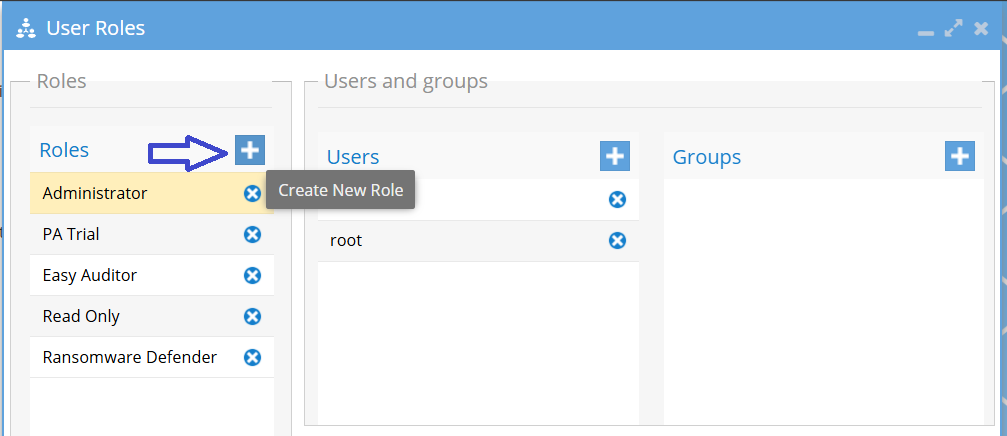
- Define the role’s name.

Assign Permissions
- Select the created role.
- Assign necessary permissions (e.g., read, write, admin).
Assign Roles to Users/Groups
- Access User Roles:
- Select Role: In the Roles tab, select the role to assign to the user.
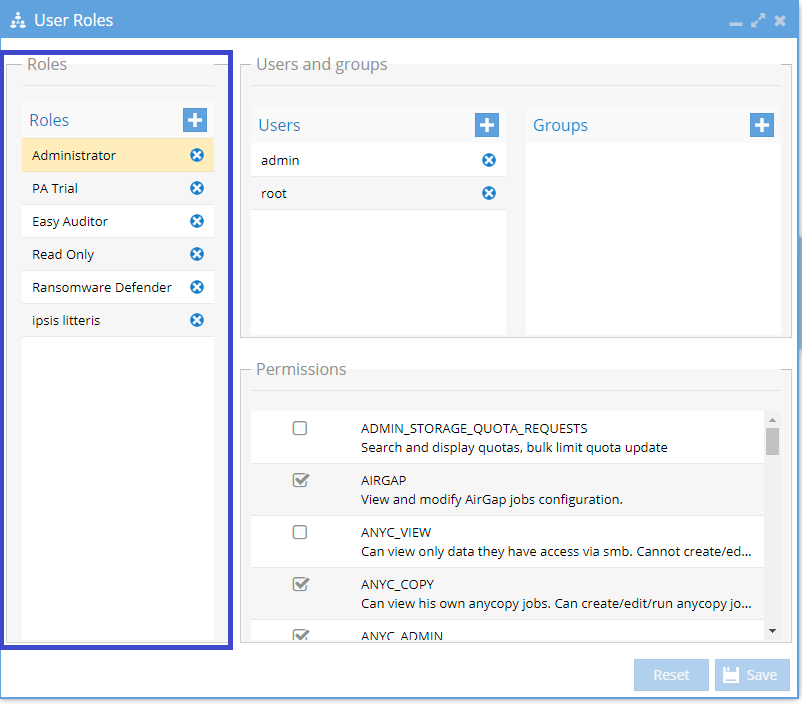
- Add User or Group: Go to the Users or Groups tab and click the plus sign (+) to add a user to the selected role.
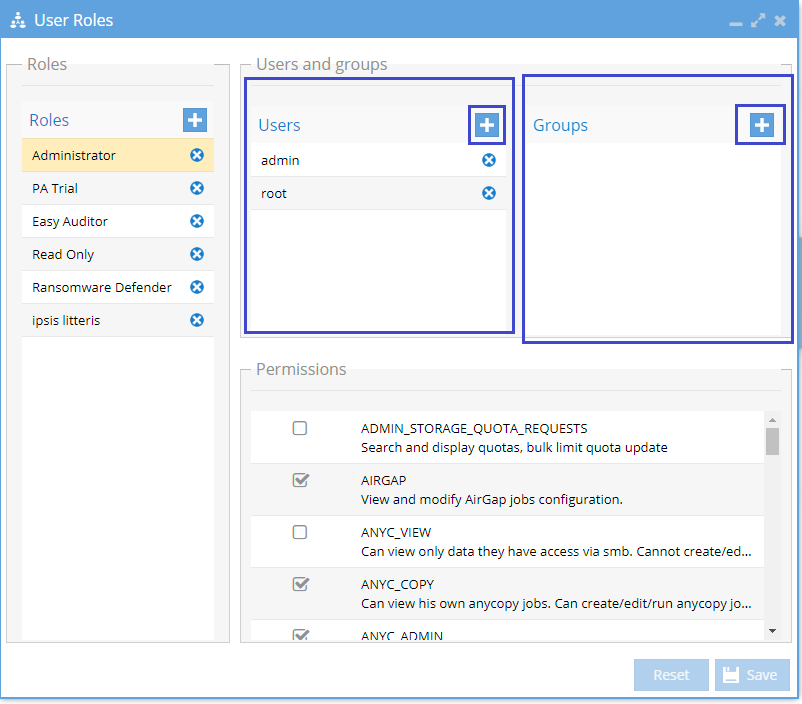
- Enter User Details: Input the username of the user and specify whether they are a remote user or a local user.
- Click Add: Confirm the addition by clicking Add.

- Verify Permissions: Test the role assignments by logging in as a test user to ensure they have the correct permissions.
AD Group Based User Roles
Set up RBAC quickly using AD groups with this method.
- Access User Roles Section: Navigate to the User Roles section in Eyeglass.
- Select a Role: Choose the role you want to assign AD groups to from the list of roles.
- Add Groups: If the groups are not listed, use the "+" button to add the AD groups.
Detailed Steps
-
Access User Roles Section:
- Navigate to the "User Roles" section in the Eyeglass interface.
- Navigate to the "User Roles" section in the Eyeglass interface.
-
Select a Role
- From the list of roles on the left, select the role you want to work with.
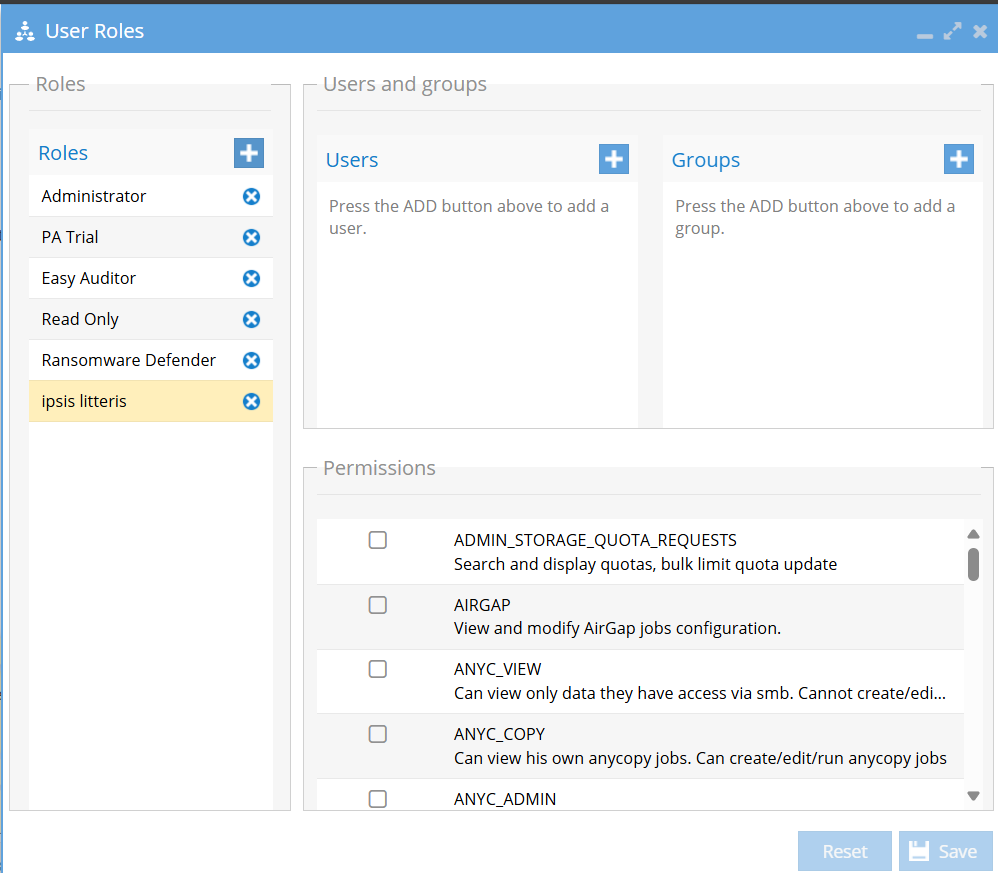
- From the list of roles on the left, select the role you want to work with.
-
Add Groups
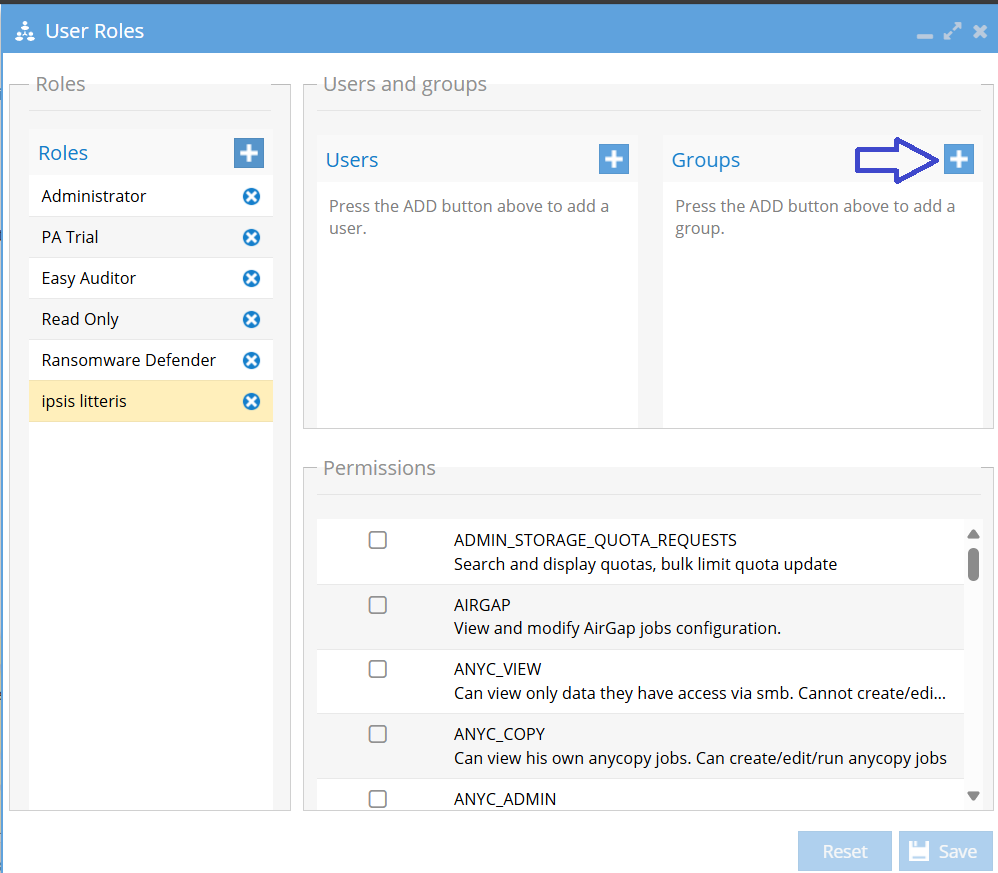
- If the groups associated with the role are not listed, click the "+" button in the "Groups" section to add a new AD group.
- Enter the group name and confirm.
Worked Example: AD Group-Based Role Verification
The following worked example shows the exact naming convention required for AD group-based roles, and how to confirm the cluster sees the group before relying on it.
-
In Active Directory, create a global security group for the role — for example,
superna-admins. Keep the group name all lower case and free of spaces or special characters. -
Add the intended user accounts to this AD group using Active Directory Users and Computers.
-
In Eyeglass, log in as the
adminuser and open the User Roles icon. Create the role (or select an existing one) and add the AD group using the syntax:DOMAIN\groupnameThe domain portion must be upper case and the group name portion must be lower case — for example,
AD02\superna-admins. -
Select the permissions/icons this role should have access to, then save the role.
-
Before testing login, confirm the cluster itself resolves the user's AD group membership. Run the following on the PowerScale cluster:
isi auth users view --user=user@domain --show-groupsThe output must list the AD group created above (e.g.,
AD02\superna-admins) under the user's group membership. If the group is not listed, the RBAC role will not work — this is a cluster-side AD lookup issue, not an Eyeglass configuration issue. -
The same
isi auth users viewoutput also shows the user's DNS Domain and SAM Account Name properties. The Eyeglass login name is constructed as<SAM Account Name>@<DNS Domain>— for example, if the DNS domain isAD2.TESTand the SAM account name isdemo1, the login name isdemo1@ad2.test.
Logging in with User Roles
Here’s how to log in using user roles accounts for enhanced security.
- Navigate to Login Page Go to the Eyeglass login page.
- Enter Credentials: Use your AD credentials mapped to an Eyeglass role.
- Access Dashboard: Upon successful login, you will have access to resources based on your assigned role.
Detailed Steps
- Navigate to Login Page
- Open your browser and go to the Eyeglass login page.
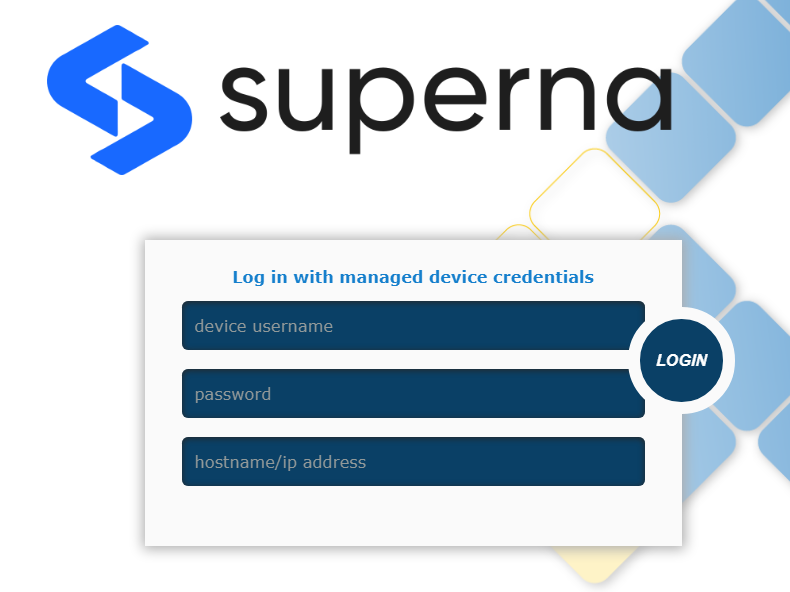
- Open your browser and go to the Eyeglass login page.
- Enter Credentials
- Enter the AD username and password mapped to your assigned Eyeglass role, then submit the login form.
- Access Dashboard
- On successful login, you land on the dashboard with access limited to the resources and actions granted by your assigned role.