Add PowerScale Device
Add a Dell PowerScale (Isilon) storage device to your Superna platform inventory for monitoring and security protection.
Add a PowerScale Device
Add a PowerScale storage device with these steps:
-
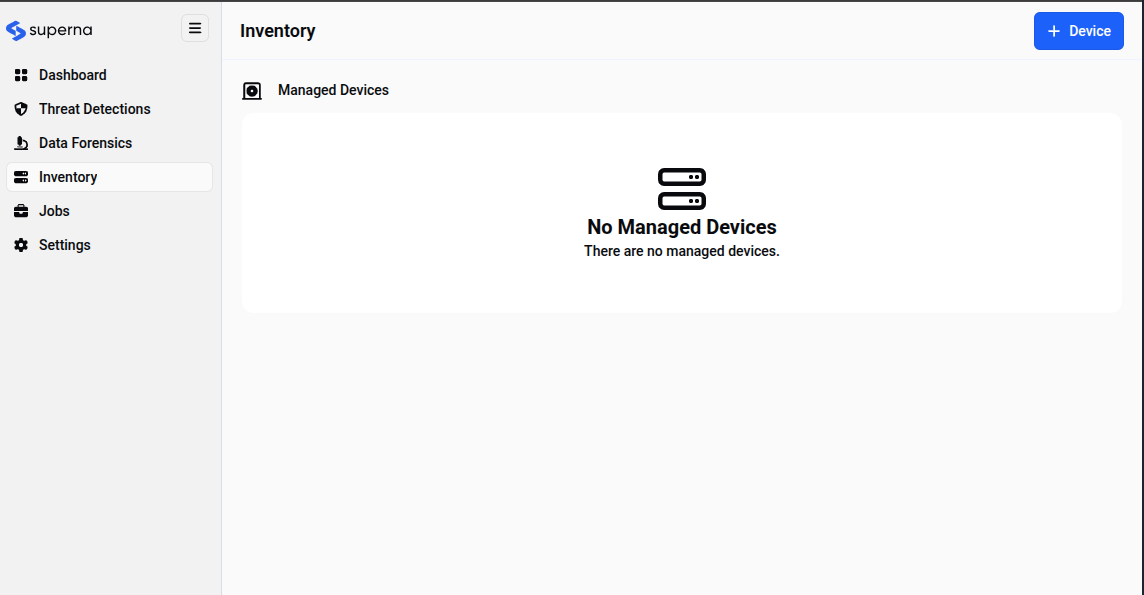
Navigate to Inventory
From the Superna navigation menu, click Inventory to access the device management area.
-
Start Device Addition
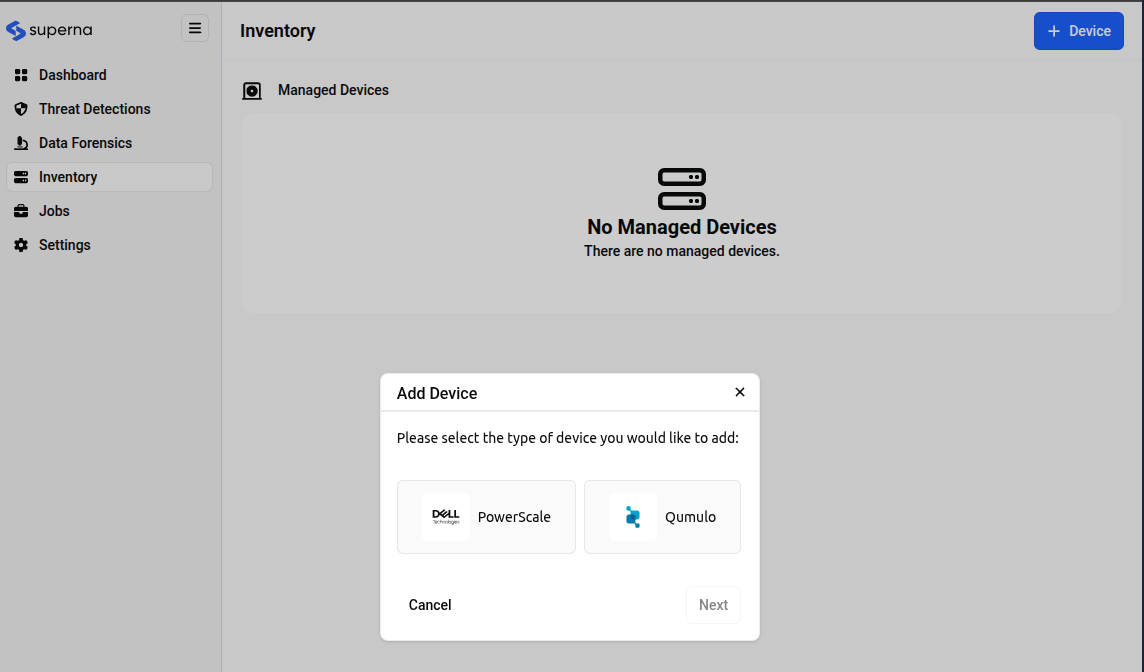
In the Inventory section under Managed Devices, click the blue + Device button in the top-right corner.
-
Select Device Type
In the Add Device dialog, you'll see the message "Please select the type of device you would like to add:" with two options:
- PowerScale (with Dell logo)
- Qumulo (with Qumulo logo)
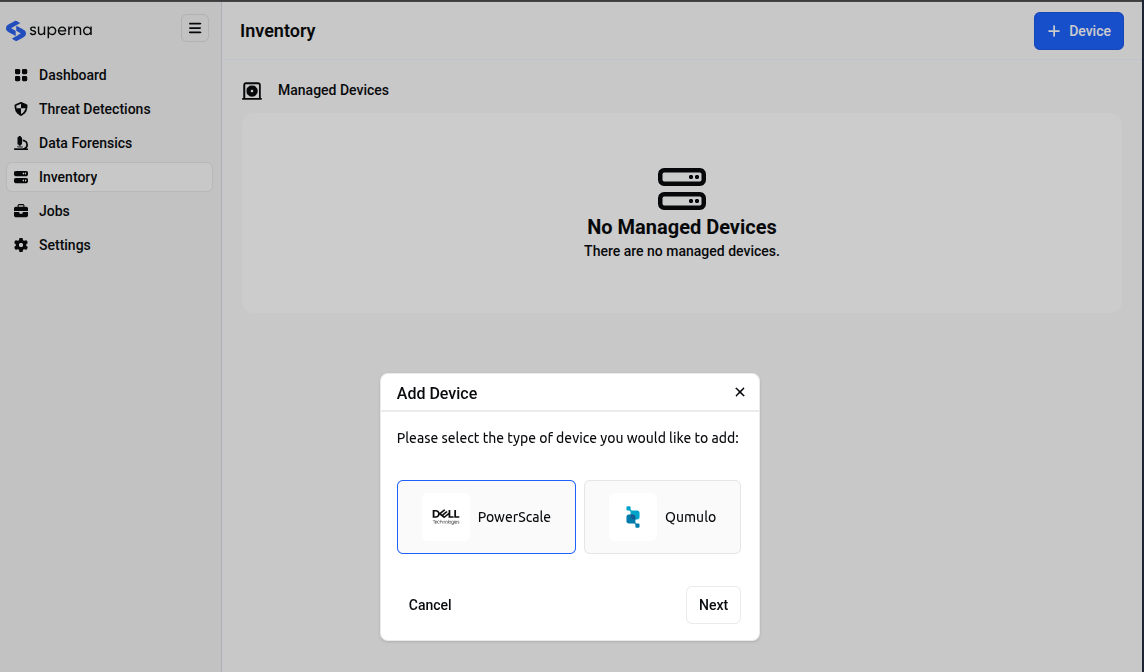
Select PowerScale by clicking on it (it will highlight with a blue border).
-
Continue Setup
Click Next to proceed to the credentials screen.
Configure PowerScale Connection
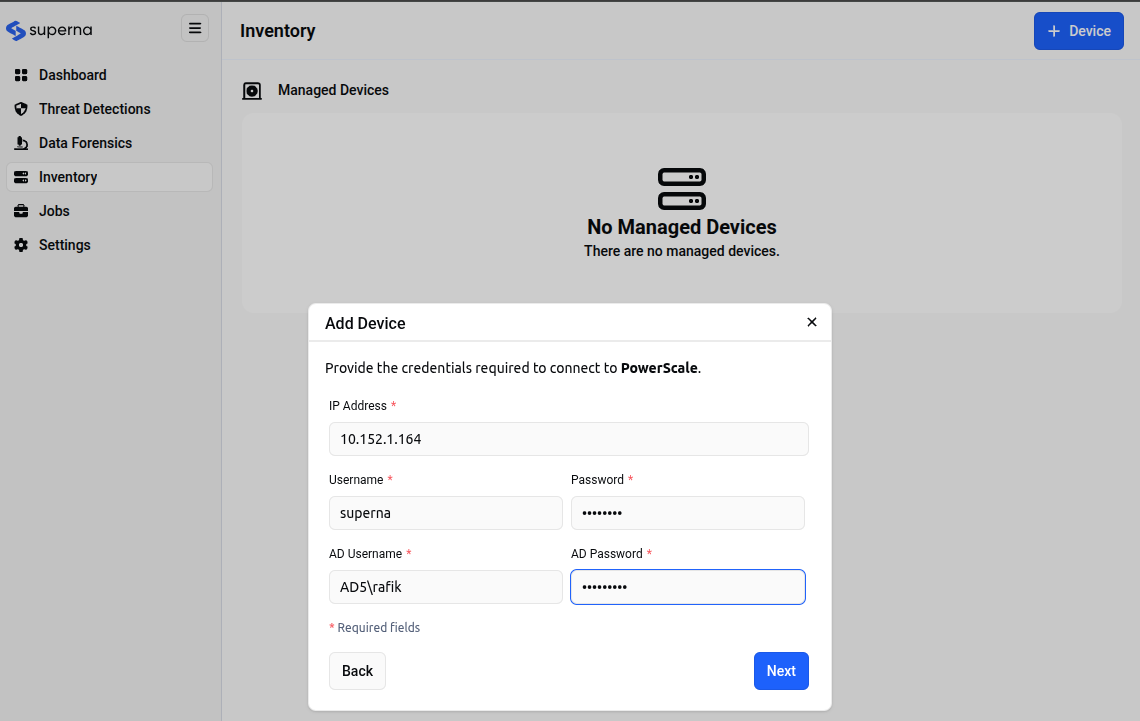
After clicking Next in the device type selection screen, you'll see the Add Device form with the message "Provide the credentials required to connect to PowerScale."
-
Enter Connection Details
Fill in the required fields (marked with * red asterisk):
- IP Address* - The management IP address of your PowerScale system (e.g.,
10.152.1.164) - Username* - Administrative username for the PowerScale system (e.g.,
superna) - Password* - Password for the administrative account (displayed as dots for security)
- AD Username* - Active Directory username if using AD authentication (e.g.,
ADS\rafik) - AD Password* - Active Directory password (displayed as dots for security)
 note
noteAll fields marked with a red asterisk () are required. The form will show " Required fields" at the bottom.
- IP Address* - The management IP address of your PowerScale system (e.g.,
-
Submit Device Information
After filling in all required details, click Next to submit the device information.
-
Monitor Device Processing
The system will begin processing the device addition and display a progress screen showing the Device Submitted status with completion steps:
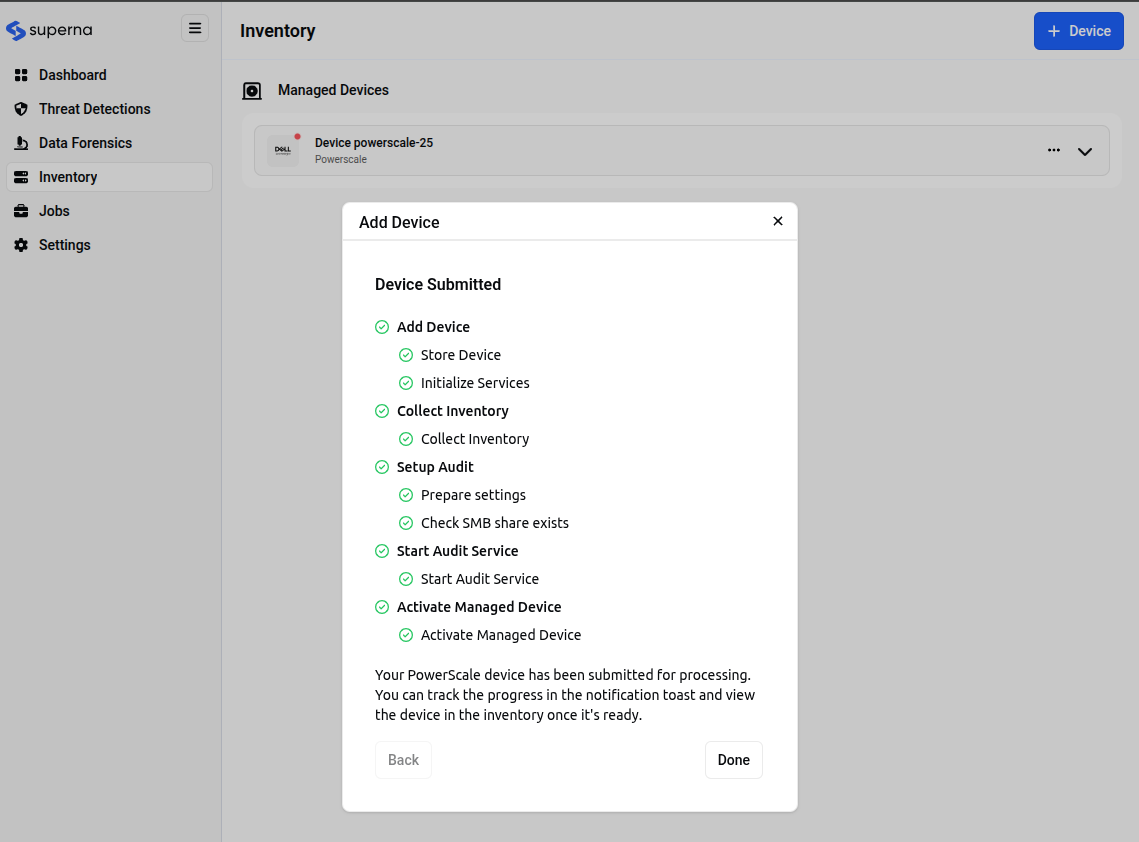
At the bottom of the progress dialog, you'll see the message: "Your PowerScale device has been submitted for processing. You can track the progress in the notification toast and view the device in the inventory once it's ready."
-
Complete the Addition Process
Click Done to close the progress dialog and return to the inventory view.
-
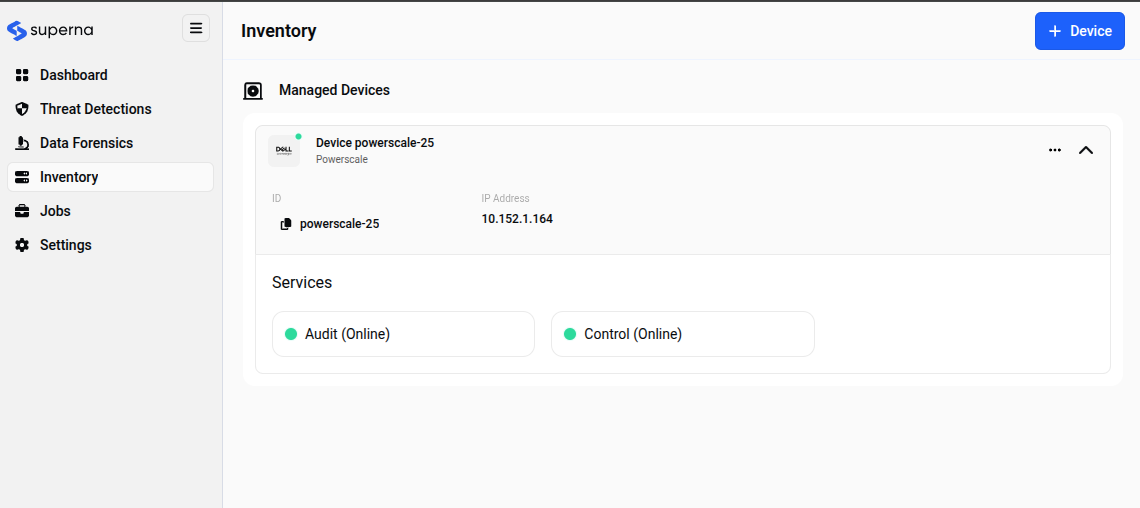
View Device in Inventory
The new device will now appear in your Managed Devices list with:
- Device name (e.g., "powerscale-25")
- Device type indicator showing "PowerScale"
- Status indicator (red dot initially, turning green when online)
Click the device dropdown arrow to expand and view the device details including:
- ID: Internal device identifier
- IP Address: The management IP you provided
- Services section showing:
- 🟢 Audit (Online) - Audit service status
- 🟢 Control (Online) - Control service status
 tip
tipThe green circles indicate that both services are running properly and the device is ready for monitoring.
Edit PowerScale Device Settings (Optional)
After adding a device to your inventory, you can edit its connection details if needed:
-
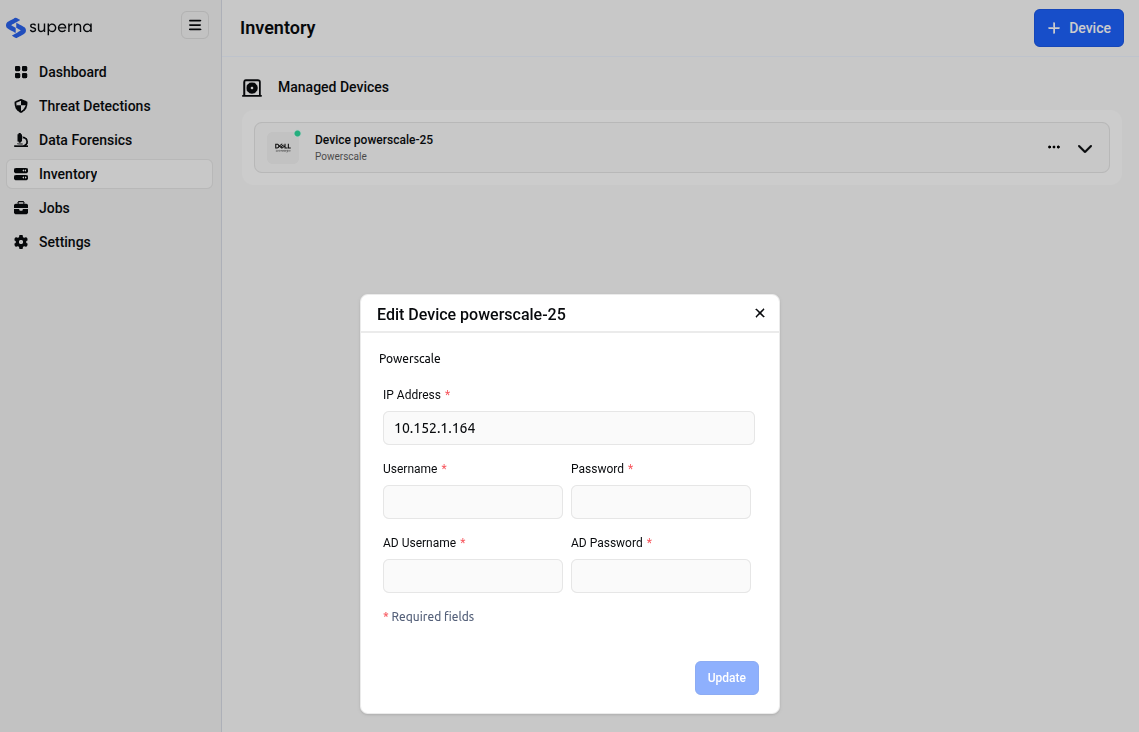
Locate Your Device
In the Inventory view under Managed Devices, find the PowerScale device you want to edit (e.g., "Device powerscale-25").
-
Access Device Menu
Click the three-dot menu (⋯) icon in the top-right corner of the device card to open the device options menu.
-
Select Edit Option
Choose Edit Device from the dropdown menu to open the device settings dialog.
-
Update Connection Details
The Edit Device powerscale-25 dialog will appear showing the current configuration. Update any of the fields as needed:
- IP Address* - The management IP address of your PowerScale system (e.g.,
10.152.1.164) - Username* - Administrative username for the PowerScale system
- Password* - Password for the administrative account (shown as masked dots)
- AD Username* - Active Directory username if using AD authentication
- AD Password* - Active Directory password (shown as masked dots)
 note
noteAll fields marked with a red asterisk () are required. The dialog shows " Required fields" at the bottom.
- IP Address* - The management IP address of your PowerScale system (e.g.,
-
Save Changes
After making your changes, click the Update button to apply the new settings.
When you update device settings, Superna validates the new connection details and may restart services to apply the changes. You can monitor this process in the Jobs section.
Next Steps
After adding your PowerScale device, you can configure security monitoring and auditing features:
Threat Detections
Monitor for ransomware and other security threats
Jobs
View and manage automated tasks for your devices
See Also
- Dashboard - Monitor device health and security status
- Threat Detection - Enable security monitoring for your devices
- Jobs - View device-related automated tasks and operations
- First Access - Initial device setup after login