Deploy on Nutanix
Introduction
This guide will take you through the steps necessary to install our appliances on your Nutanix cluster operating on the AHV hypervisor.
Superna supports deployment of our Core and Processing appliances on Nutanix AHV. Superna is “Nutanix Ready AHV” certified. For more information, please visit Nutanix’s Compatibility and Interoperability Matrix and enter “superna” in the “Type to Filter” search bar in the table.
Requirements
You will need the following information for the networking set-up of the VM. You should be able to get this information from your networking team.
- IP Address
- Netmask
- Gateway
- Hostname
- DNS Search Domains
- Name Servers
- NTP Servers
This guide will take you through the steps necessary to install our appliances on your Nutanix cluster operating on the AHV hypervisor.
Superna supports deployment of our Core and Processing appliances on Nutanix AHV. Superna is “Nutanix Ready AHV” certified. For more information, please visit Nutanix’s Compatibility and Interoperability Matrix and enter “superna” in the “Type to Filter” search bar in the table.
Deployment Steps
Upload the Image
To start, log in to Nutanix Prism
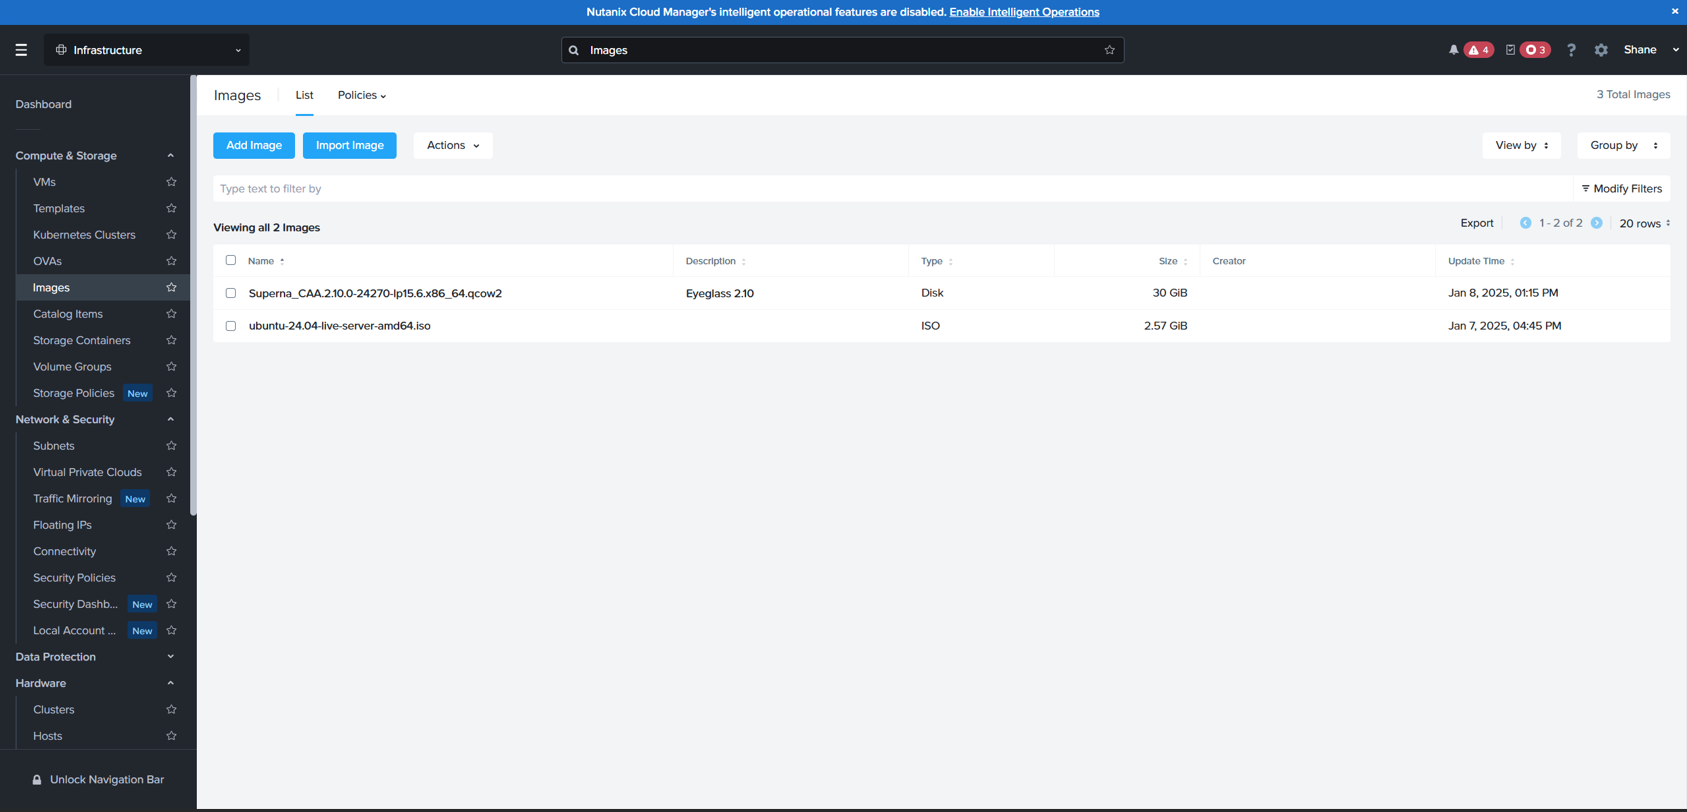
Before uploading, check the Images tab to confirm whether the release version you need is already available.
If the version you need is not available:
-
Obtain an image file (qcow2) from Superna's support portal.
Follow the instructions in Download Superna Software.
-
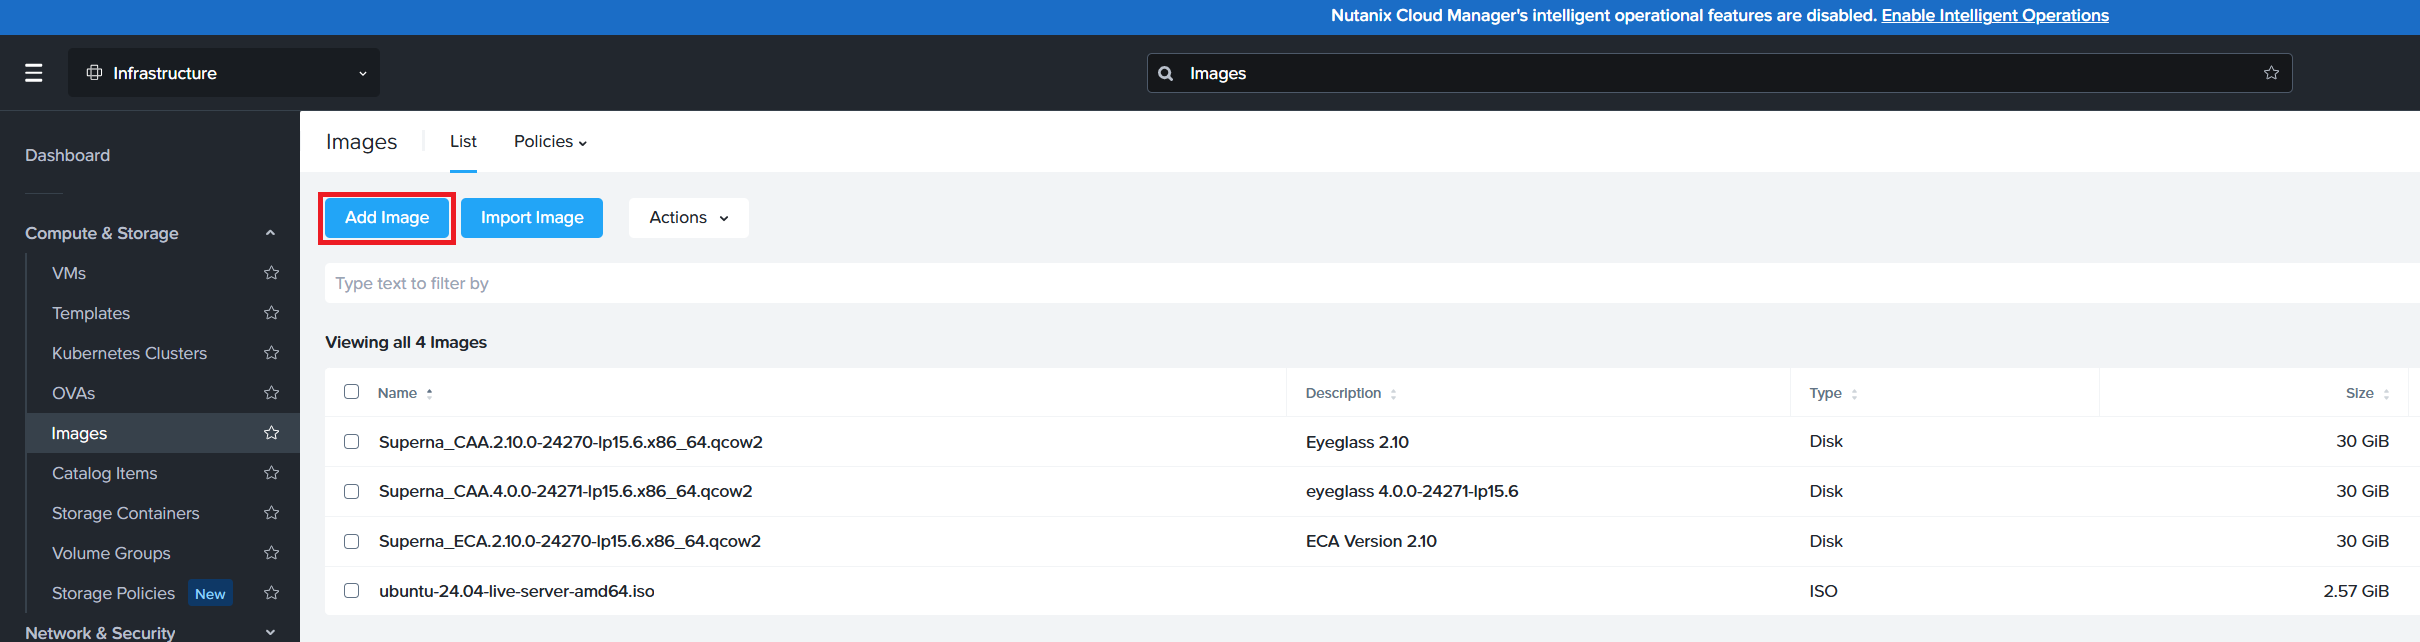
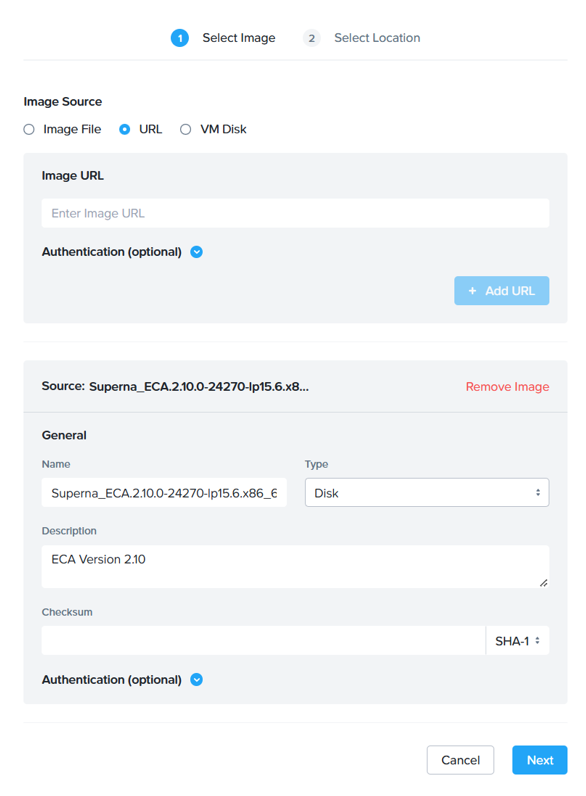
Go to Compute & Storage > Images.
-
Select Add Image.
-
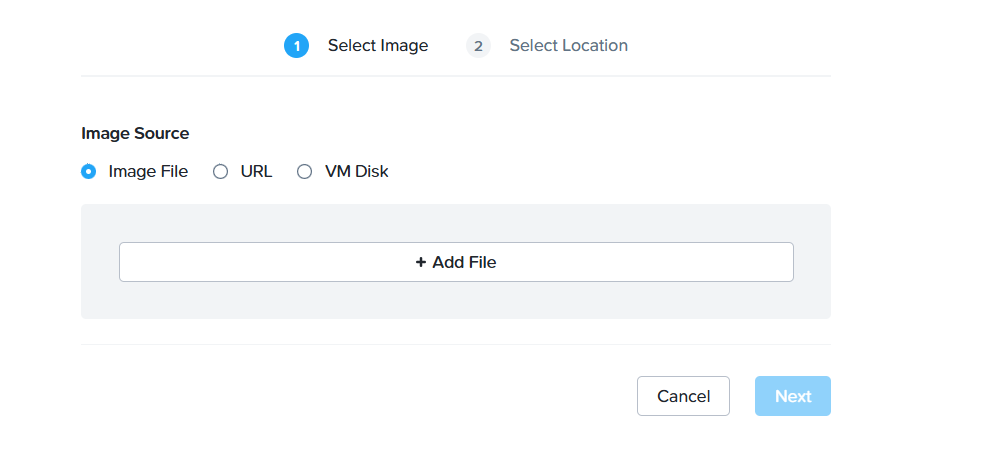
Upload the image file (+Add File).
-
Select Next.
-
Add a description for the image, then select Next.
-
Select Save (leave default settings).
The image will begin uploading in the background
This process takes some time, but you can track progress in View All Tasks.
Do not refresh your screen during the upload.
Create the VM
Once the upload is complete,
-
Go to Compute & Storage > VMs.
-
Select Create VM.
-
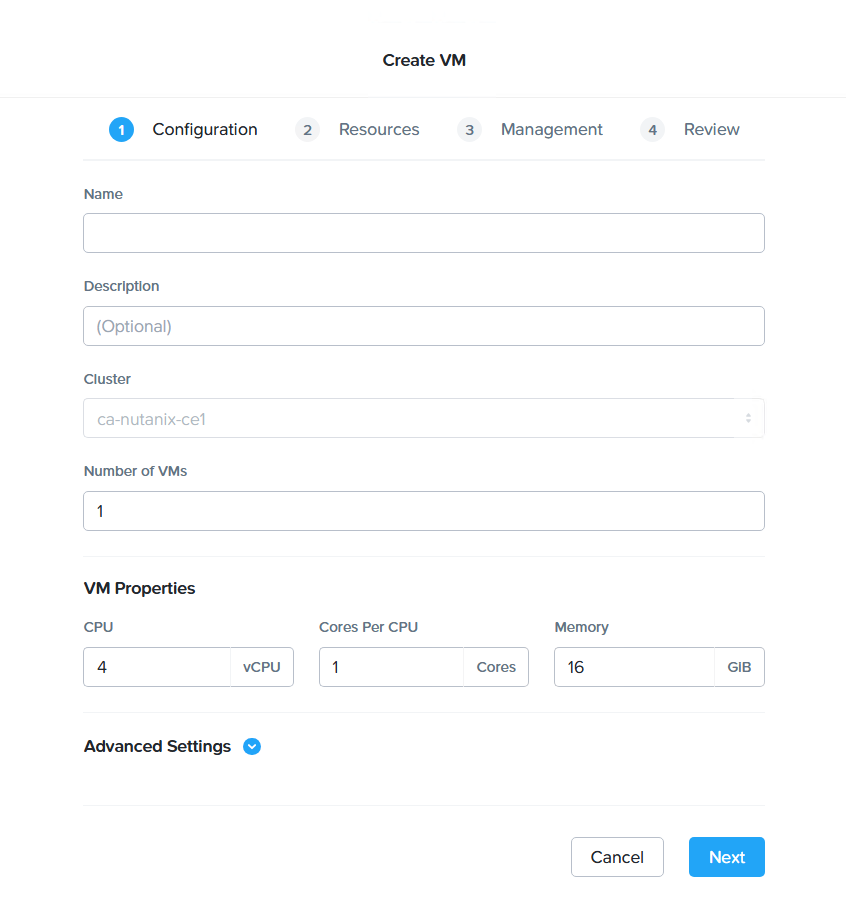
Enter:
- Name
- Description
- Cluster (Leave Default)
- Number of VMs (# of nodes required)
- vCPUs, cores, and memory
Typical Eyeglass/ECA Settings (pre-2.11/4.1) include:
- CPU: 4vCPU
- Cores per CPU: 1
- Memory: 16GB
Deployment 2.11/4.1 or LaterFor deployment version 2.11/4.1 or later, please use these minimum specifications:
- vCPUs: 4
- Cores per vCPU: 4
- Memory: 24 GB
-
Select Next
-
Under Disks:
- Select Attach Disk
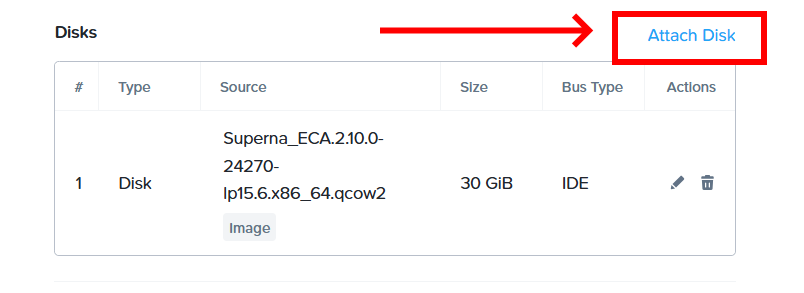
- For Operation, select Clone from image
- For Image, select the appropriate VM image for Eyeglass or ECA
- Set Capacity to 30GB
- Set Bus Type to IDE
- Select Save
Disk 1 Sizing for Deployment 2.11/4.1 or LaterFor deployment version 2.11/4.1 or later, please use the following Disk 1 sizing requirements:
- Eyeglass: 38GB GB
- ECA Nodes: 32 GB

-
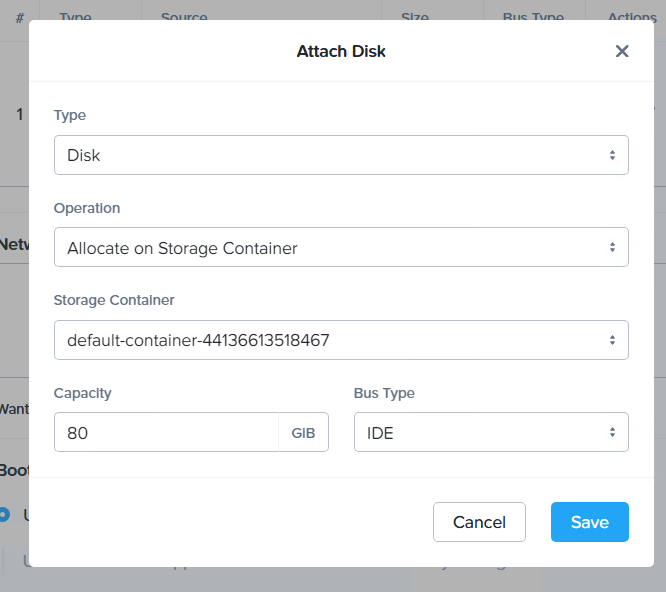
Add a second disk (blank data drive):
- Select Attach Disk
- For Operation, select Allocate on Storage Container
- Select a Storage Container
- Set capacity to 80GB for releases 2.10/4.0 or earlier. For 2.11/4.1 or later, see the note below.
- Select Save
Disk 2 Sizing for Deployment 2.11/4.1 or LaterFor deployment version 2.11/4.1 or later, please use the following Disk 2 sizing requirements:
- Eyeglass: 140 GB
- ECA Nodes: 120 GB
-
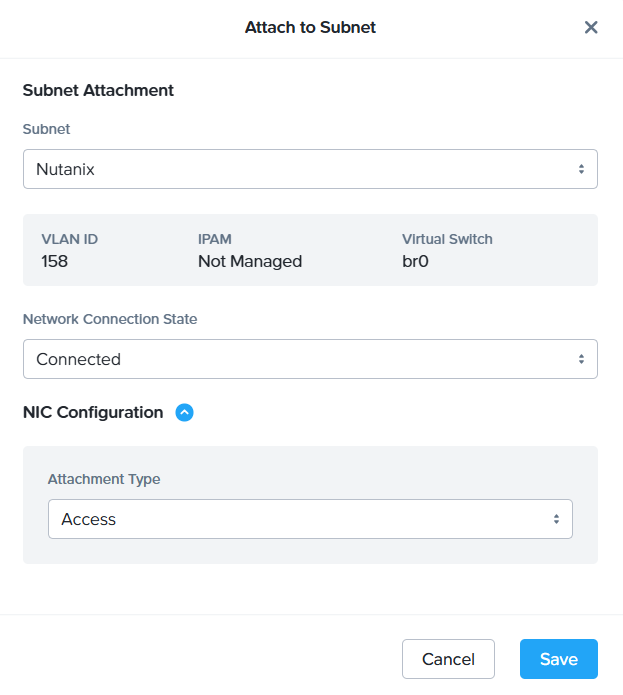
Attach to Subnet
Under Networks, select Attach to Subnet
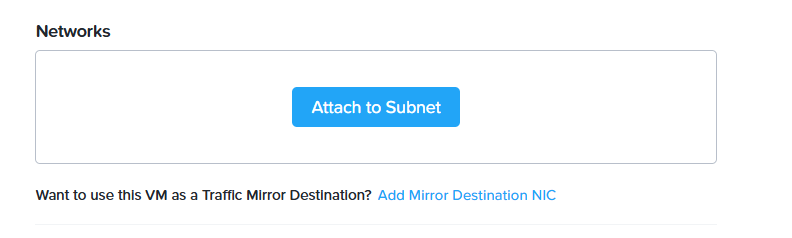
Leave the default settings, then select Save
-
Boot configuration
Set Boot Config to Legacy BIOS
The following warning may appear. Select Confirm to continue.
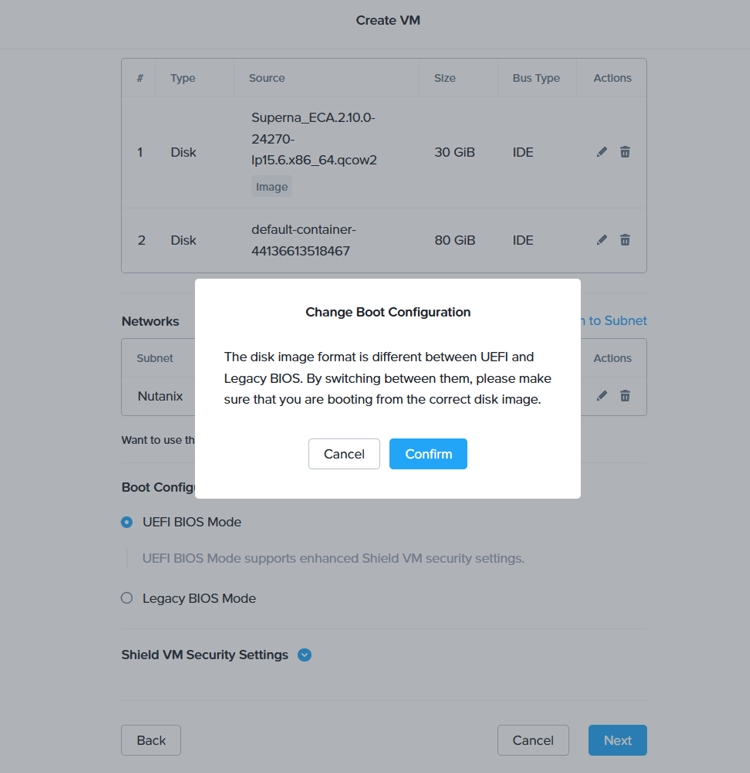
Select Next to continue
-
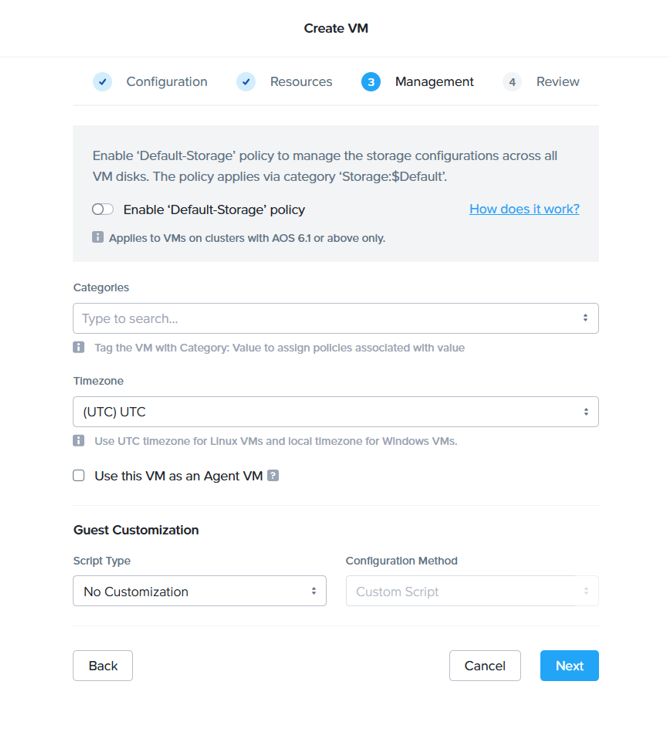
Enter desired Management Settings, then select Next
 OEM Eyeglass Deployments Only
For OEM Eyeglass deployments, an extra configuration step is required in the Management section of the VM creation wizard.
- Change Guest Customization Script Type to:
cloud-init (Linux) - Paste the following script into the configuration field:
#cloud-config
write_files:
- path: /opt/superna/.ovf/local
   content: |
      {"branding": "DELL"}
   owner: root:root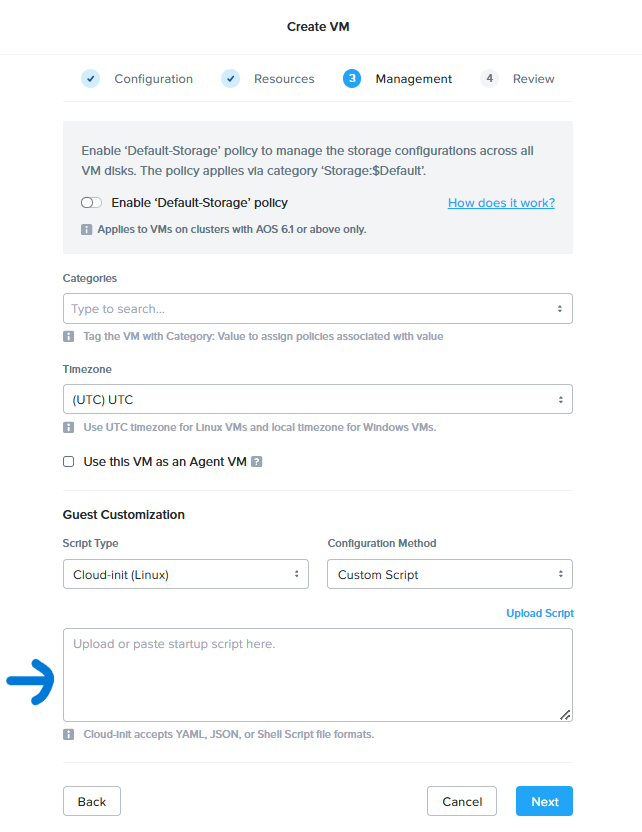
- Change Guest Customization Script Type to:
-
Review the summary. If the information is correct, select Create VM.
You can follow the creation process in the Activity > Tasks screen.
The VMs will appear in Compute & Storage > VMs > List once the deployment is complete.
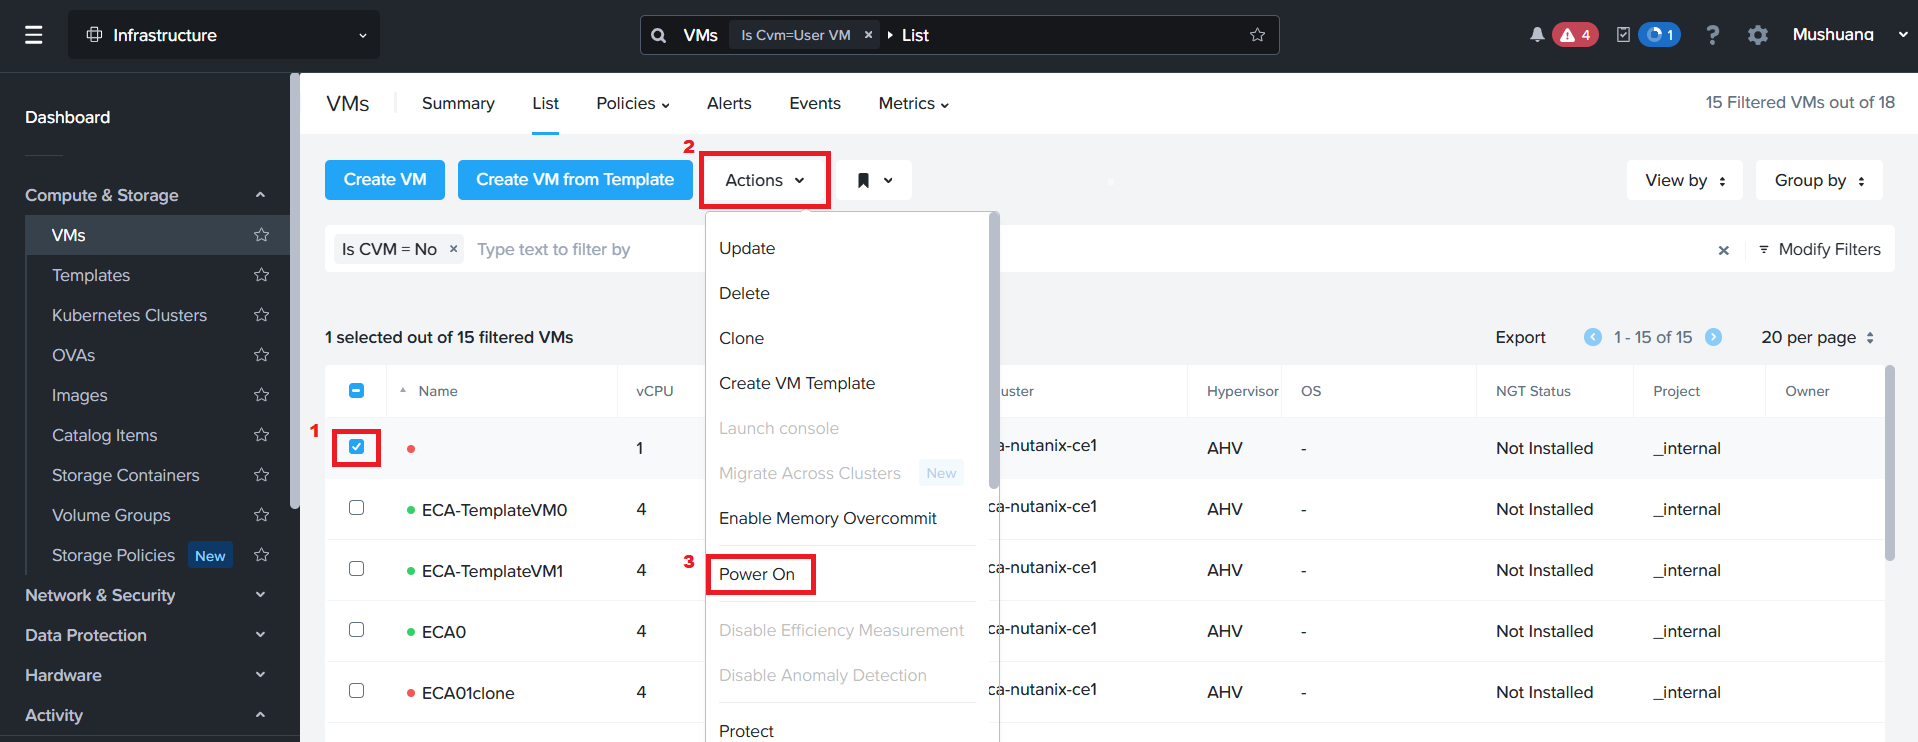
Launch the VM
-
Go to Compute & Storage > VMs > List.
-
Select the newly created VM.
-
Select Actions > Power On
VM Network Setup
These are necessary steps for any Nutanix deployment for Eyeglass or ECA nodes:
-
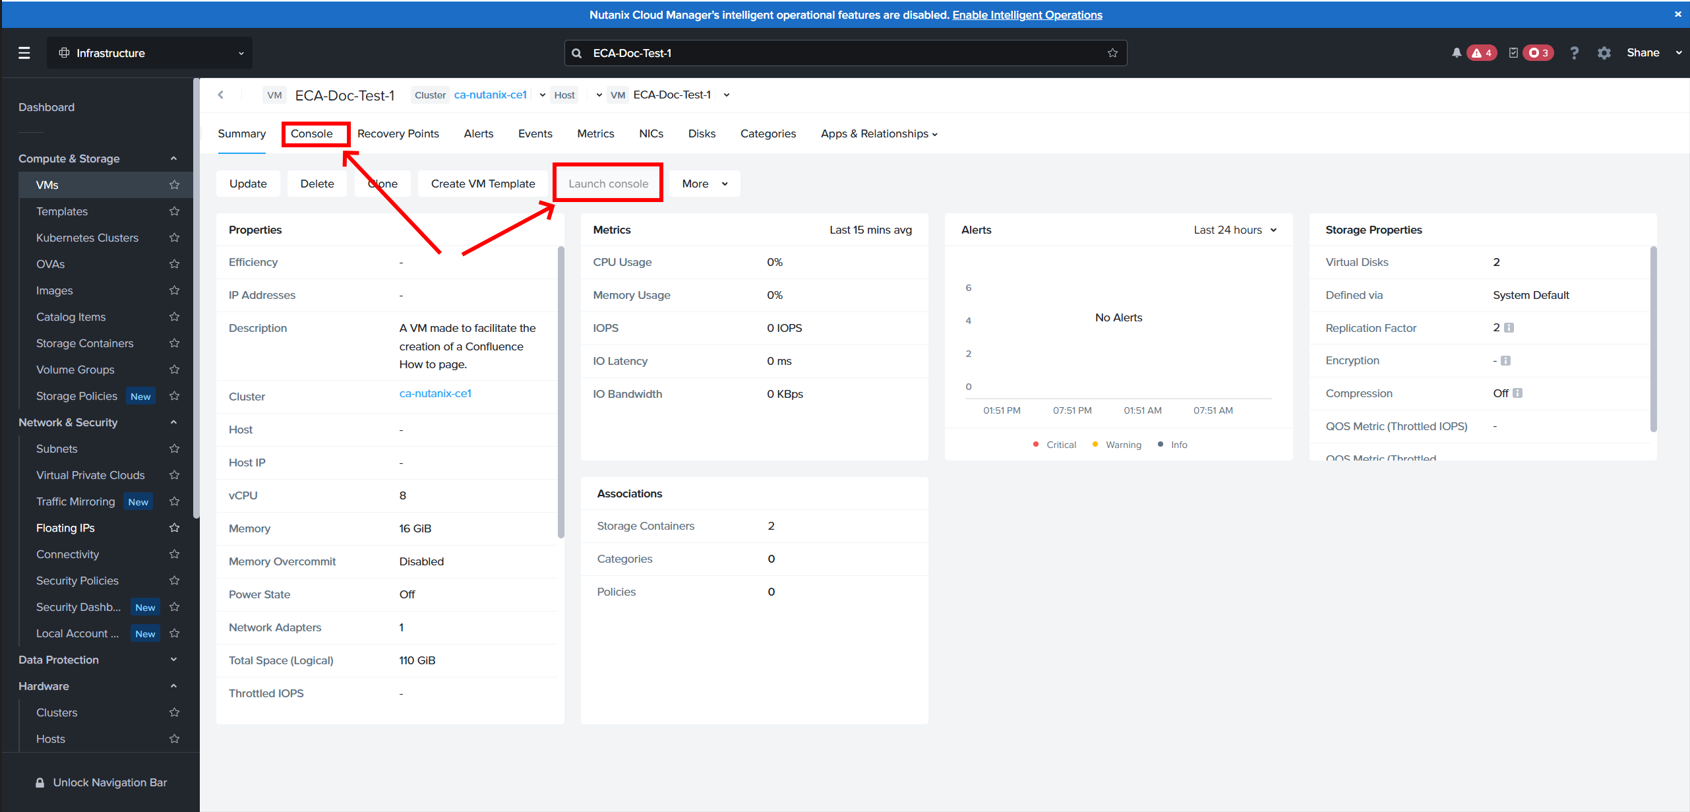
Access the VM through Launch Console or an SSH client of your choice. Use the default credentials for your appliance.
From the VM List, select the appliance you would like to access.
From the VM Management screen, either:
- Select the Console tab on the horizontal toolbar under the VM Name (shown below)
or
- Select Launch Console under the Summary tab (shown below)
-
Elevate to root privileges using
sudo -s -
Check appliance boot status.
Run the following command to monitor the appliance’s startup log:
tail -f /var/log/superna-on-boot.logWait until you see the following message in the output:
"Please execute sudo spy-hypervisor-setup before attempting to use the appliance."
Once this message appears, press Ctrl+C to stop the log and return to the command prompt.
-
Run initial setup script.
Select the tab for the appliance you are deploying.
- Core Agent Appliance
- Extended Cluster Appliance
Run the following command to start the setup script:
sudo spy-hypervisor-setupWhen prompted, enter the following network details:
- IP Address
- Netmask
- Gateway
- Hostname
- DNS Search Domains
- Name Servers
- NTP Servers
These values should match the information provided by your networking team.
ImportantFor multi-node ECA deployments, you must run this command on all non-primary nodes first, and then on the primary node (node 1) last.
Run the following command to start the setup script:
sudo -E spy-hypervisor-setupWhen prompted, enter the following network details:
- IP Address
- Netmask
- Gateway
- Hostname
- DNS Search Domains
- Name Servers
- NTP Servers
These values should match the information provided by your networking team.
-
Extract Eyeglass UI Files (Only for Eyeglass on PowerScale, Version 2.10.0)
This step is only required if you are:
- Deploying the Core Agent Appliance,
- On a PowerScale platform, and
- Using version 2.10.0
If you are deploying ECA, using a platform other than PowerScale, or running a different version — skip this step.
If all the above apply, follow the branding-specific instructions below:
For Superna branding, run the following commands:
tar xvf /opt/data/branding/ui/EYEGLASS.tar.gz -C /srv/www/htdocs/eyeglass --strip-components=1tar xvf /opt/data/branding/ui/EYEGLASSwidgets.tar.gz -C /srv/www/htdocs/eyeglasswidgets --strip-components=1For Dell branding, run the following commands:
tar xvf /opt/data/branding/ui/DELL.tar.gz -C /srv/www/htdocs/eyeglass --strip-components=1tar xvf /opt/data/branding/ui/DELLwidgets.tar.gz -C /srv/www/htdocs/eyeglasswidgets --strip-components=1Then run the setup script:
sudo -E spy-hypervisor-setupThese commands unpack the necessary files for the Eyeglass web interface based on your selected branding.
Create VM-level Snapshots
In some cases — such as before performing an upgrade — you may want to take a VM-level snapshot as a recovery point. This ensures you can roll back to a known good state if needed.
To create a snapshot:
-
In Nutanix Prism, go to Compute & Storage > VMs.
-
Locate and select the VM you want to snapshot from the VM List.
-
Select Action to open the drop-down menu.
-
Select Create Recovery Point.
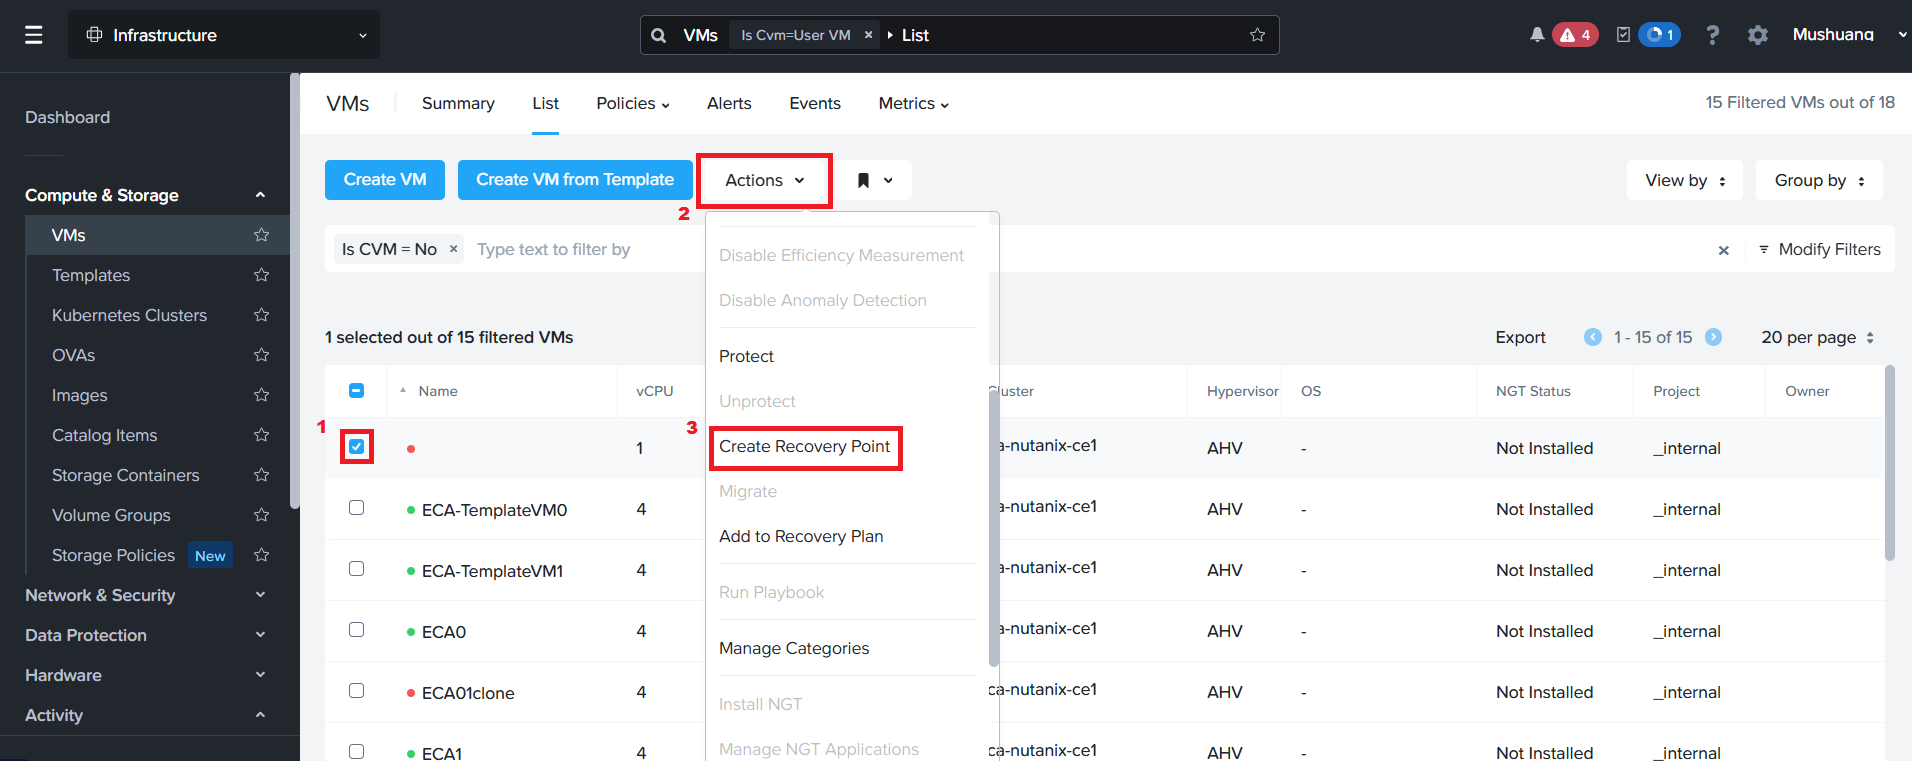
This will generate a snapshot that can be used to restore the VM if needed.
Next Steps
Continue with the installation guide for the solution and environment you are deploying.