Execute a Failover
Introduction
Executing a failover is a critical step in disaster recovery that requires precision, careful planning, and a clear understanding of the process involved. Once you have configured your failover type, the next phase is the actual execution, which ensures continuity of service and data integrity. This guide contains detailed steps to perform a failover using Eyeglass DR Assistant, highlighting the key actions needed to maintain control over your environment during a disaster recovery event.
Pre-Failover Check
- Do not make any changes to SyncIQ Policies or Eyeglass Configuration Replication Jobs during failover, as this can lead to unexpected results.
- Eyeglass Assisted Failover has a 45-minute timeout for each failover step. If any step is not completed within this period, the failover will fail. This can occur if SyncIQ policies are already running or if the SyncIQ steps take longer than expected to finish. While the timeout duration can be adjusted, lowering it does not speed up the failover process.
- If configuration data (such as shares, exports, or quotas) is deleted or modified on the target cluster—especially Share names, NFS Alias names, or NFS Export paths—without running Eyeglass Configuration Replication, these changes may cause the source cluster to delete the object after failover. To prevent this, run Eyeglass configuration replication before failover.
Controlled vs Uncontrolled Failover
To ensure data integrity during a failover, it is crucial to prevent client access to the Failover Source cluster.
Use the SMB Data Integrity option to disconnect user sessions on shares that will failover, and unmount NFS shares to prevent client access.
Execute Failover with DR Assistant
-
Open the DR Assistant
-
Choose failover settings
In the Failover Wizard tab, select your source cluster, failover type, and failover options, outlined in the table below.
-
Select the source cluster
-
Select the failover type
-
Leave the failover mode set to failover/failback
-
Leave all default check boxes for a planned controlled failover, or read the options below to make changes:
Failover Options
Failover Option Description Controlled Failover Check if the source cluster is healthy and reachable. Uncheck ONLY for a real DR event. Uncontrolled failover skips API calls and assumes the source is destroyed. Data Sync Runs a final SyncIQ data sync job during failover (Recommended). Config Sync Syncs shares, exports, and NFS aliases during failover (Disabled in versions > 2.5.6). SMB Data Integrity Failover Disconnects active SMB sessions and blocks new sessions to protect data integrity during failover. Quota Sync Syncs quotas to the target cluster or skips syncing to improve failover performance if there are many quotas. Block Failover on Warning Prevents failover if warnings are detected in the DR Dashboard (Recommended to leave enabled). Quota Domain Conflict Check Overrides validation for quotas with pending scans that could block failover (Recommended to run quota scan first). SyncIQ Resync Prep Prepares SyncIQ policies for failover and failback (Recommended to leave enabled). Disable SyncIQ Jobs on Target Disables SyncIQ jobs on the target cluster post-failover (Recommended to leave enabled for automated failback; manual steps required if disabled). Rollback SMB Shares on Failure Automatically rolls back SMB share renames if a failure occurs during failover (Recommended to leave enabled). -
Use uncontrolled failover only if is a real DR event
To run an uncontrolled failover, uncheck "controlled failover" in failover options.
In this case, source cluster API calls are skipped and cached knowledge of shares and quotas are used to failover. Eyeglass assumes the source cluster has been destroyed. No steps that provide the option for failback are executed.
warningDo not use uncontrolled failover unless you are lab testing, or prepared for manual steps to recover from the resulting end state.
Recovery from an uncontrolled failover is a customer's responsibility, and is not covered by the support contract.
All recovery is manual if this option is used.
noteEyeglass Configuration Replication jobs will be in a 'USERDISABLED' state after an uncontrolled failover.
Click next after selecting failover options.
-
-
Review and accept you have read all material regarding the support process and customer responsibilities.
-
Verify domain mark steps have been completed.
-
Select the policy or policies, Access Zone, or IP pool for the failover type selected.
importantCheck readiness again before continuing! Make sure you understand the warnings, and if they will block failover. In general, warnings will not block failover. Errors block failovers.
-
Validate the failover configuration.
Click next to proceed, and Eyeglass will run a validation check. If you receive an error, you will need to review and address it.
Review the validations and acknowledge the necessary conditions to proceed. Ensure all conditions are met before continuing with the failover process - failing to read any accompanying documents or address warnings could result in data loss.
-
Review the final summary.
warningThis is the point of no return. Be sure you are ready for failover before proceeding.
Once started, the failover steps can be cancelled, but the resulting recovery steps will be manual.
-
Start the failover.
Read and acknowledge any conditions to initiate failover.
Select "Run Failover" to begin the failover job.
Cancelling FailoverUse this only if directed by support.
Cancelling a failover requires manual recovery of networking policy state, shares, SPN, and SmartConnect. Support is unable to assist with recovery from intentionally cancelling a failover.
Failover jobs can be canceled by clicking the 'cancel job' link provided in the running failover job table.
-
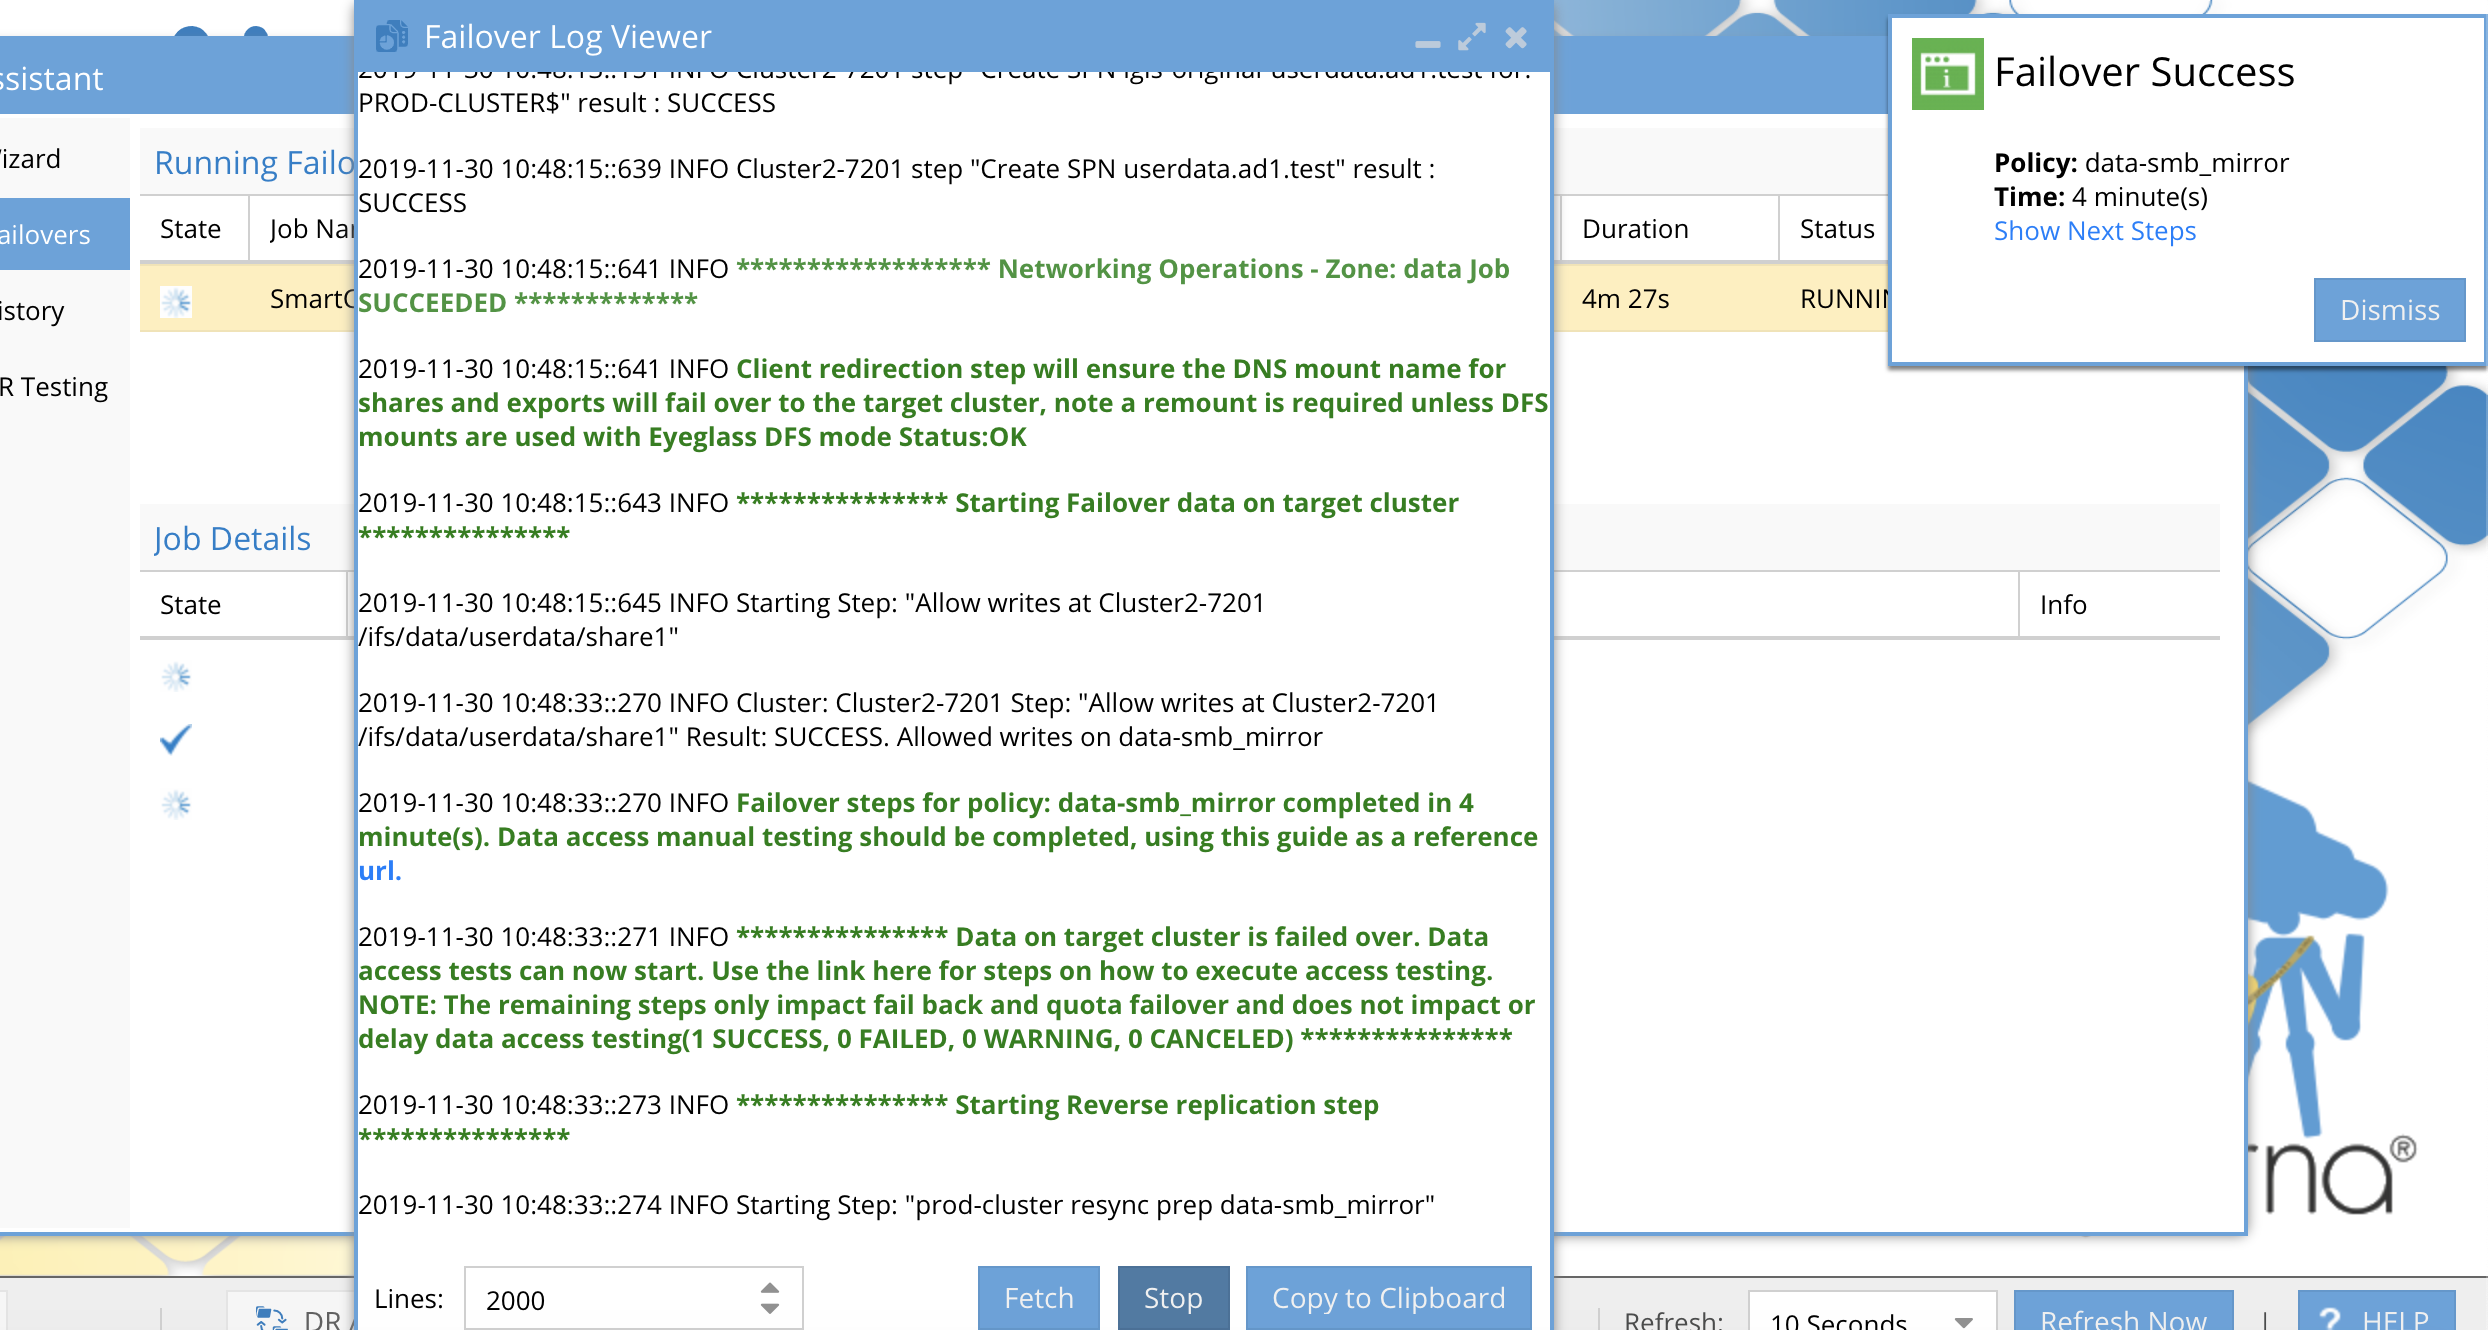
Monitor the failover job progress.
Navigate to the Running Failovers tab to see the failovers currently in-progress. Click Logs, then click Watch to follow the failover real time, or click Fetch to update the log window with the current progress.
-
Test client data access for failover success or failure.
-
Download completed failover logs.
To review and download failover logs, follow the steps below:
-
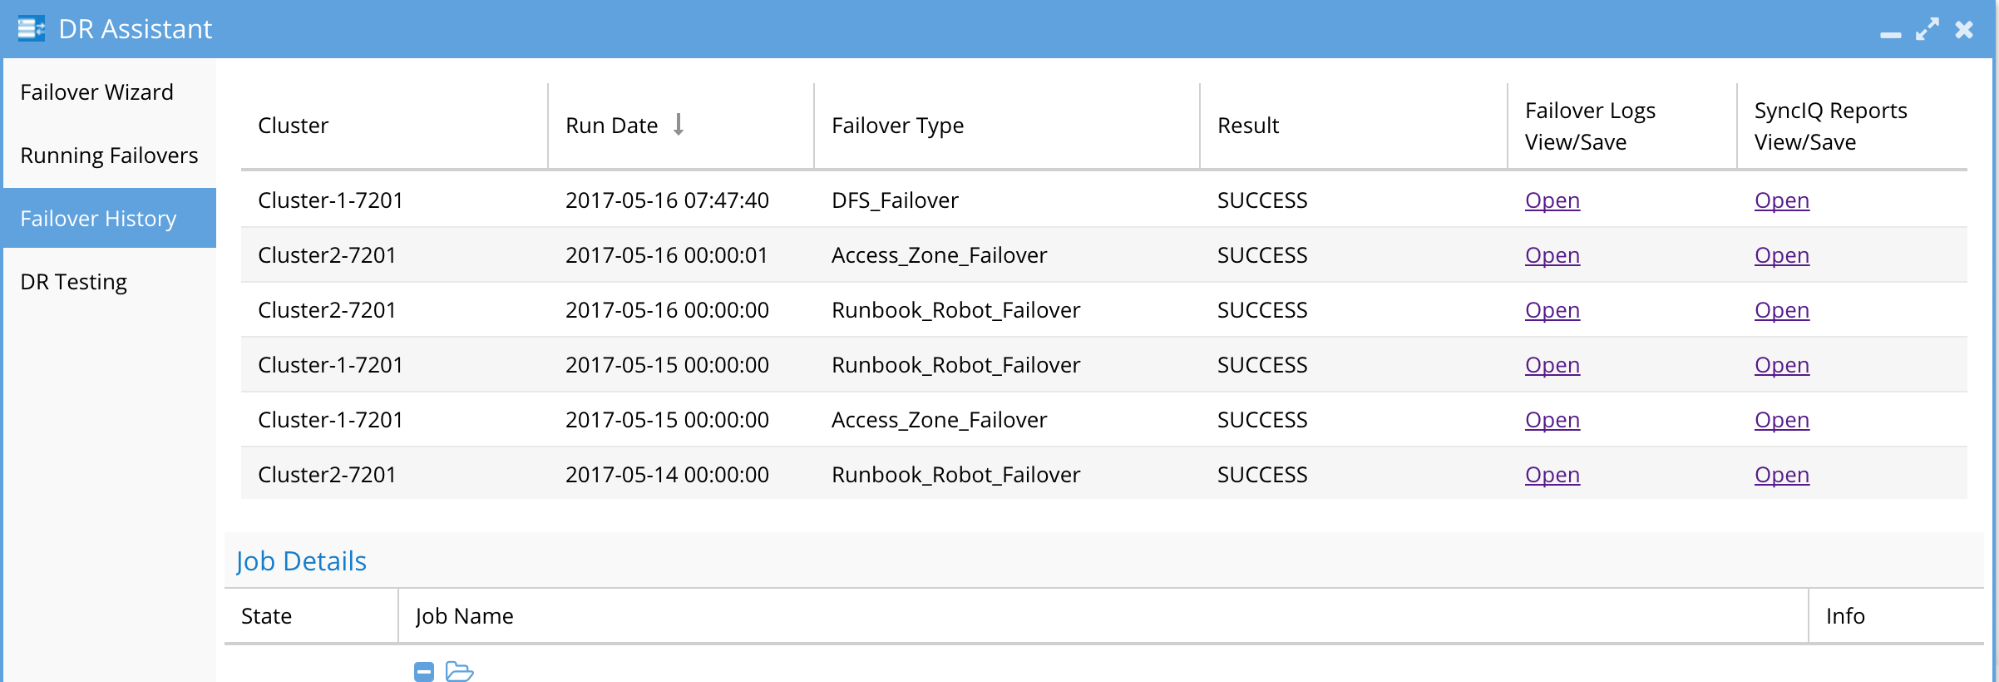
Click on the "Failover History" tab in the DR Assistant interface. This tab provides a comprehensive list of past failover events.
-
Accessing Failover Logs:
- Locate the desired failover entry in the history list.
- Under the "Failover Logs View/Save" column, click on the "Open" link corresponding to the selected failover event. This action will open the failover log details.
-
Downloading SyncIQ Reports:
- In addition to the failover logs, SyncIQ reports can also be accessed. Click on the "Open" link under the "SyncIQ Reports View/Save" column for the selected event.
- These reports are crucial for understanding the specifics of SyncIQ steps, especially if a SyncIQ step has failed.
-
Using SyncIQ Logs for PowerScale OneFS Support:
- If there are issues with the SyncIQ steps, the logs can provide detailed information.
- These logs can be downloaded and shared with PowerScale OneFS support when opening a support request (Service Request - SR) to expedite the troubleshooting process.
-
Monitor Failover with DR Assistant
In-Progress Failover
-
Once a failover has been started, you can monitor its progress by going to the DR Assistant icon on the Eyeglass Web UI, and clicking on the Running Failovers tab.
-
There, you may click on the line of the running failover, and in the lower half of the screen you'll be able to expand the "Job Details" tree.
-
One of the columns is called "Logs". Clicking on the link found there will show you the log that is being created for the failover in real time. (As of release 2.5.6 or later, a copy to clipboard option is available)
- Each entry in the log is timestamped.
- The log is updated as the failover process continues.
- You can see log updates by closing and re-opening the log file.
- If there is an error during failover, an Eyeglass System Alarm will be issued. You may find these alarms wherever you have configured them (email, or otherwise), or you can consult the Alarms icon on the Eyeglass Web UI Desktop.
Completed Failover
-
Once a failover is completed, it will appear in the DR Assistant module, under the Failover History tab.
-The Result column will display either SUCCESS or FAIL, depending on whether or not there were errors encountered in the Failover steps.
- Click on the row corresponding to the Failover you're looking to review. The "Job Details" tree will appear in the lower half of the screen.
- You may also click on the "Open" link under Failover Logs and SyncIQ Reports to view those files.
An Access Zone Failover with a result of SUCCESS may have had SPN errors. Refer to the Post Access Zone Failover Guide for more information on how to verify this.
Next Steps
After the failover process, it’s important to check that your environment is functioning correctly and that all data is in the right place. Verifying that everything matches your disaster recovery plan helps ensure data integrity and keeps your operations running smoothly.
See the Post-Failover Steps documentation for more information.