System Settings
Data Security Essentials requires proper configuration of database and email settings to function correctly. This section covers how to set up these core system components and manage suspicious extensions for ransomware detection.
Database Configuration
Configure your database connection settings for Data Security Essentials.
You can edit the SQL Server name and Database Name directly from the configuration interface.
All events tracked by the Data Security Essentials policies are stored in your designated database.
-
Access Database Settings
Go to Settings > Database configuration
-
Review Configuration
Verify your database connection and authentication settings
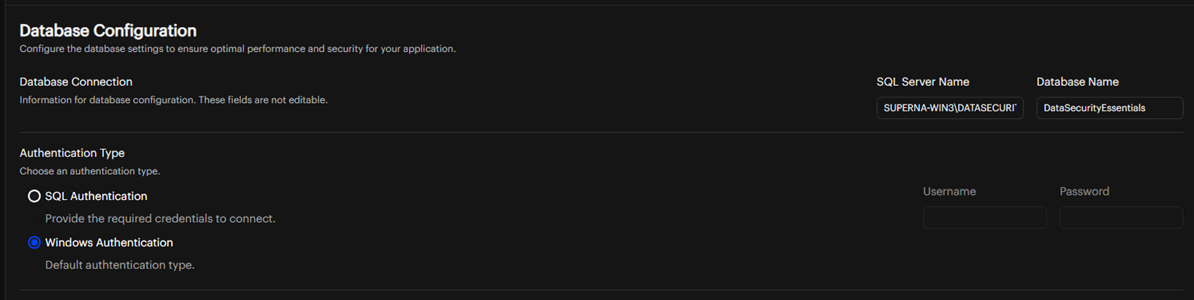
You can edit the SQL Server name and Database Name directly from the configuration interface.
-
Database Credentials
Ensure that the authentication credentials are correct and have appropriate permissions
-
Connection Status
Check that the connection status indicator shows a successful connection to the database
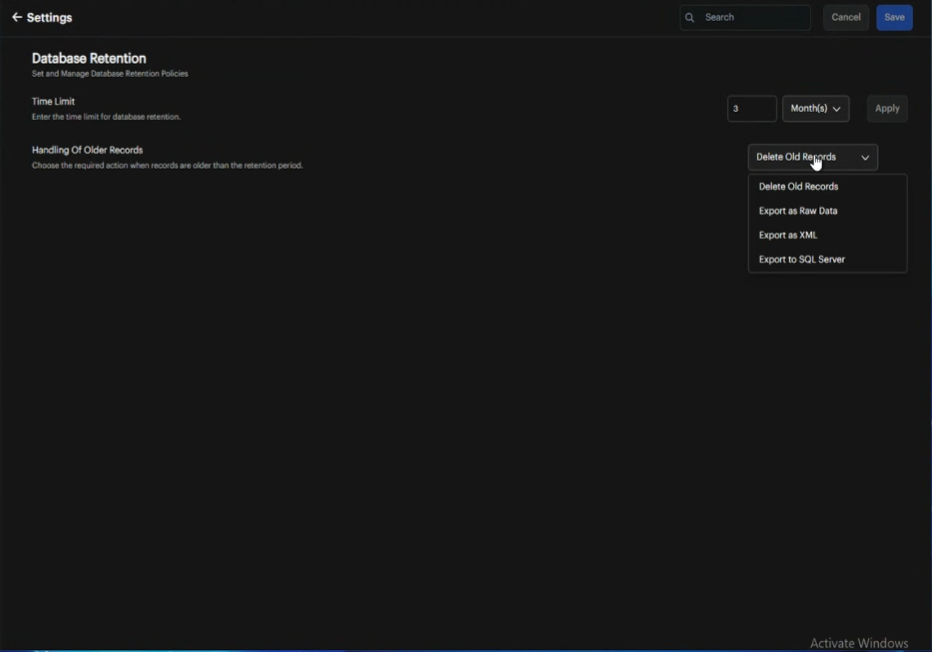
Database Retention
Configure how long data remains in your database before deletion or export.
-
Enter Time Limit
Specify the retention duration in the time limit field.
-
Select Time Unit
Choose days, weeks, months, or years from the dropdown menu and click Apply.
warningReducing the retention period permanently deletes data outside the new timeframe. The system displays this warning when you change the time limit:
"Changing the time limit for database retention may delete data outside the selected timeframe. Do you want to continue?"
- Cancel: Keeps current retention settings
- Yes: Applies the new time limit and deletes data outside the timeframe
-
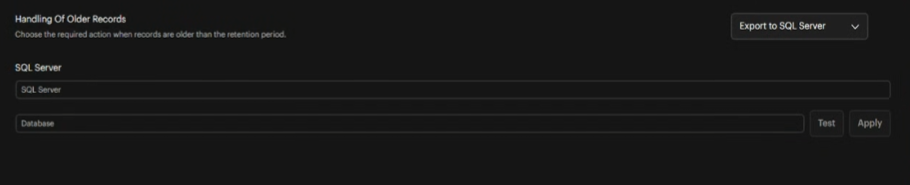
Configure Older Record Handling
Choose what happens to records that exceed the retention period. Different fields appear based on your selection:
-
Delete Old Records (default is 3 months, user configurable)
- No additional fields required
-
Export as Raw Data

- Export path field appears
noteThe Export path must already exist on each Windows server where Data Security Essentials is installed.
-
Export as XML

- Export path field appears
noteThe Export path must already exist on each Windows server where Data Security Essentials is installed.
-
Export to SQL Server
-
Enter SQL Server Name
SQL Server name field appears
-
Enter Database Name
Database name field appears
-
Test Connection
Click Test button to verify server connection
-
Apply Changes
If connection succeeds, you can apply the changes
-
-
-
Apply Changes
Click Apply to save your retention settings.
Test the server configuration before applying changes to ensure proper validation.
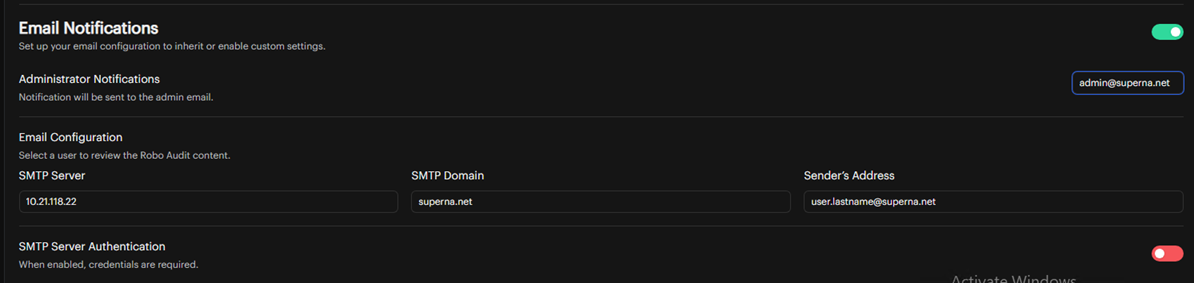
Email Configuration
Configure email settings to receive notifications from Data Security Essentials:
-
Navigate to Email Settings
Go to Settings > Email Configuration
-
Enter Email Information
Fill in the appropriate information for your email environment:
- SMTP Server: Your email server address
- Port: The SMTP port number (typically 25, 465, or 587)
- From Address: The email address notifications will come from
- Authentication: Select if your SMTP server requires authentication
- Username/Password: If authentication is required
-
Test Email Connection
Use the test function to verify your email settings are working correctly
-
Save Settings
Click OK to save the changes
Suspicious Extensions
The Suspicious Extensions used by the Ransomware Extensions Policy Trigger can be managed from the Data Security Essentials User Interface which is accessible from the Settings menu. This list of extensions is generated by Superna and automatically updated by Data Security Essentials when updates are available.
Administrators can disable an extension by toggling the state if an extension on the list conflicts with an extension used by a corporate application. If the state is enabled, the extension is included in the check for ransomware threats. The state will be maintained when updates are received from Superna.
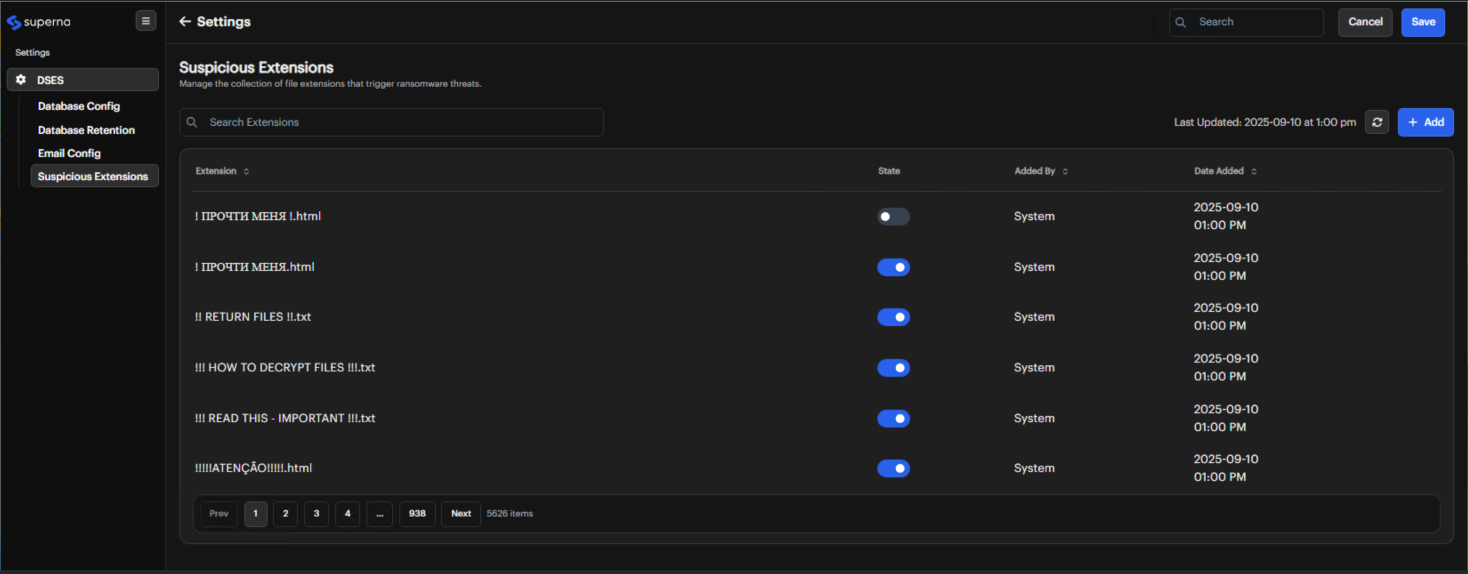
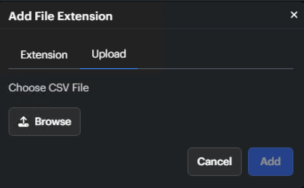
Custom extensions can also be added to this list by clicking the +Add button.
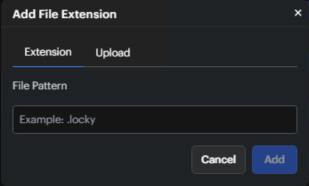
Extensions can be added one at a time or a CSV file can be uploaded with multiple extensions.
Once all changes have been made, click the Save button in the upper right corner.
Extensions added by an administrator through the UI can be enabled, disabled and deleted. Extensions added by Superna can only be enabled or disabled.