Upgrade Guide DSE
This upgrade guide provides instructions for upgrading Data Security Essentials from 1.0.x to 1.0.4. If you are already on version 1.0.4, you can skip this guide.
Before You Begin
Prerequisites
- You need a Windows domain account with:
- Local administrative rights on the DSE server to perform software installation and upgrades
- Database owner (dbo) rights on the DSE database in SQL Server to upgrade the schema
- SQL Server account with dbo rights on the DSE database ONLY if the Windows account lacks schema modification rights
- SQL Server DBA to run DB upgrade scripts manually ONLY if the Windows account lacks database modification rights AND SQL Server uses integrated security only
- Valid license key
- Estimated upgrade time: 5-10 minutes per server
Create a backup of your Data Security Essentials database before starting the upgrade process.
Upgrade Procedure Overview
The Data Security Essentials upgrade uses a standard Windows setup program. The upgrade takes a few minutes and performs these operations:
-
Upgrade Database Schema
Updates the database structure for new features. -
Stop Services
Stops all Data Security Essentials services. -
Replace Files
Replaces existing files with newer versions. -
Restart Services
Restarts all Data Security Essentials services. -
Reboot If Necessary
Prompts for system reboot when required.
In multi-server environments, upgrade the server running the Business Overwatch Task Service (BOTs) first. The 1.0.4 database schema includes updates for new BOTs functionality. If you don't upgrade the BOTs service first, enabled BOTs fail until you update the service to 1.0.4.
Determining the BOTs Server
To identify which server runs BOTs:
-
Open BOT Configuration
Click Data Security Essentials BOT Configuration in the Superna Data Security Essentials start menu group. -
View Configuration UI
The BOT Configuration UI opens. -
Access Server Information
Select Configure > BOTs Server... from the menu.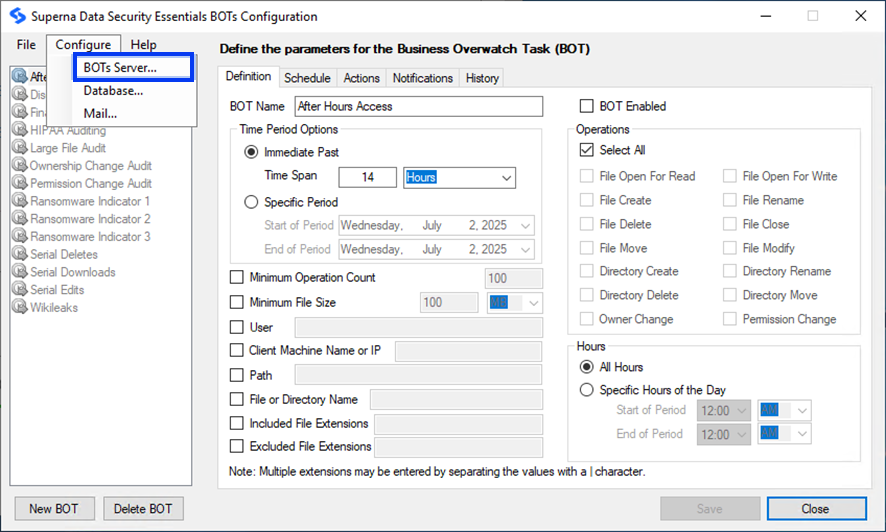
-
Identify Server Name
A dialog box shows the name of the server configured to execute BOTs. Note the server BOT name and click OK.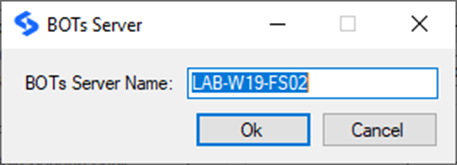
Upgrade Process
-
Extract and Launch Setup
Log into the DSE server. Extract the setup package you downloaded from Superna using Windows Explorer. Navigate to the appropriate platform folder (Windows, NetApp, Dell, or Hitachi) and double-click setup.exe. -
Confirm Upgrade
The setup program launches and prompts for the upgrade. Select Yes to continue.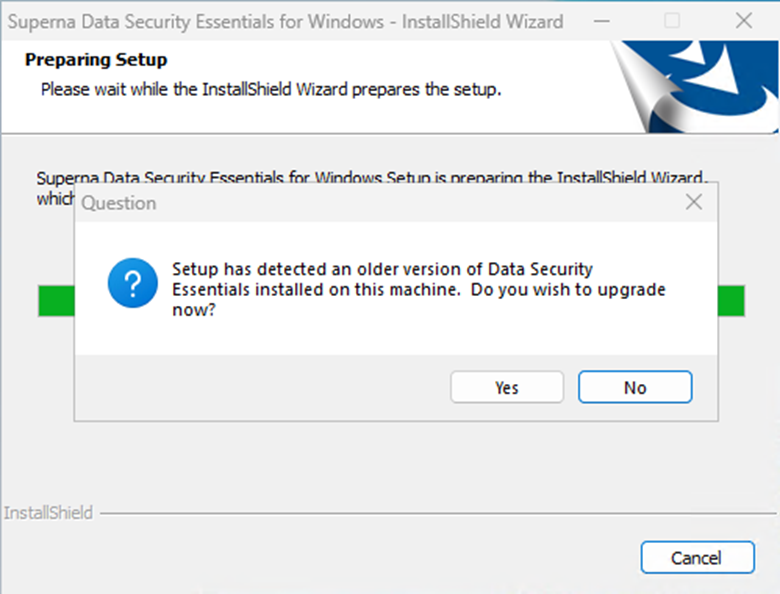
-
Continue to Next Dialog
Select Yes and continue to the next dialog and click Next.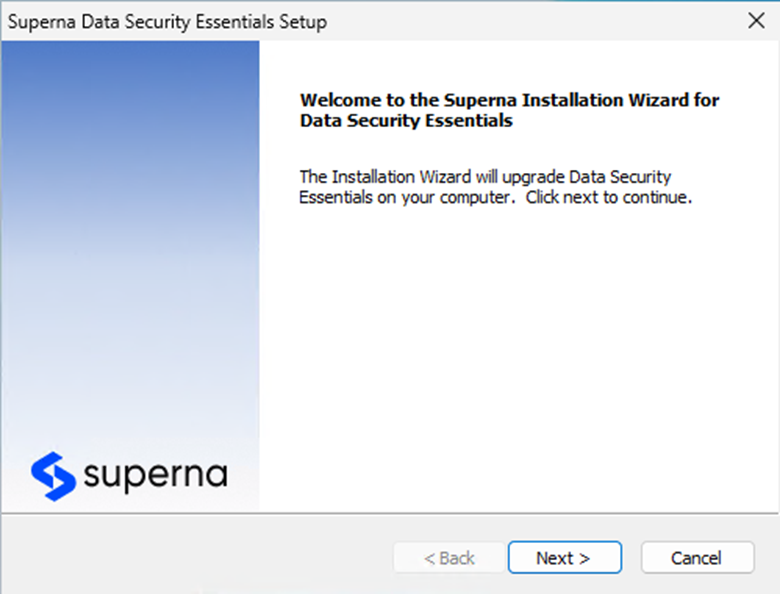
-
Accept License Agreement
Review the license agreement and click Next to proceed.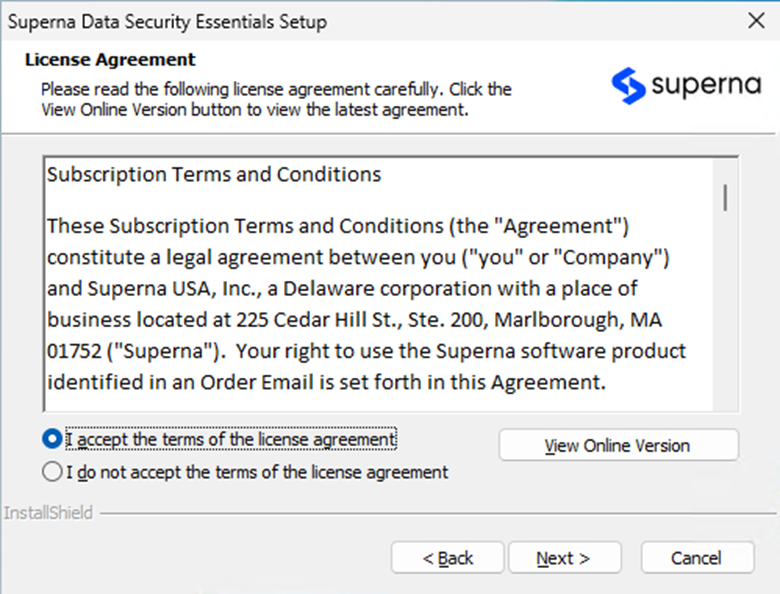
-
Verify Database Connection
The dialog automatically populates with your existing SQL Server name and database. Verify this information and click Next.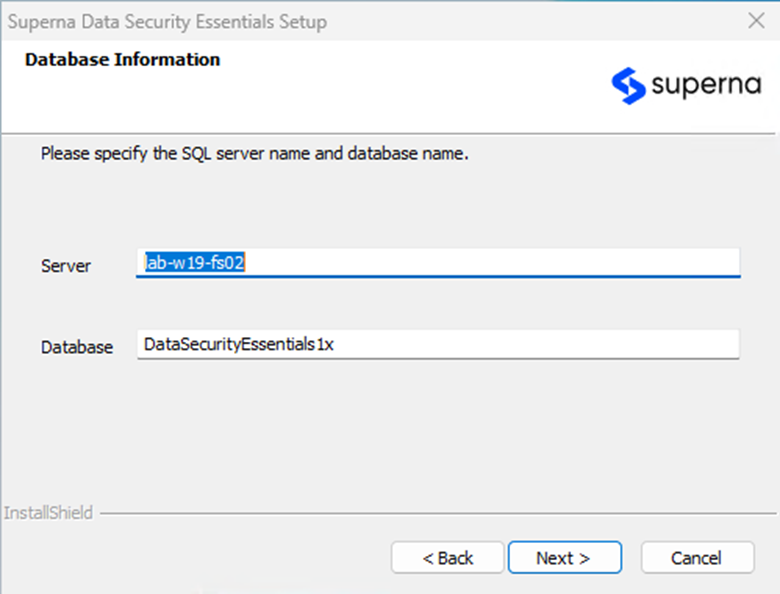
-
Configure Database Upgrade
Select the checkbox to upgrade the database and tables. Choose to use Integrated Security (currently logged in user) or specify a SQL Server account for the database schema upgrade. If your current user lacks permissions to upgrade the database, uncheck the Upgrade option and have a SQL DBA upgrade the database after this upgrade completes. Click Next. Setup verifies connectivity and permissions to the database.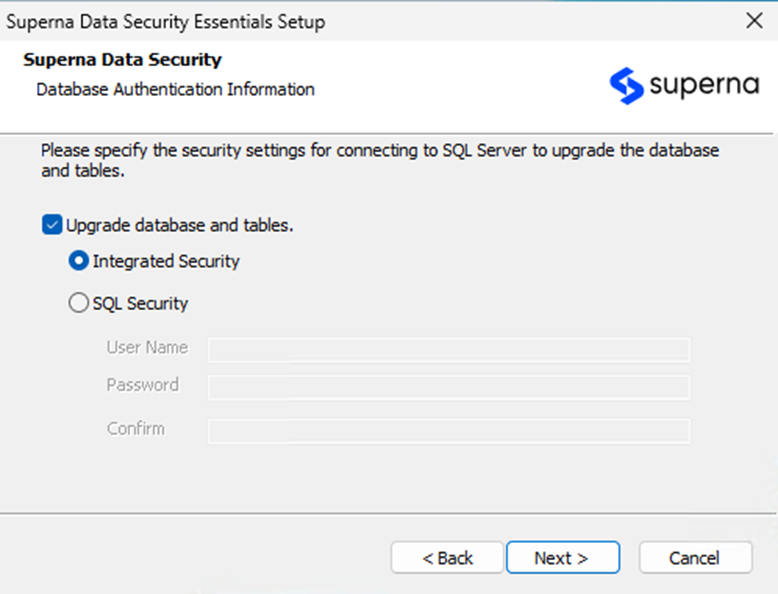 Database Upgrade
You only need to do this on the first server in a multi-server environment. Skip this step on subsequent servers.
-
Enter License Information
Confirm the Company Name and Administrator's email address. Provide your existing contract license or enter a new contract license if one was provided with the upgrade.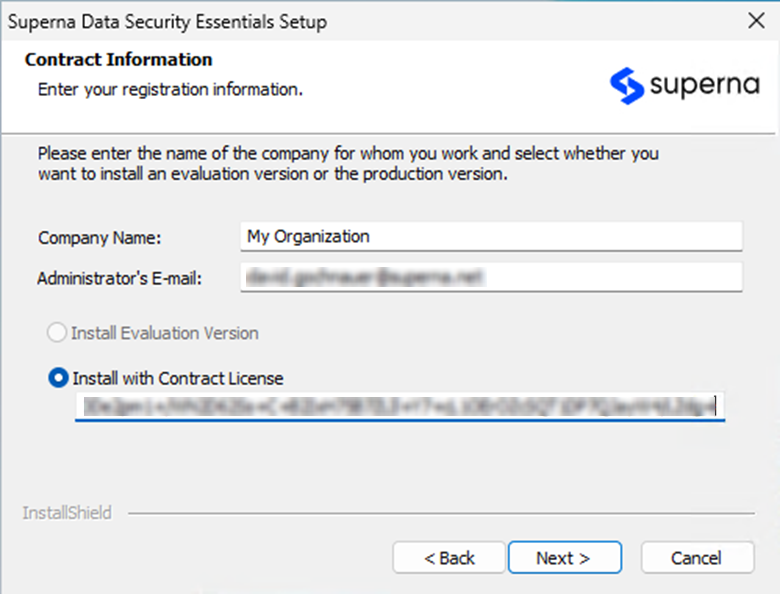
-
Review Summary
Confirm the information on the Summary screen and click Next to begin copying files.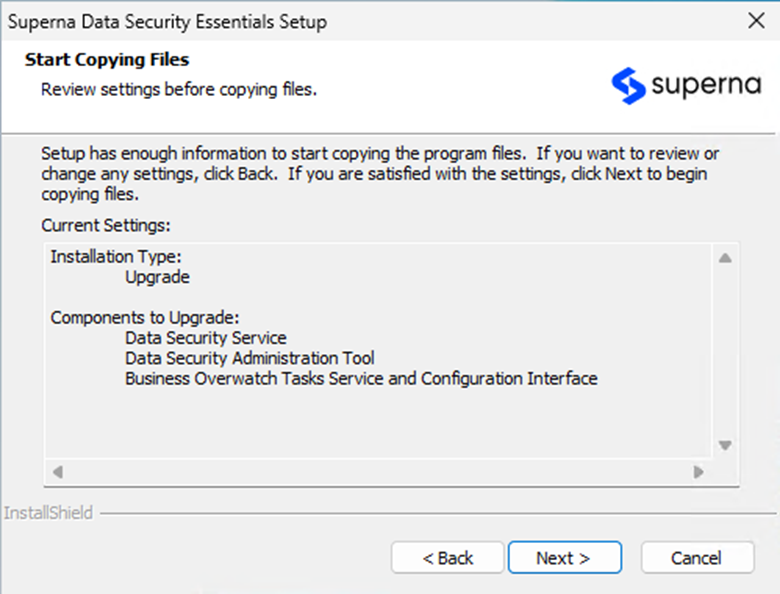
-
View Installation Status
The setup program will display a dialog with the status of the operations being performed.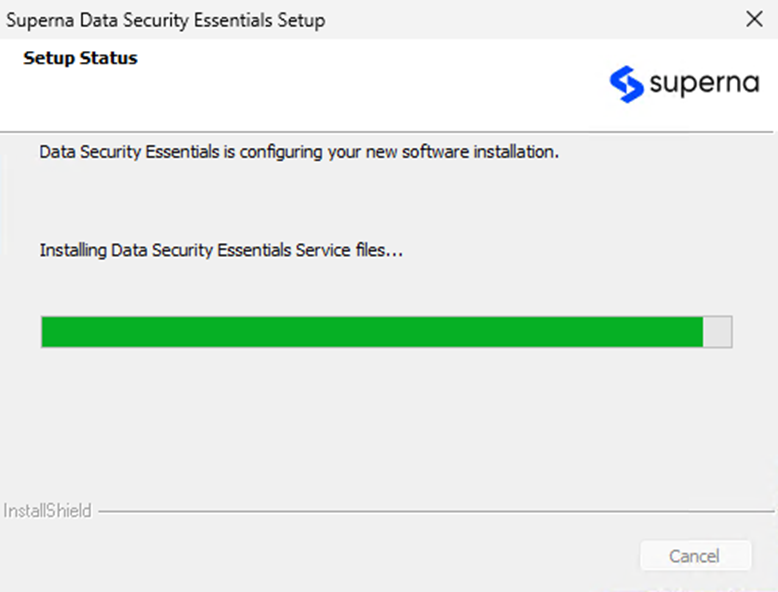
-
Reboot System
The software requires a server reboot to complete the upgrade. Choose to reboot now or schedule it for the earliest possible convenience.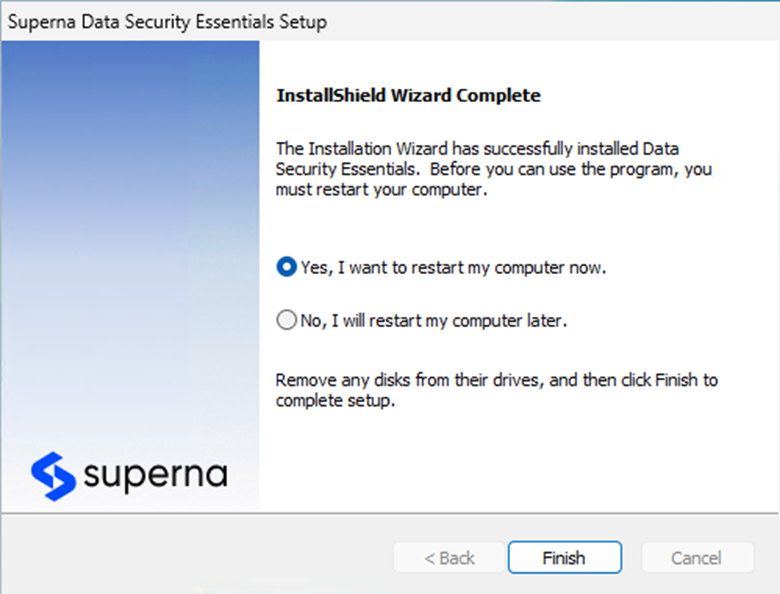
The upgrade is not complete until you reboot the server. Schedule the reboot at the earliest possible convenience to ensure all components function properly.