Active Auditor
Introduction
Active Auditor provides real-time auditing capabilities that allow administrators to define and respond to specific file activity behaviors across the cluster. Using prebuilt and custom triggers, you can monitor actions such as mass deletions, file accesses, and user activity patterns.
Mass Delete
The Mass Delete trigger is a prebuilt policy designed to detect unusually high rates of file deletions in a specified directory. This helps identify risky user behaviors such as accidental or intentional mass deletions, which could lead to data loss or operational issues.
To set up a Mass Delete response in Easy Auditor:
-
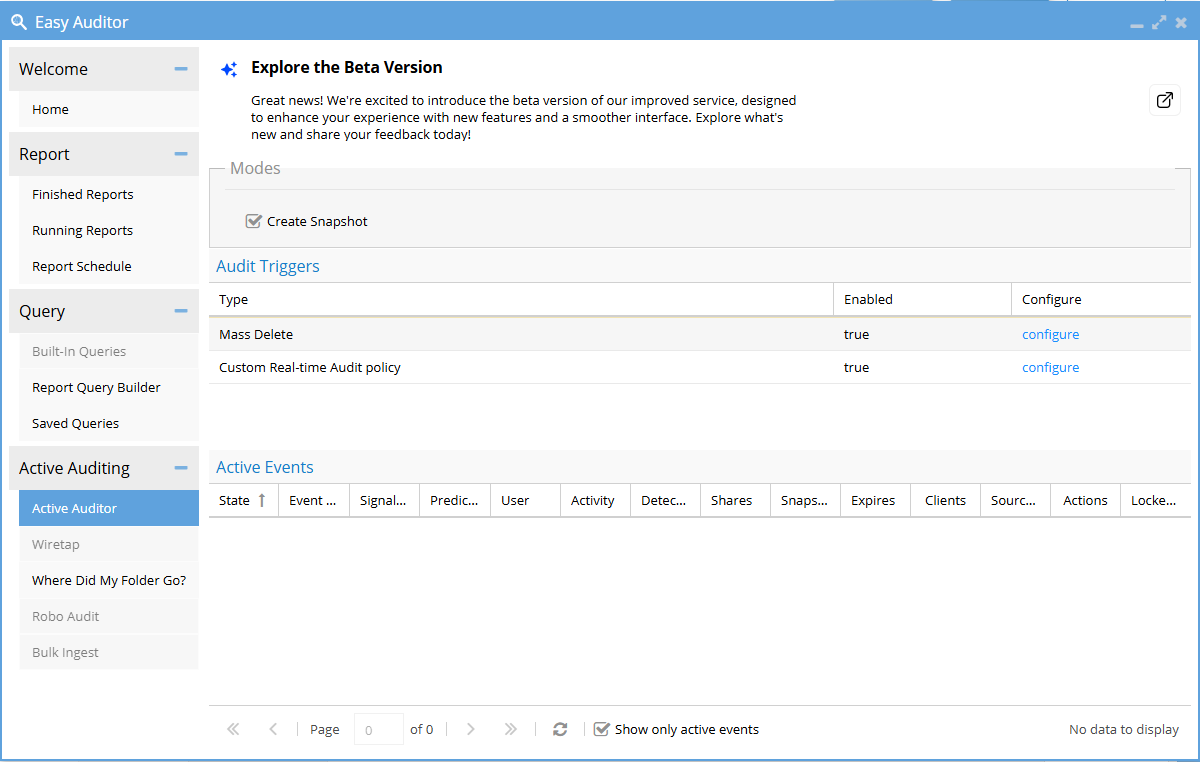
Open Easy Auditor
Select the Easy Auditor icon to open the interface.
-
Navigate to Active Auditor
Select the Active Auditor tab from the navigation menu.
-
Open the Mass Delete configuration
Under Audit Triggers, locate the Mass Delete option and select configure in the rightmost column.
This opens the Mass Delete Configuration window.
-
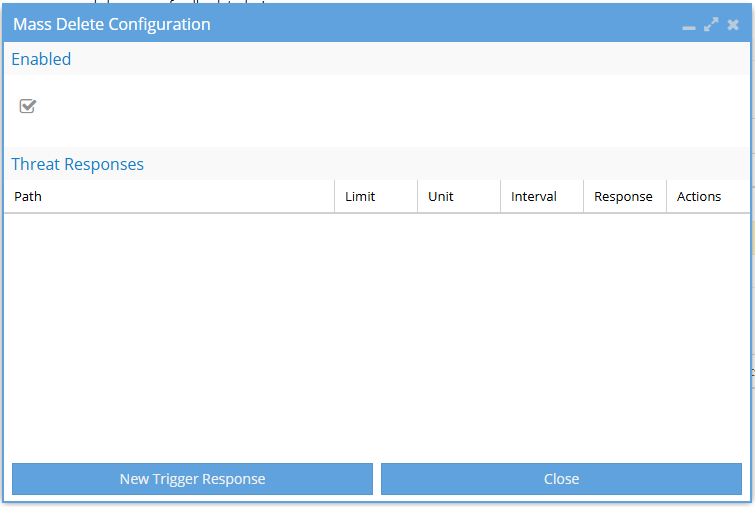
Add a new trigger response
Select New Trigger Response to create a new Mass Delete response.
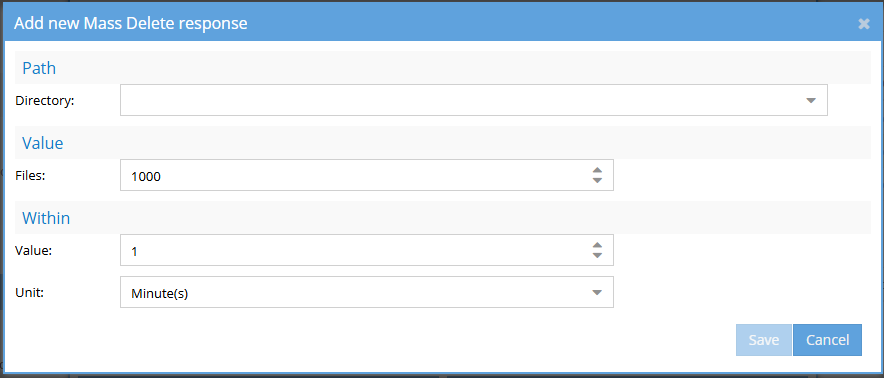
The Add new Mass Delete response dialog will appear.
-
Configure the response settings
Fill in the following fields:
-
Path
Use the Cluster Directory Selector to choose the directory you want to monitor. -
Value
Enter the number of files that must be deleted to trigger the response.
For example, enter1000to trigger the alert when 1000 or more files are deleted. -
Within
Define the time window during which the deletions must occur.- Value: Enter the numeric value (e.g.,
1) - Unit: Choose the time unit (e.g., Minute(s) or Hour(s))
- Value: Enter the numeric value (e.g.,
-
-
Save the response
When finished, select Save to apply the settings or Cancel to discard changes.
-
Review configured responses
After saving, your new response will appear under the Threat Responses section.
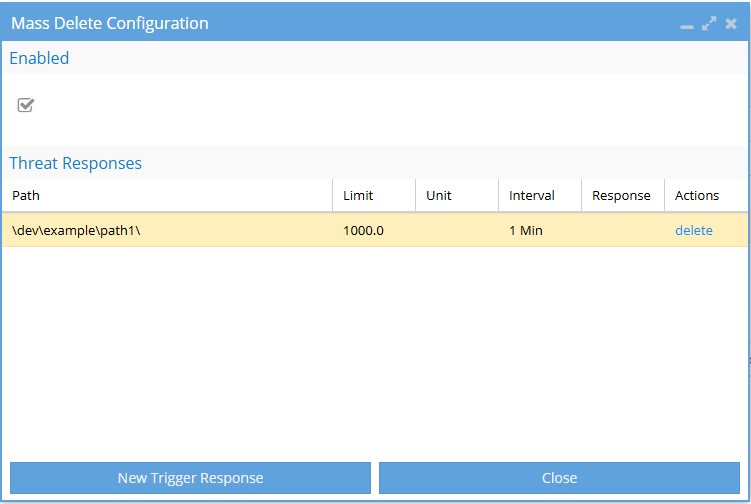
Here, you can:
- Review the settings for each response (path, limit, and time interval).
- Remove a response by selecting Delete in the Actions column.
To add additional responses, select New Trigger Response again.
When finished, select Close to exit the configuration window.
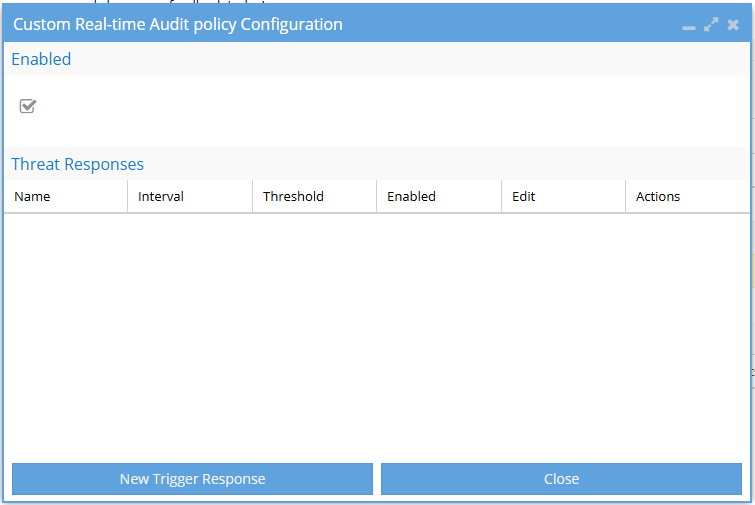
Custom Real-time Audit Policy
The Custom Real-time Audit Policy feature offers advanced auditing capabilities. It enables administrators to define highly specific conditions using rule-based logic with AND/OR groupings, allowing for detailed detection of abnormal or unauthorized behaviors.
To create or edit a Custom Real-time Audit policy:
-
Open Easy Auditor
From the Easy Auditor interface, navigate to the Active Auditor tab.
-
Open the policy configuration
Under Audit Triggers, locate the Custom Real-time Audit policy row and select configure in the rightmost column.
-
Assign a name and enable the policy
In the configuration window:
- Name: Enter a descriptive name for your policy (e.g.,
High File Access Alert). - Enabled: Ensure the checkbox is selected to activate the policy.
- Name: Enter a descriptive name for your policy (e.g.,
-
Define audit criteria
Select View/Edit Audit Criteria to open the rule builder, which allows you to define exactly what should be monitored.
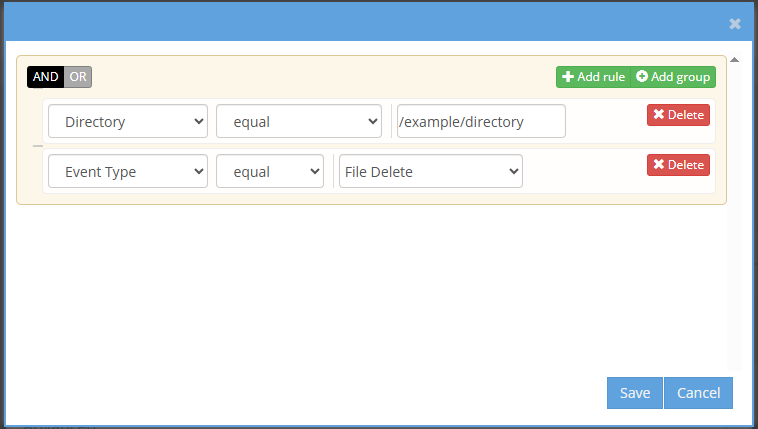
In this builder, you can create complex rules using AND/OR logic. Combine multiple conditions to match specific audit events.
Examples of criteria you can define:
- Directory – Monitor a specific folder path.
- Full Path – Track activity for a specific file.
- File Name or Extension – Focus on certain file types or names.
- Event Type – Choose actions like File Delete, Read, or Write.
- User – Monitor actions by a specific user.
- Cluster Name – Filter by originating cluster.
- Source IP – Limit activity by IP address.
Logic options:
- Select Add Rule to add a new condition.
- Select Add Group to nest multiple rules under AND/OR logic.
- Select Delete to remove individual rules or groups.
After defining your rules, select Save to return to the configuration screen.
-
Set monitoring parameters
- Interval – Define the time window for tracking events.
- Value – Enter a number (e.g.,
1) - Unit – Choose a time unit (e.g., Minute(s))
- Value – Enter a number (e.g.,
- Threshold – Enter the number of matching events that must occur within the interval to trigger the policy (e.g.,
100)
- Interval – Define the time window for tracking events.
-
Save the policy
When you're done, select Save to apply the configuration or Cancel to discard changes.
-
Review the policy
After saving, your new policy response will appear under the Threat Responses section.
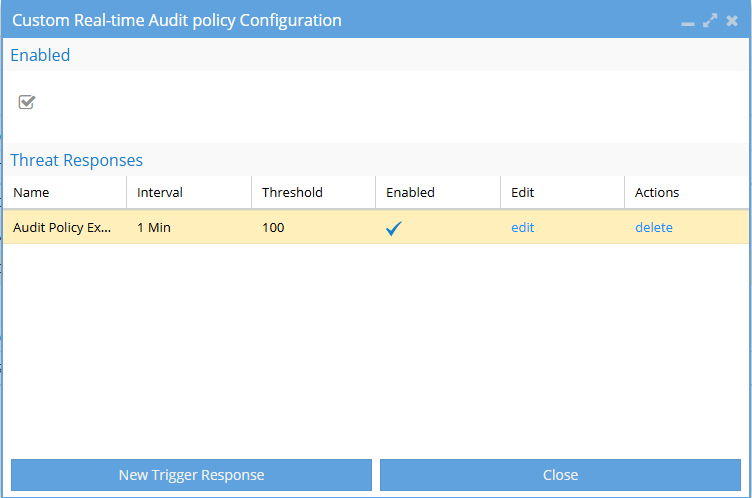
Here, you can:
- View the policy name, interval, threshold, and whether it’s enabled.
- Select edit to update the response configuration.
- Select delete to remove the response if it's no longer needed.
To create additional custom audit responses, select New Trigger Response.
When finished, select Close to exit the configuration window.
Database Health Monitoring
Active Auditor monitors PostgreSQL database health to ensure continuous audit data collection.
Configure Health Check Schedule
The system checks database health using a scheduled task defined in sync.xml:
<SQLDBHealthCheck
    IsEnabled="true"
    IsConfigurable="true"
    Label="SQL DB Health Check"
    combine.self="OVERRIDABLE">
    0 * * * *
</SQLDBHealthCheck>
Default settings:
- Runs hourly (cron:
0 * * * *) - Enabled by default
- Configurable via CLI
What Gets Checked
The health check monitors:
- Database connection - Validates PostgreSQL connectivity
- Event ingestion - Verifies new audit events are processing
Manage the Schedule
To view or modify the health check schedule:
igls admin schedules
This command lets you:
- Enable or disable the task
- Change the schedule frequency
- View current configuration
Health Check Alarms
The system raises these alarms when it detects issues:
| Alarm Code | Description | Severity |
|---|---|---|
| EAU0014 | Failed to connect to PostgreSQL database | CRITICAL |
| EAU0015 | No new events detected in database | CRITICAL |
See Alarm Codes Reference for details.