Response Procedures
Superna 5.x provides tools to investigate and respond to detected security threats. This page explains the investigation interface and available response actions. The threat response process involves three main interfaces:
Threat List
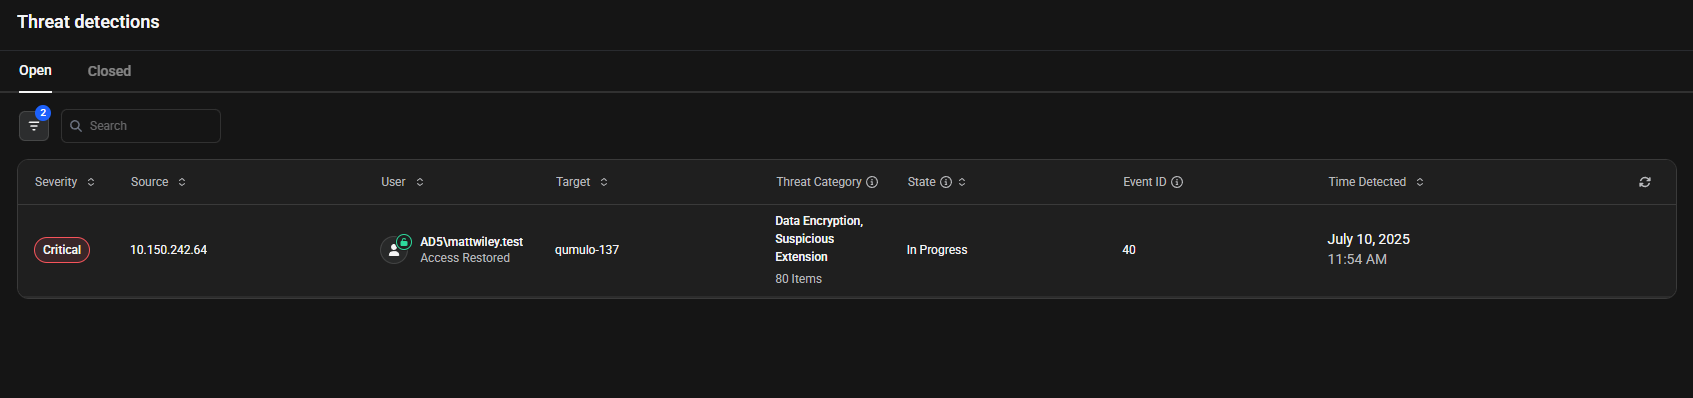
The main Threat Detection page displays all detected threats with severity indicators, user information, affected devices, and threat categories. Click any threat to view details.
Handling Threats
Follow these steps to access and respond to detected threats:
-
Access Threat Detection
Navigate to the Threat Detection page from the main menu. -
View Threat List
The page displays all detected threats with color-coded severity indicators:- Red - Critical severity
- Orange - High severity
- Yellow - Medium severity
- Blue - Low severity
-
Open the Threat Details Sidebar
Click any threat in the list to open a detailed sidebar panel on the right side of the screen.
- User Status - Current access state (for example, "Access Restored")
- Threat Categories - Detailed descriptions of detected threats
- Affected Devices - Number of impacted devices
- Items Affected - Count of affected files
- Device Details - Specific device information and type
- Recovery Summary - Percentage and count of unrecoverable items
- Details Section - Complete threat information including:
- Severity level
- Source IP address
- Target device
- Items Affected count
- Threat Category types
- Current State (Open, In Progress, Closed)
- Time Detected
- Event ID
Two action buttons can be seen at the bottom:
- Investigate - Opens the detailed investigation interface
- Take an Action - Provides options to Lockout User or Close Threat
-
Choose Your Response Action
- Opens Investigation Interface - Click this to open the detailed investigation interface with three tabs: Items Affected, Assets Affected, and Activity Log
- Access Immediate Response Options - Click this for quick response actions
- Choose Response Type - Select from two options:
- Lockout User - Disable the user account immediately
- Close Threat - Mark the threat as resolved, moving it to the Closed Threats tab
-
Review Threat Categories
Before proceeding, understand the threat types shown in the sidebar. Examples include:- Data Encryption - User created encrypted files while removing originals
- Suspicious Extension - Files with ransomware-associated extensions detected
For a complete list of threat types, see the Reference.
Investigating Threats
When you click the Investigate button from the sidebar panel, the system takes you to a detailed investigation interface. This interface provides three tabs for comprehensive threat analysis:
The investigation interface provides comprehensive threat analysis tools through three main tabs and action options:
Analysis Tabs:
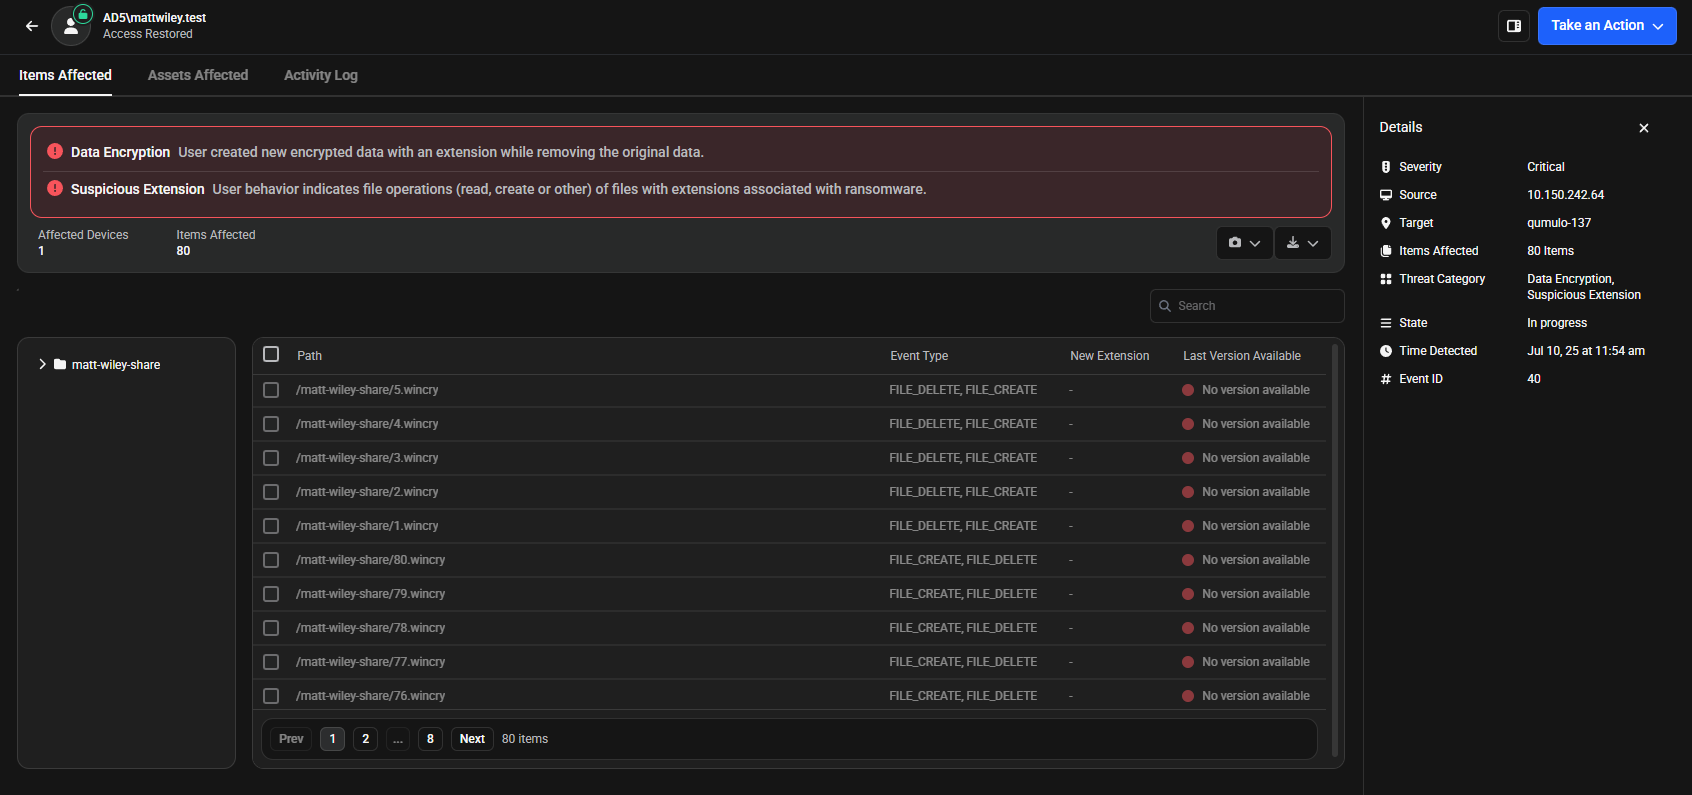
- Items Affected - View detailed information about affected files, including threat types, file paths, event types, and new extensions. Create snapshots, download files, and export CSV reports with comprehensive recovery data.
- Assets Affected - Review all accessible resources for the user who triggered the threat, including managed devices, data assets, asset types, locations, and domain information to assess potential damage scope.
- Activity Log - Monitor the chronological timeline of all system events and security activities with exact timestamps. Add comments for documentation and team collaboration.
Action Options:
- Take an Action - Access immediate response options including Lockout User, Restore User Access, and Close Threat functionality.
Items Affected Tab
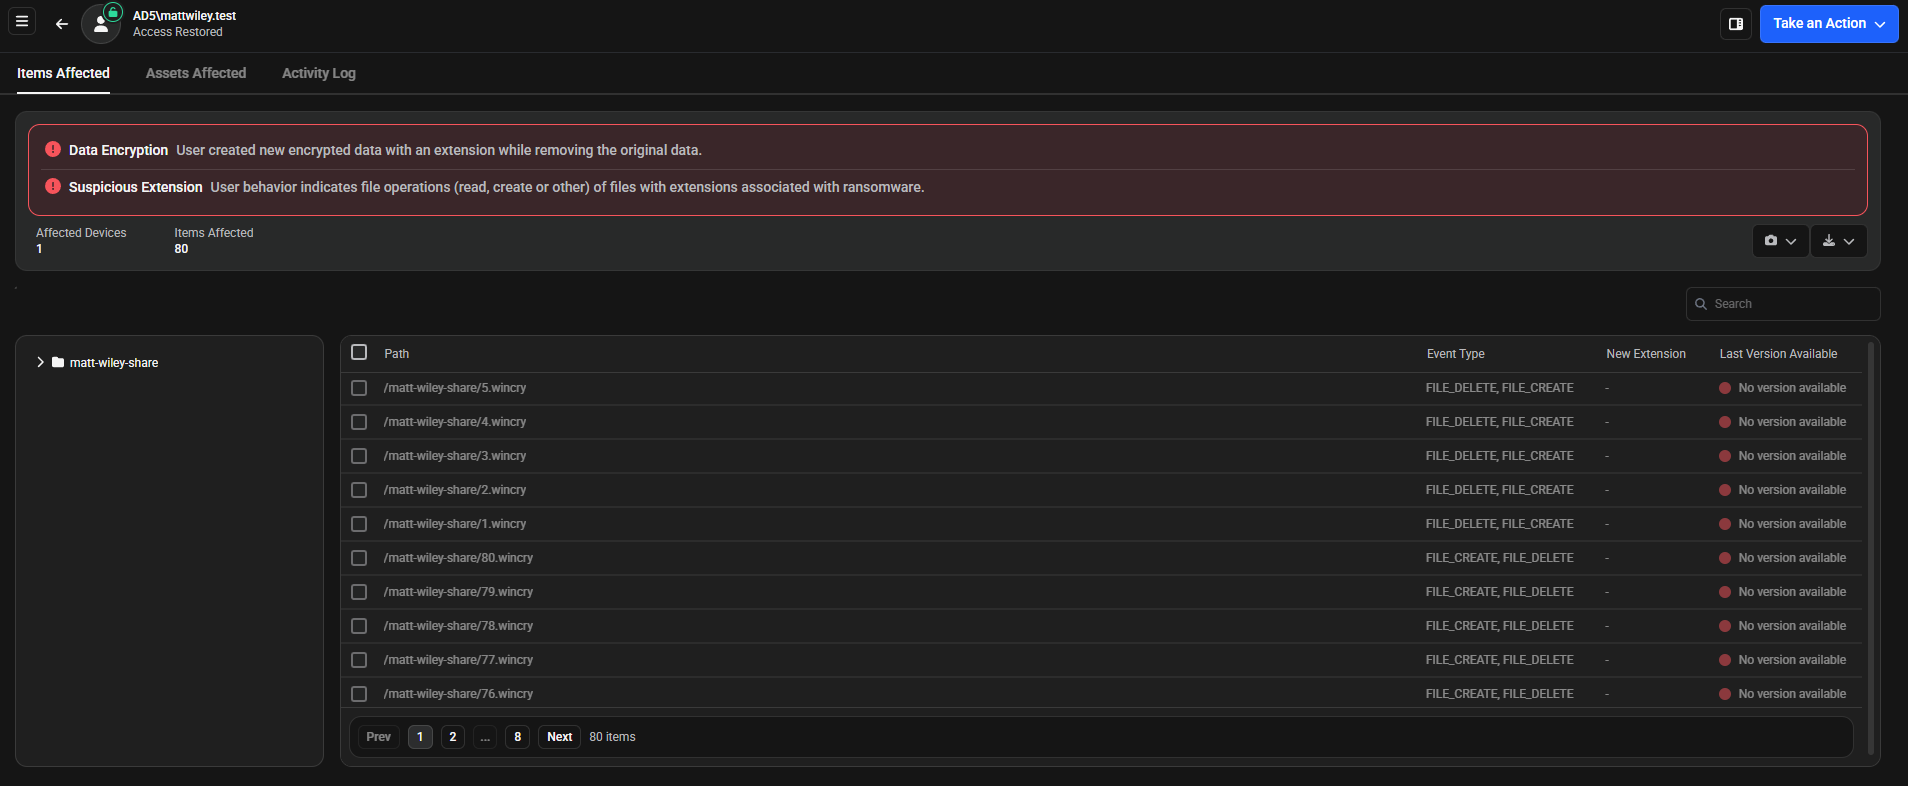
The Items Affected tab displays the detected threat types and detailed information for affected items. The table shows the path, event type, the new extension if it exists, and last version available for each affected item.
Data Encryption - User created new encrypted data with an extension while removing the original data
Suspicious Extension - User behavior indicates file operations (read, create or other) of files with extensions associated with ransomware
Affected Devices: 1
Items Affected: 80
Action Buttons
The tab provides two action buttons in the top right:
- Snapshot Button (camera icon) - Create or update snapshots for selected files
- Create/Update Snapshot - Creates new snapshots or updates existing ones
- CSV Button (download icon) - Exports detailed information about affected items
-
What does the CSV file include?
Category Fields Basic Information id, userId, username, managedDeviceId, protocol, path Location Details clusterId, clusterName, zoneId, zoneName, bucket, region Timestamps earliestTimestamp, latestTimestamp Event Data eventCount, itemState Recovery Information recoverySearchState, recoverable, recoverySource, recoverySourceType, recoverySourceTimestamp, recoverySourceExpiryTimestamp Recovery Actions recoveryJobState, recoveryAction, recoveryActionTimestamp, recoveryActionSuccess
-
File Search
- Search Bar - Find specific files within the affected items list
Assets Affected Tab
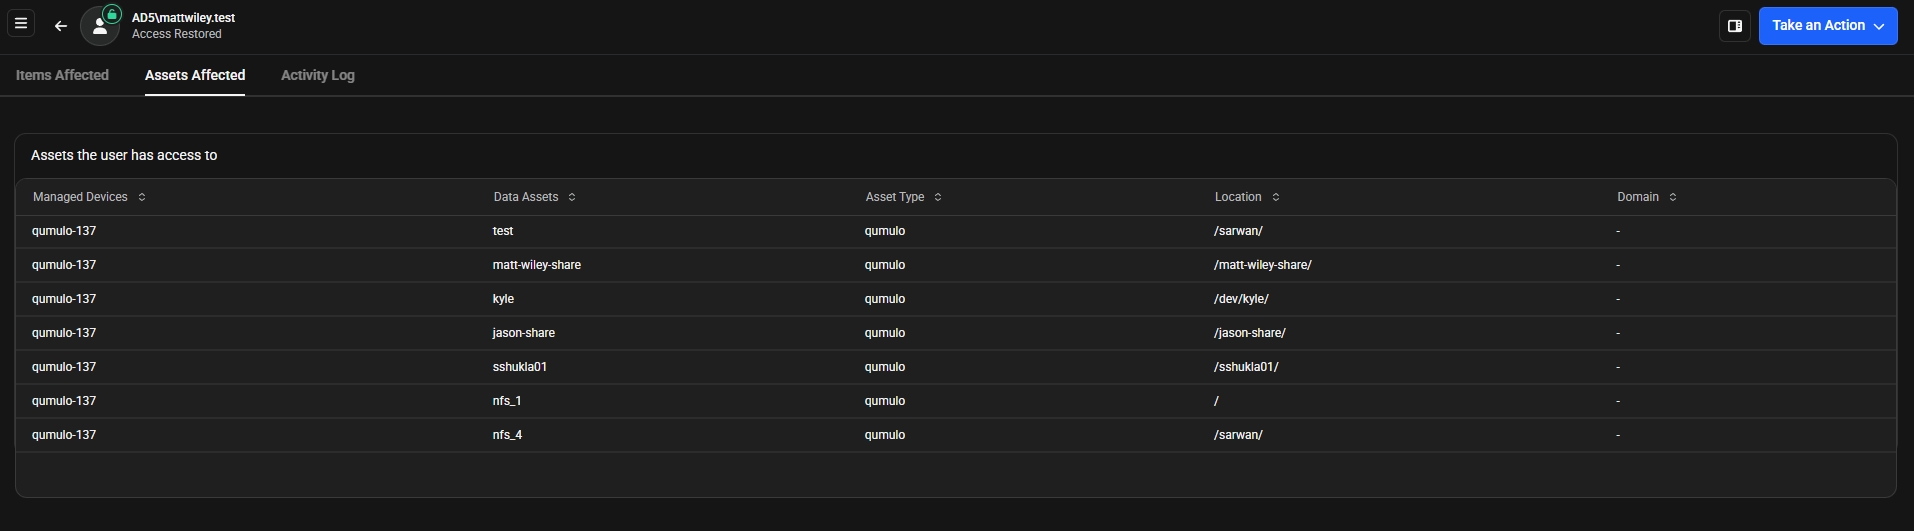
The Assets Affected tab displays all assets accessible by the user who triggered the threat. The table shows managed devices, data assets, asset type, location, and domain information for each accessible asset. This access information helps you assess potential damage scope, prioritize response by focusing on critical assets first, plan remediation by identifying all locations that may need scanning or restoration, and improve security by reviewing if the user had excessive permissions.
Table Columns
| Column | Description |
|---|---|
| Managed Devices | Device names from your inventory |
| Data Assets | Names of shares, exports, or paths |
| Asset Type | Storage platform type |
| Location | Full path to the asset |
| Domain | Domain information (shown as "-" when not applicable) |
| Managed Devices | Data Assets | Asset Type | Location | Domain |
|---|---|---|---|---|
| qumulo-137 | test | qumulo | /sarwai/ | - |
| qumulo-137 | matt-wiley-share | qumulo | /matt-wiley-share/ | - |
| qumulo-137 | kyle | qumulo | /dev/kyle/ | - |
| qumulo-137 | jason-share | qumulo | /jason-share/ | - |
| qumulo-137 | sshukla01 | qumulo | /sshukla01/ | - |
| qumulo-137 | nfs_1 | qumulo | / | - |
| qumulo-137 | nfs_4 | qumulo | /sarwai/ | - |
Activity Log Tab
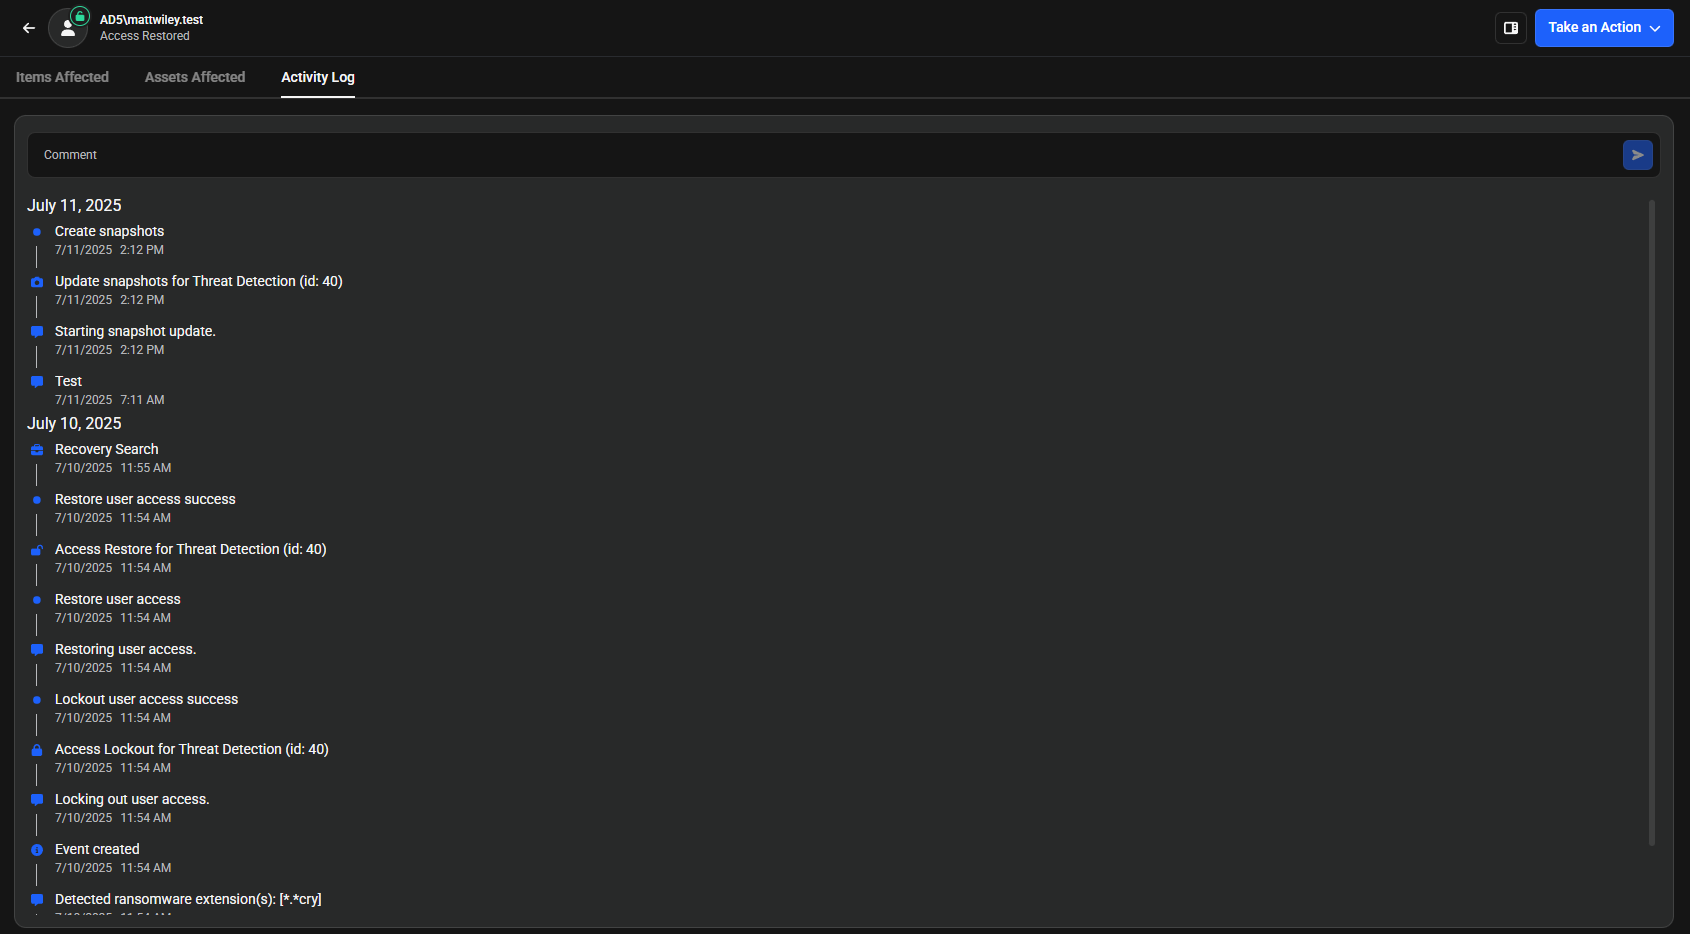
The Activity Log tab displays a chronological timeline of system events and security-related activities. Each entry shows the exact date, time, and hour when actions occurred. For example, user lockouts, event creation, snapshot creation, and comment additions.
Adding Comments
You can add comments to any activity log entry for documentation and team collaboration purposes.
- Ransomware detection (for example, detected .cry extension)
- User access management (lockout and restore actions)
- Threat detection responses (with ID references like "id: 40")
- System signals and event creation
- Snapshot creation activities
- Comment additions
Taking Action
The Take an Action button is available from the main threat list or within the investigation interface. When clicked, you have these response options:
- Lockout User - Immediately disable the user account to prevent further access
- Restore User Access - Restore access for a previously locked out user
- Close Threat - Mark the threat as resolved and move it to the Closed Threats section
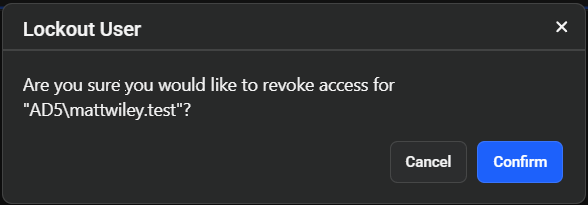
Lockout User
-
Select Lockout User
Choose this option from the action menu. -
Confirm Action
A confirmation popup appears asking if you are sure you want to proceed. Click Confirm to proceed with the lockout.
-
Job Processing
The system runs a job to process the lockout request. You can monitor the job progress in the Jobs section. -
Automatic Access Loss
The user loses access automatically once the lockout job completes successfully.
Restore User Access
Only restore user access after the threat has been properly investigated and handled.
To restore access for a locked out user:
-
Click Take an Action
Click the Take an Action button again. A box called "Restore User Access" will now be displayed. -
Select Restore User Access
Click the "Restore User Access" option. -
Confirm Restoration
A confirmation popup appears asking if you are sure you want to proceed. Click Confirm to restore user access. -
Automatic Access Restoration
The user regains access automatically once the restoration is confirmed.
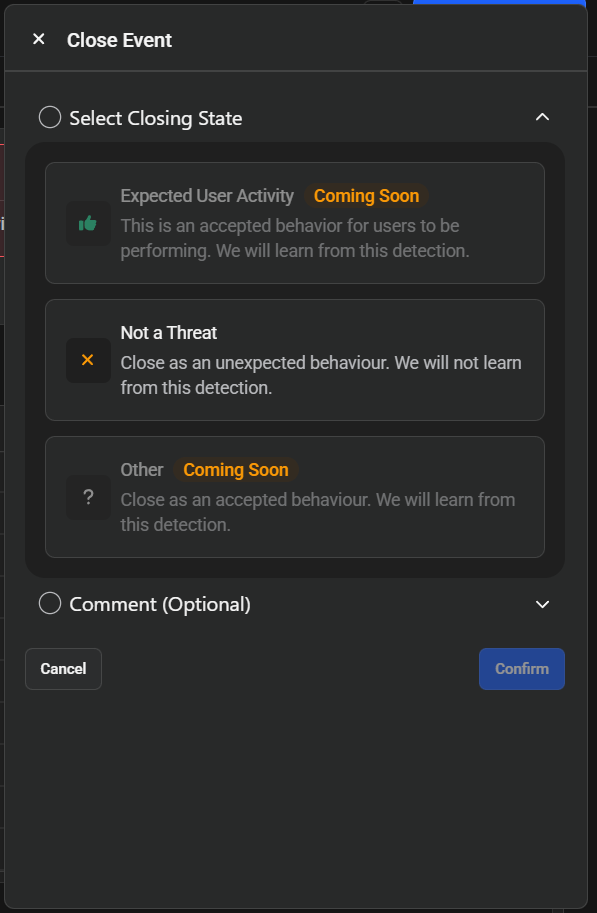
Close Threat
-
Select Close Threat
Choose this option from the action menu. The Close Event dialog appears. -
Select Closing State
 Click the "Select Closing State" and choose how to categorize the threat:
- Expected User Activity (Coming Soon) - Mark as accepted behavior. The system will learn from this detection and won't raise the same events again for the same thresholds.
- Not a Threat - Close as unexpected behavior. The system will not learn from this detection.
- Other (Coming Soon) - Close as accepted behavior. The system will learn from this detection.
-
Add Comment (Optional)
Click the "Comment (Optional)" dropdown to expand the comment field. Enter a reason for closing the threat. These comments will appear in the Activity Log tab when viewing the closed threat. -
Confirm or Cancel
Click Confirm to finalize the closure or Cancel to return without closing the threat. -
Threat Moved to Closed Section
The threat is automatically moved to the Closed Threats section once confirmed.
See Also
- Detection Overview - Understanding threat detection categories
- Dashboard - Monitor active threats
- Jobs - Track response job status
- Inventory - Manage monitored devices