Quick Start Steps
Quick Start Steps
info
A quick guide to setting up user roles in the environment
- Create Roles: Use predefined roles or create new ones based on specific requirements.
- Assign Permissions: Assign appropriate permissions to the roles.
- Assign Roles to Users: Map AD groups or individual users to the roles created.
Detailed Steps
Create Roles
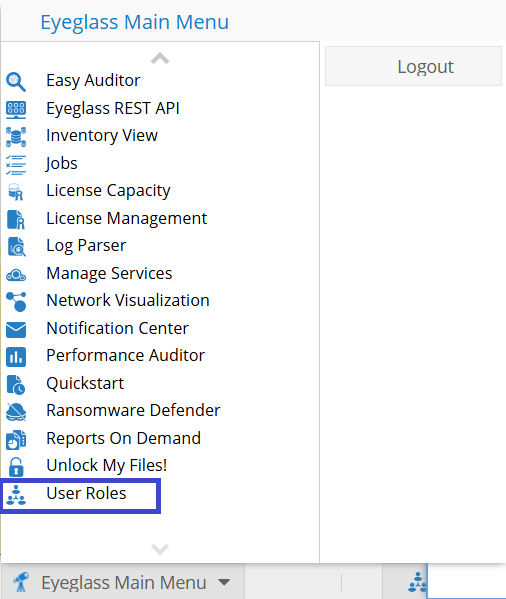
- Go to the user roles section.
- Choose 'Create New Role'.
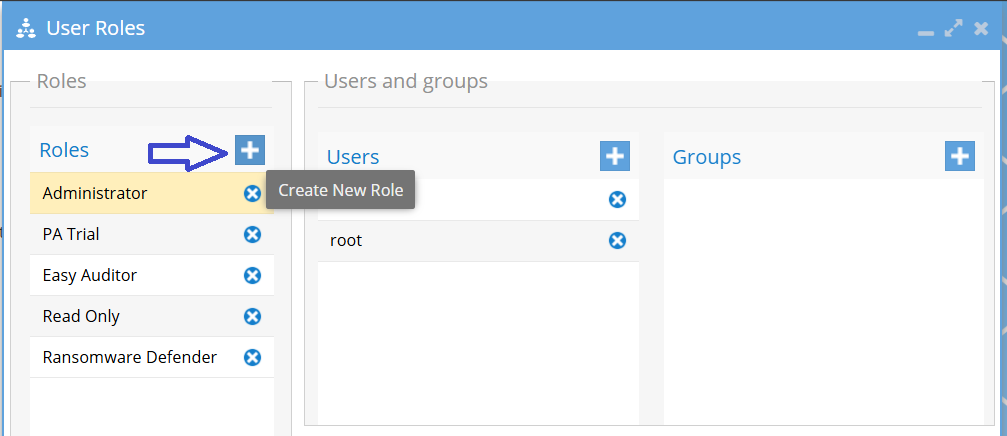
- Define the role’s name.

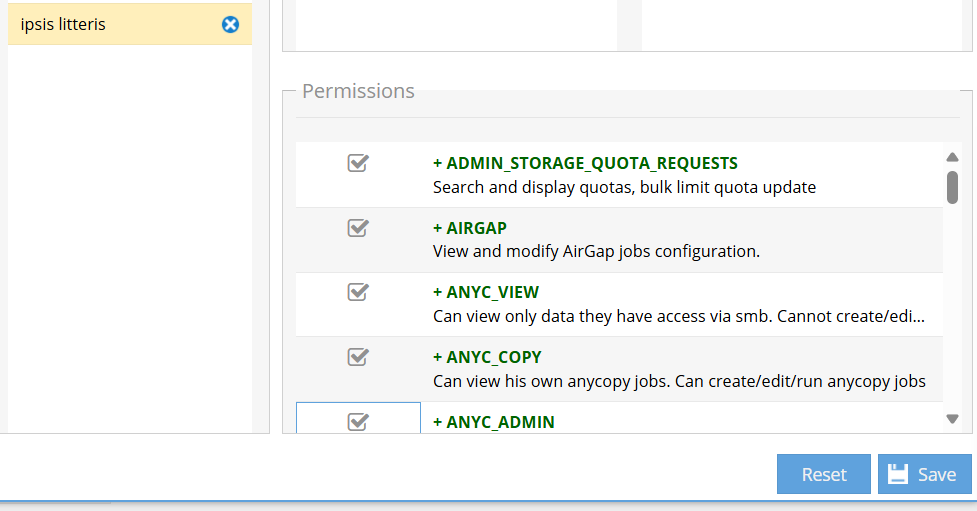
Assign Permissions
- Select the created role.
- Assign necessary permissions (e.g., read, write, admin).
Assign Roles to Users/Groups
- Access User Roles:
- Select Role: In the Roles tab, select the role to assign to the user.
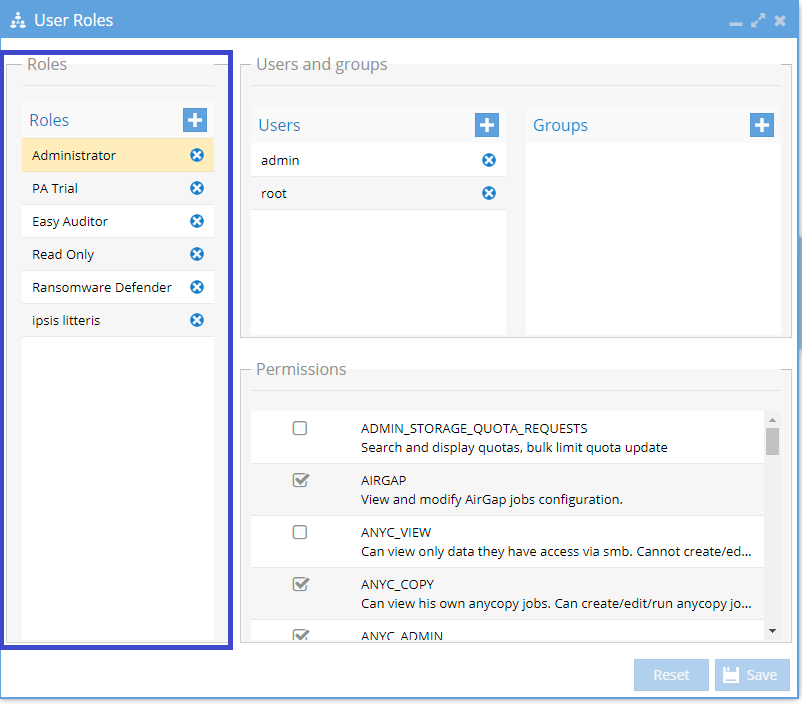
- Add User or Group: Go to the Users or Groups tab and click the plus sign (+) to add a user to the selected role.
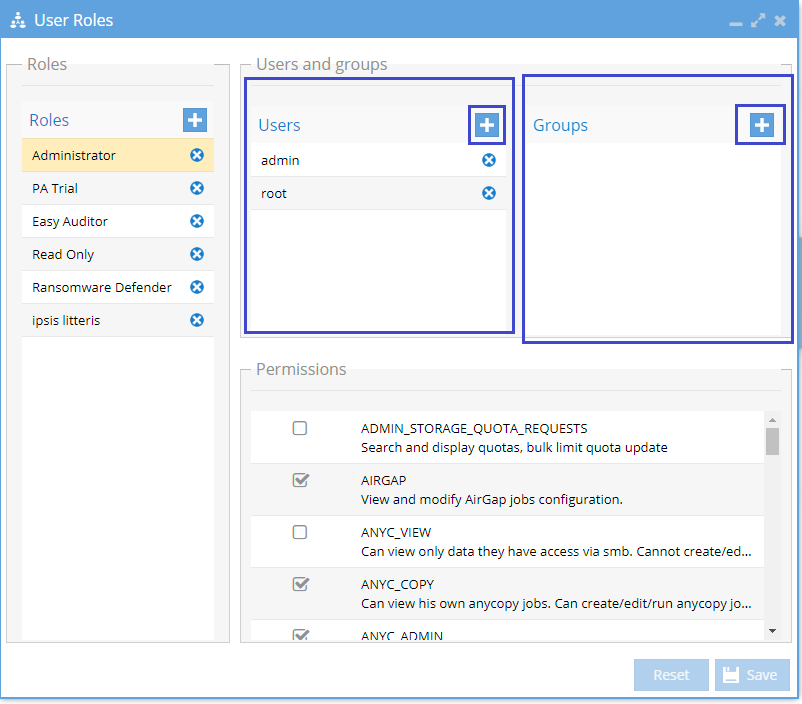
- Enter User Details: Input the username of the user and specify whether they are a remote user or a local user.
- Click Add: Confirm the addition by clicking Add.

- Verify Permissions: Test the role assignments by logging in as a test user to ensure they have the correct permissions.