Add Clusters
Introduction
Before Superna Disaster Recovery can perform monitoring, failover readiness checks, or recovery operations, your storage clusters must be added to the Eyeglass interface. This page explains how to register VAST, Qumulo, and Pure FlashBlade clusters as managed devices.
Once added, these clusters become visible in the inventory and are available for Disaster Recovery workflows such as configuration, readiness validation, and failover execution.
Add a Cluster
- VAST
- Qumulo
- Pure FlashBlade
Adding a VAST Cluster to Eyeglass
-
Open Eyeglass Main Menu: On the Eyeglass Appliance, go to the bottom left corner and click on Eyeglass Main Menu. Then, choose Add Managed Device.
-
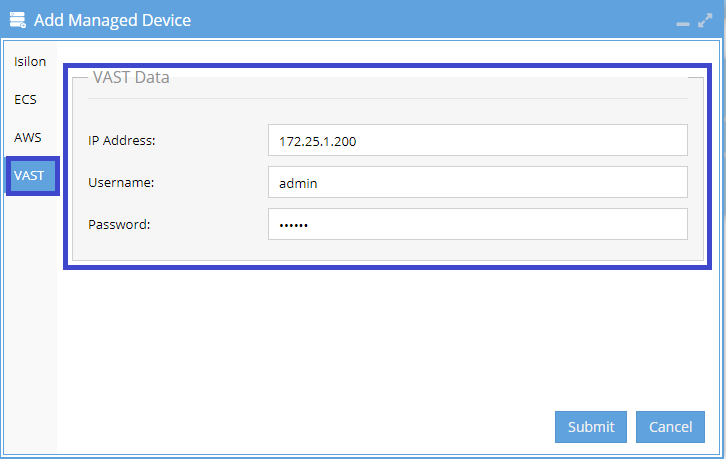
Select VAST: In the Add Managed Device window, choose VAST from the options on the left.
-
Enter VAST Details: Fill in the following fields and click Submit:
- IP Address of the VAST cluster
- Username
- Password
-
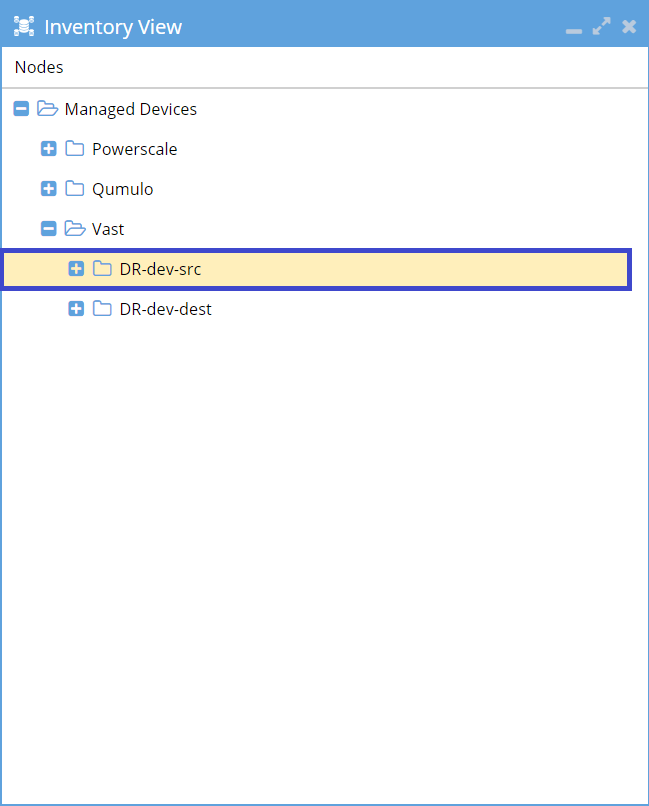
Check Inventory View: Once submitted, the VAST cluster should appear in the Inventory View.
-
Success: You have now successfully added the VAST cluster to Eyeglass.
The device should appear in the inventory right away, but it might take a few minutes for all inventory details to show up.
Adding a Qumulo Cluster to Eyeglass
-
Within the Eyeglass Appliance, click Eyeglass Main Menu in the bottom left corner and select Add Managed Device.
-
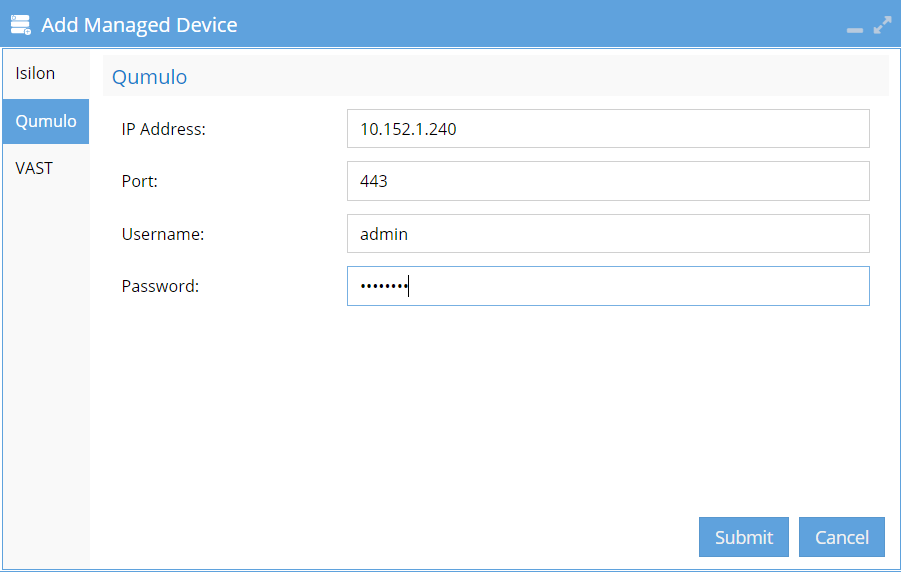
In the Add Managed Device window, select Qumulo from the left-hand options.
-
Enter the following details and click Submit:
- IP Address of Qumulo Cluster
- Port (if different than 443)
- Username
- Password
-
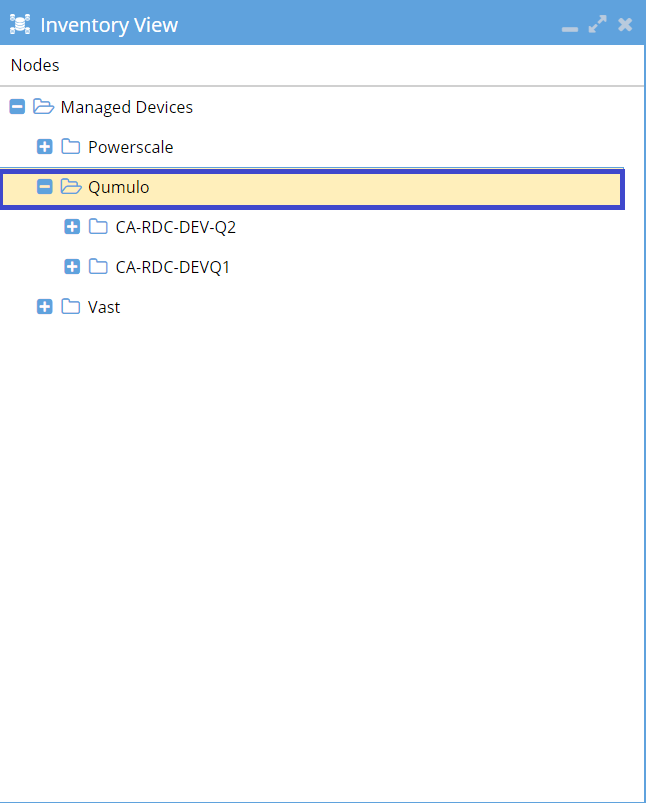
If the operation is successful, you will see the Qumulo cluster within the Inventory View.
-
Success: You have now successfully added the Qumulo cluster to Eyeglass.
The device should appear in the inventory right away, but it might take a few minutes for all inventory details to show up.
Adding a Pure FlashBlade System to Eyeglass
-
Open Eyeglass Main Menu: On the Eyeglass Appliance, go to the bottom left corner and click on Eyeglass Main Menu. Then, choose Add Managed Device.
-
Select Pure FlashBlade: In the Add Managed Device window, choose Pure FlashBlade from the options on the left.
-
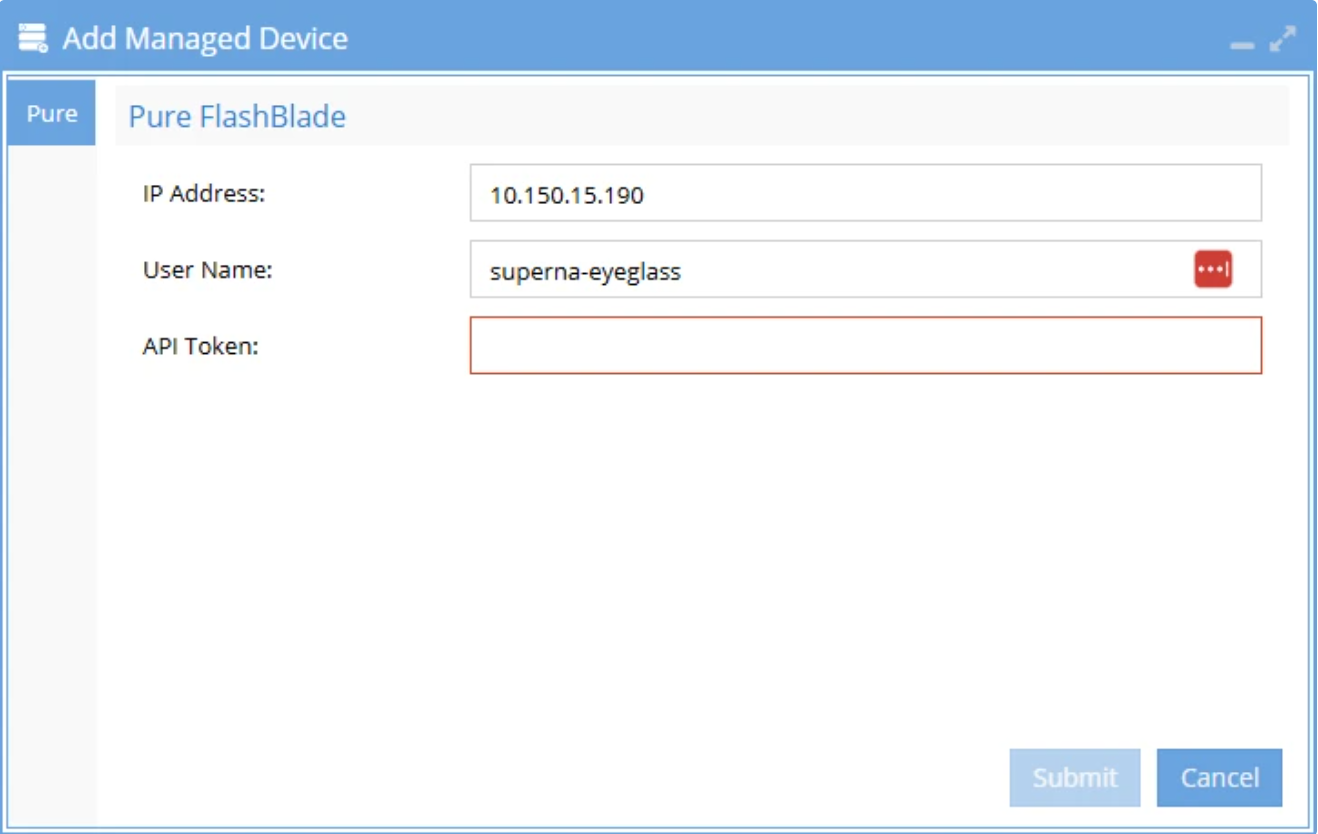
Enter Pure FlashBlade Details: Fill in the following fields and click Submit:
- IP Address of the FlashBlade system
- Username
- API Token
-
Check Inventory View: Once submitted, the Pure FlashBlade system should appear in the Inventory View.
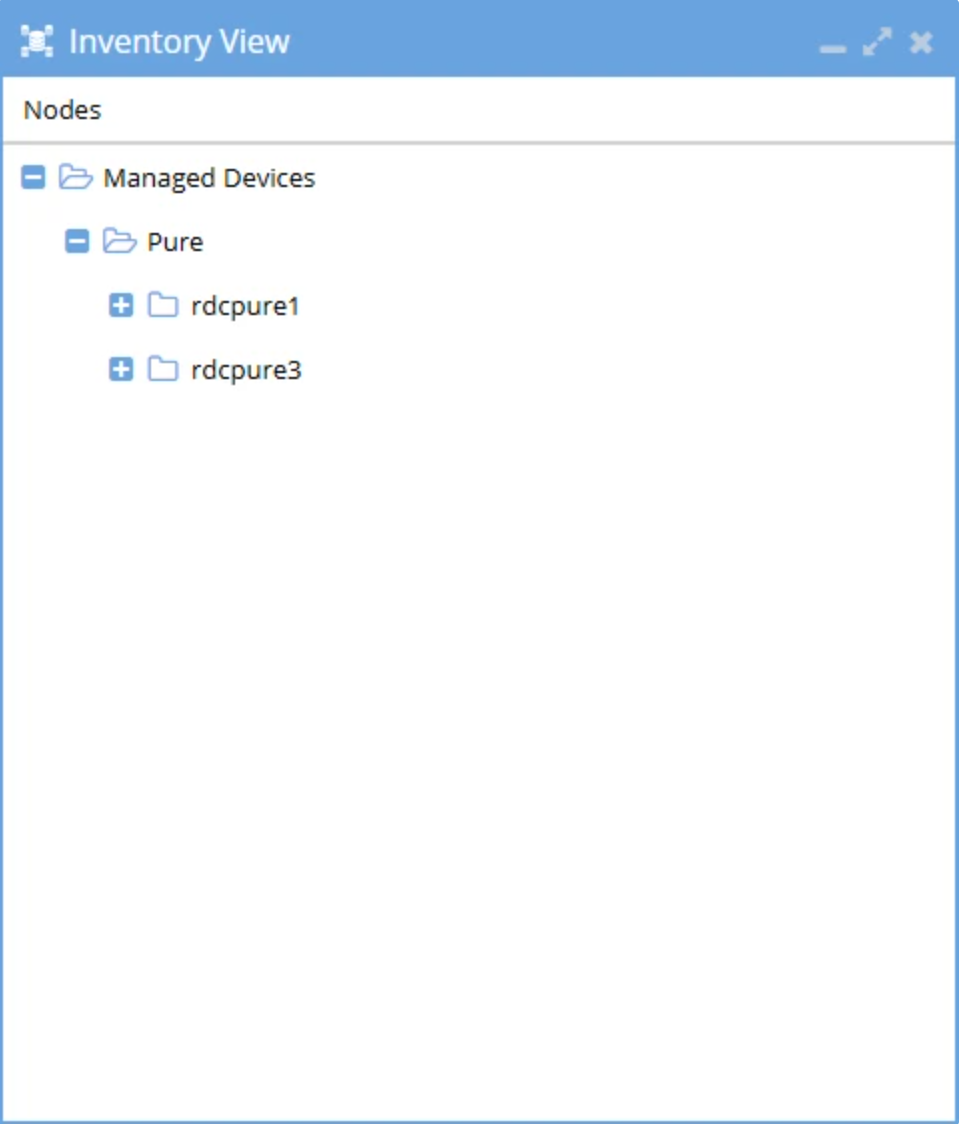
-
Success: You have now successfully added the Pure FlashBlade system to Eyeglass.
The device should appear in the inventory right away, but it might take a few minutes for all inventory details to show up.