Configure Tenant/SMB Failover
Introduction
This guide outlines the steps to configure Tenant Failover between two VAST clusters: a production (PROD) cluster and a disaster recovery (DR) cluster.
It covers VAST operations for preparing tenants, networking, and protection policies, along with Eyeglass tasks needed to enable and validate failover readiness.
Requirements
- Two VAST Clusters
- Non-routable IP range in
system.xml - Active Directory configured
- DNS configured
Configuration Steps
VAST Operations
Create a Tenant
On the PROD and DR clusters,
-
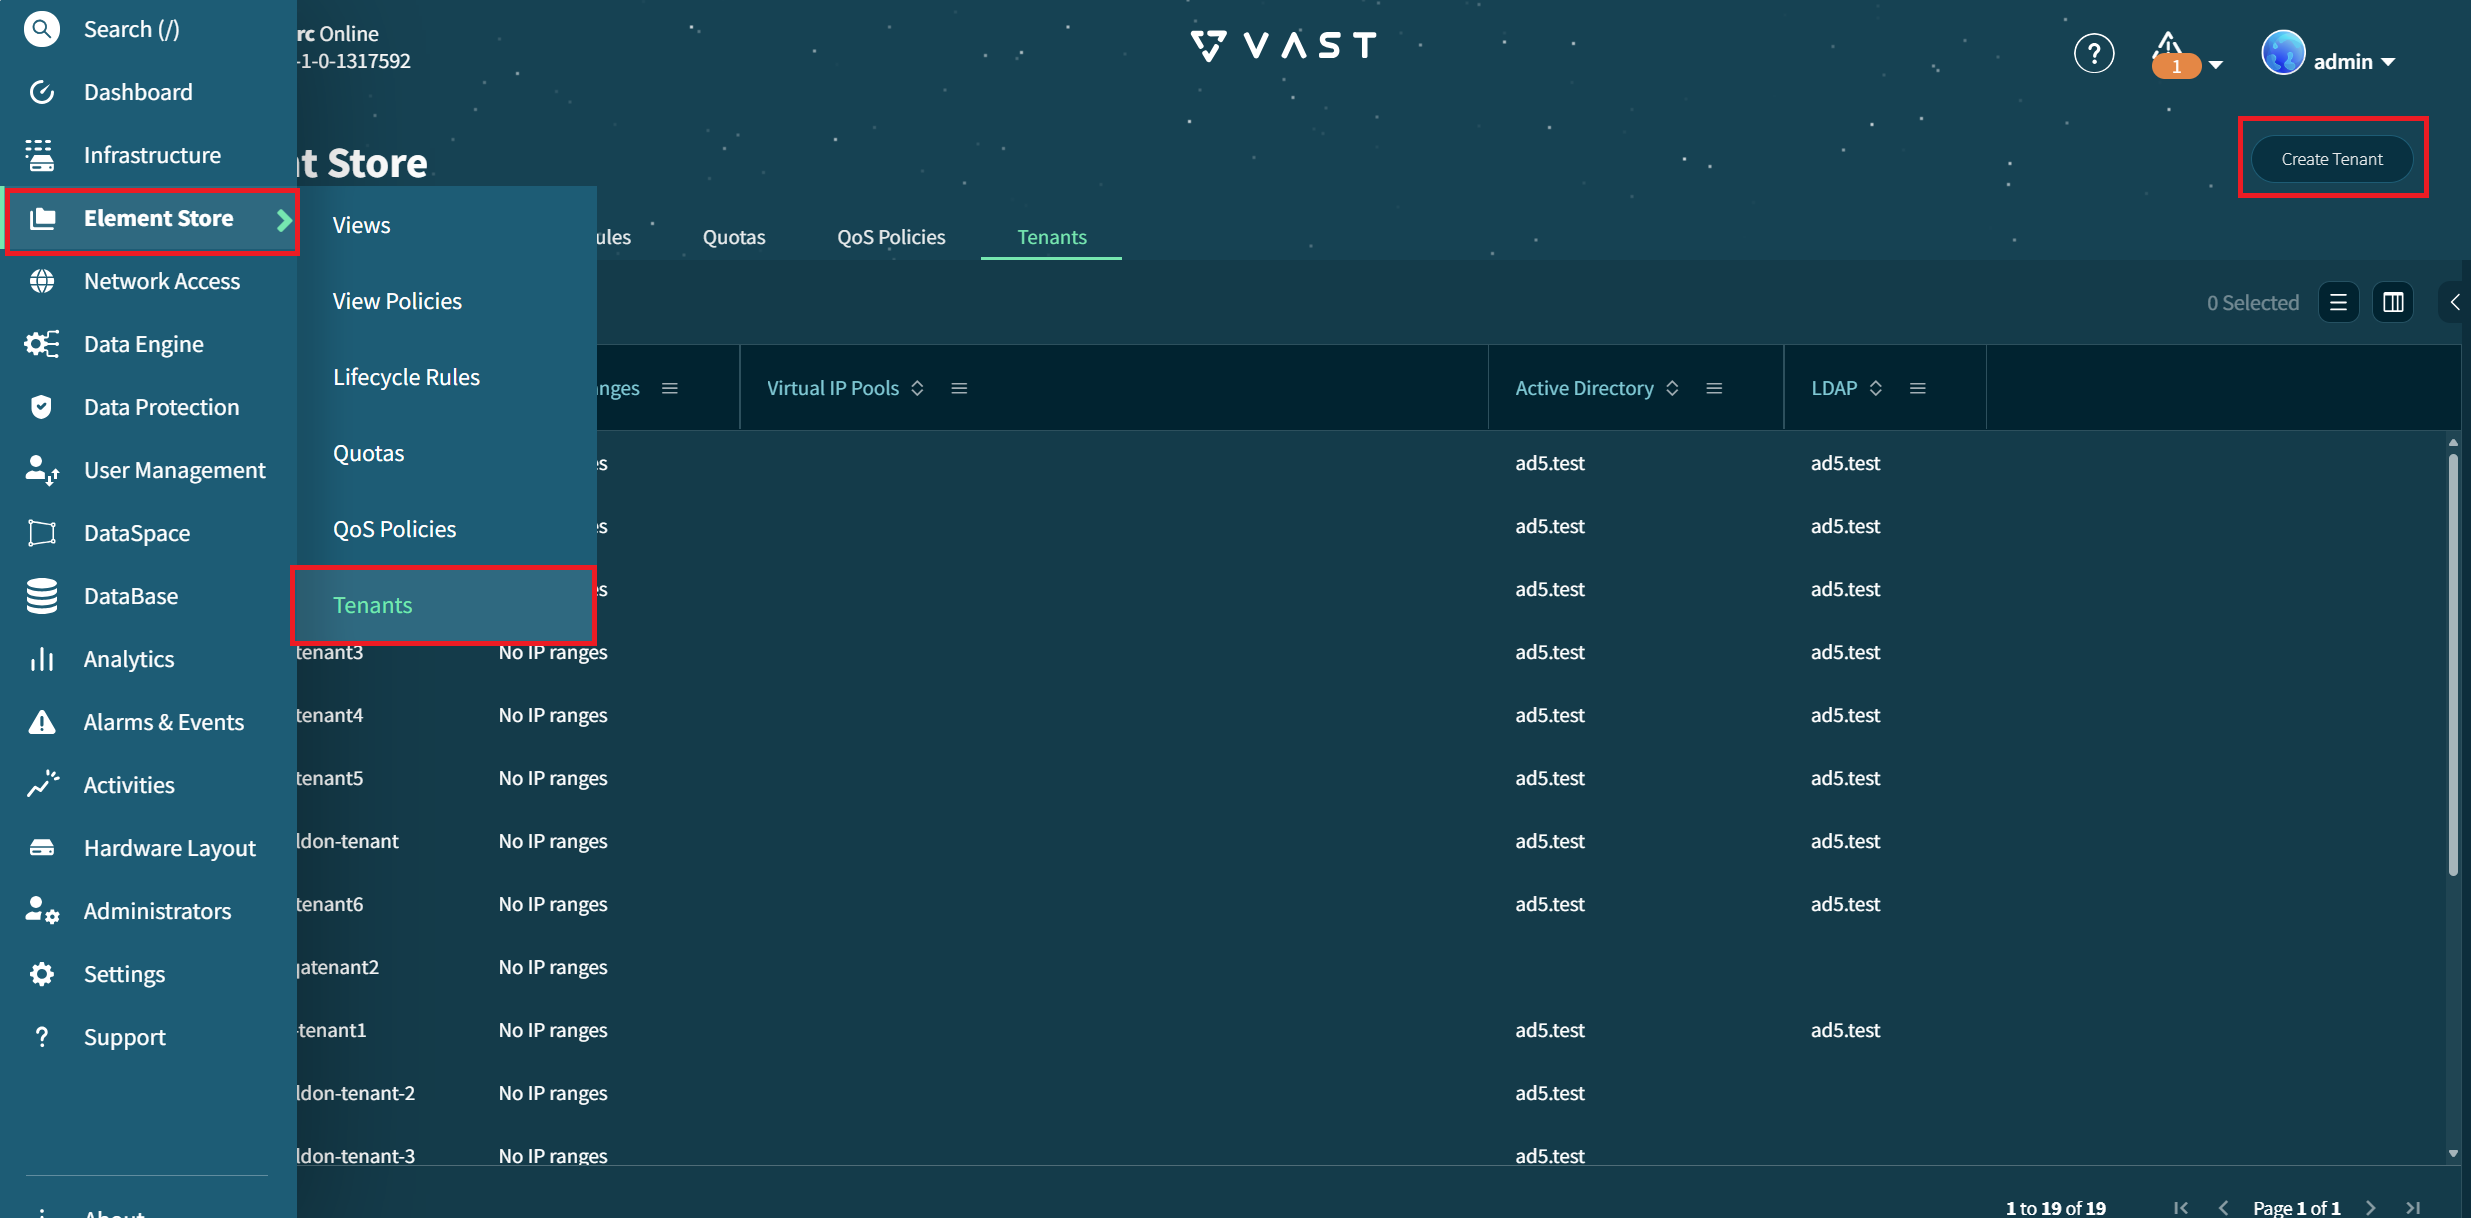
Go to Element Store > Tenants. Click Create Tenant.
-
Complete the information in the Add Tenant window.
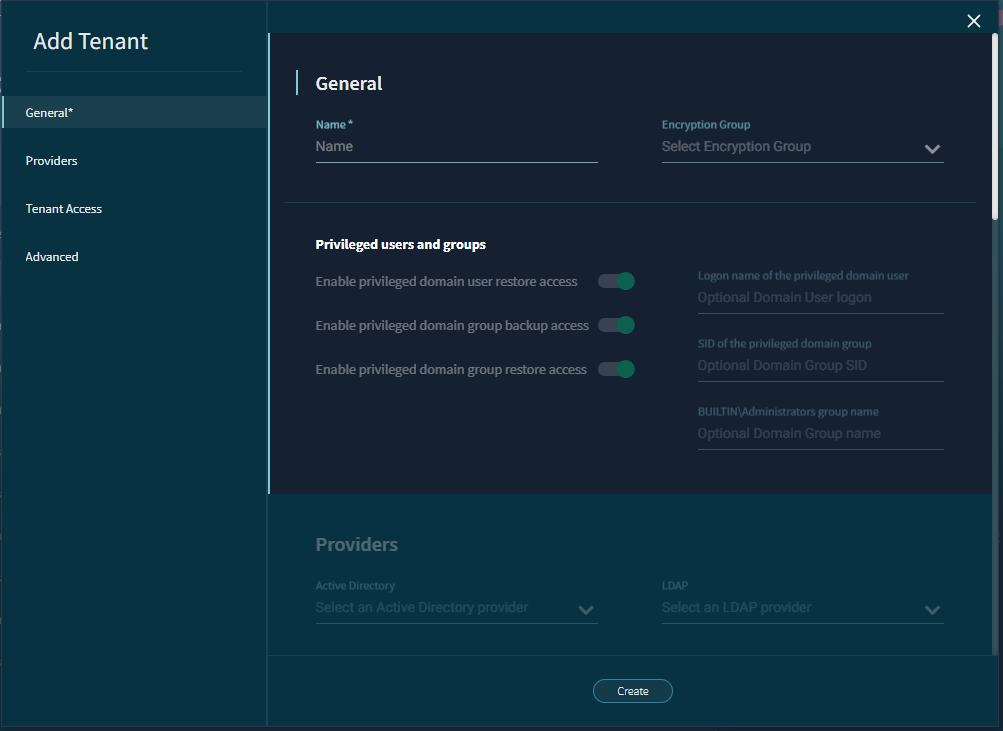
Enter a Name for the Tenant.
Ensure that the tenant names for the
PRODandDRcluster match.For example,
PRODTenant Name:DRTenant Name:
Go to the Providers tab. Select the correct Active Directory and LDAP values.
-
Click Create to create the Tenant and close this window.
If presented with a dialog asking to Create an inaccessible tenant?, select Yes, Create Tenant Anyway
Create a Virtual IP Pool
On the PROD and DR clusters,
-
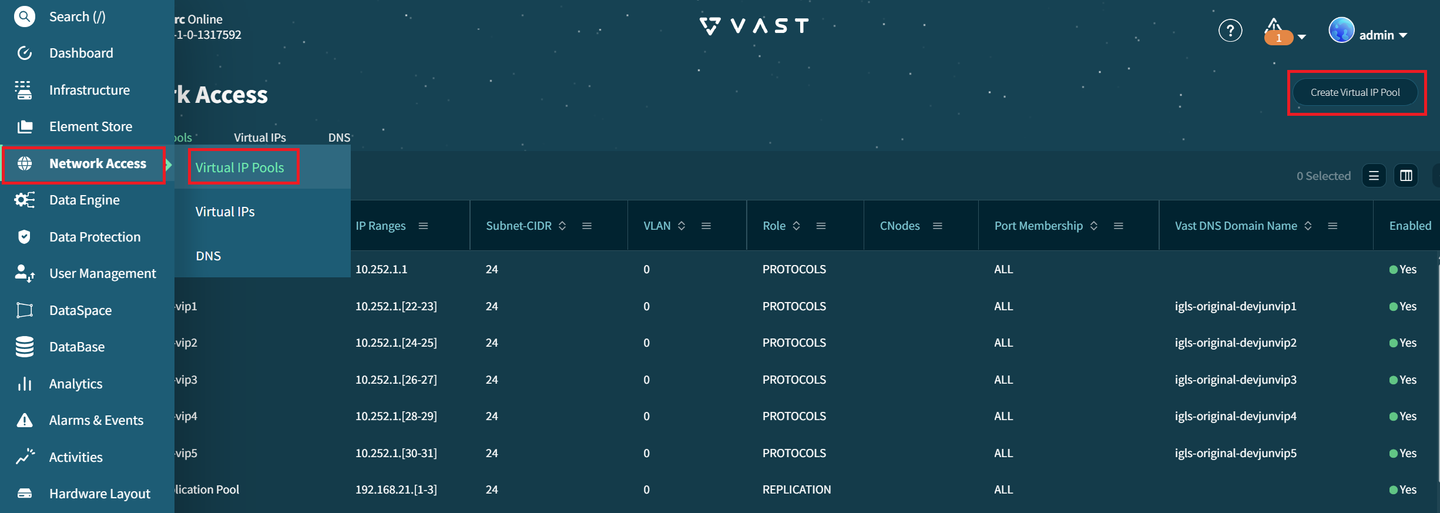
Go to Network Access > Virtual IP Pools. Click Create Virtual IP Pool
-
Complete the information in the Add Virtual IP Pool window.
Select the previously created Tenant. Enter a Name for the VIP Pool.
Enter the appropriate Subnet CIDR IPv4 value that matches your network requirements.
Go to the IP Range List tab. Enter the Start IP and End IP, then click + Add.
Go to the DNS Configurations tab. Enter the Virtual IP Pool Domain Name.
-
Click Create to add the virtual IP pool and close this window.
Repeat the process to create a VIP Pool on the DR cluster. Ensure the names match.
Dual-delegate the domain name within Active Directory.
Create a View Policy
On the PROD cluster,
-
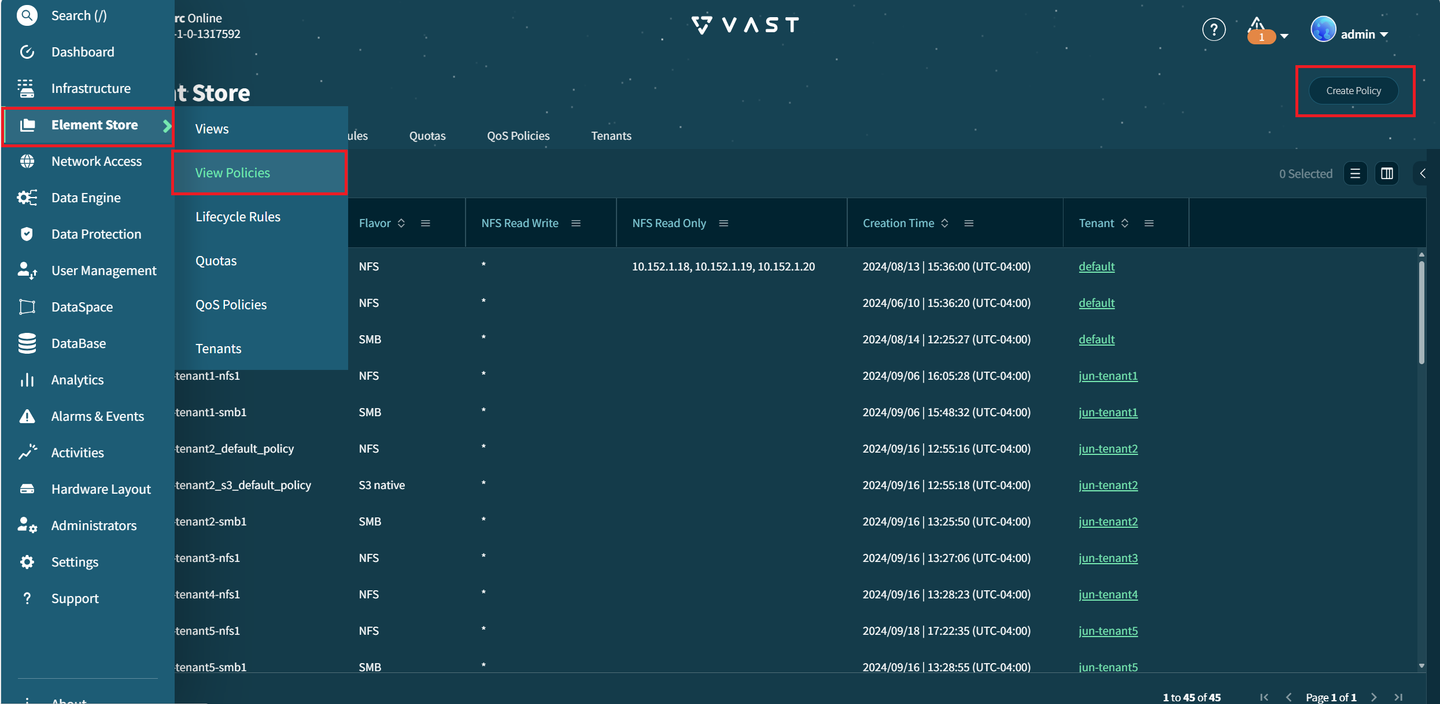
Go to Element Store > View Policies. Click Create Policy.
-
Complete the information in the Add Policy window.
Select the Tenant and Virtual IP Pool created earlier.
Enter a Name for the view policy and select Security flavor.
Go to the NFS tab. Select Group membership source.
-
Click Create to add the view policy and close this window.
Create a View
On the PROD cluster,
-
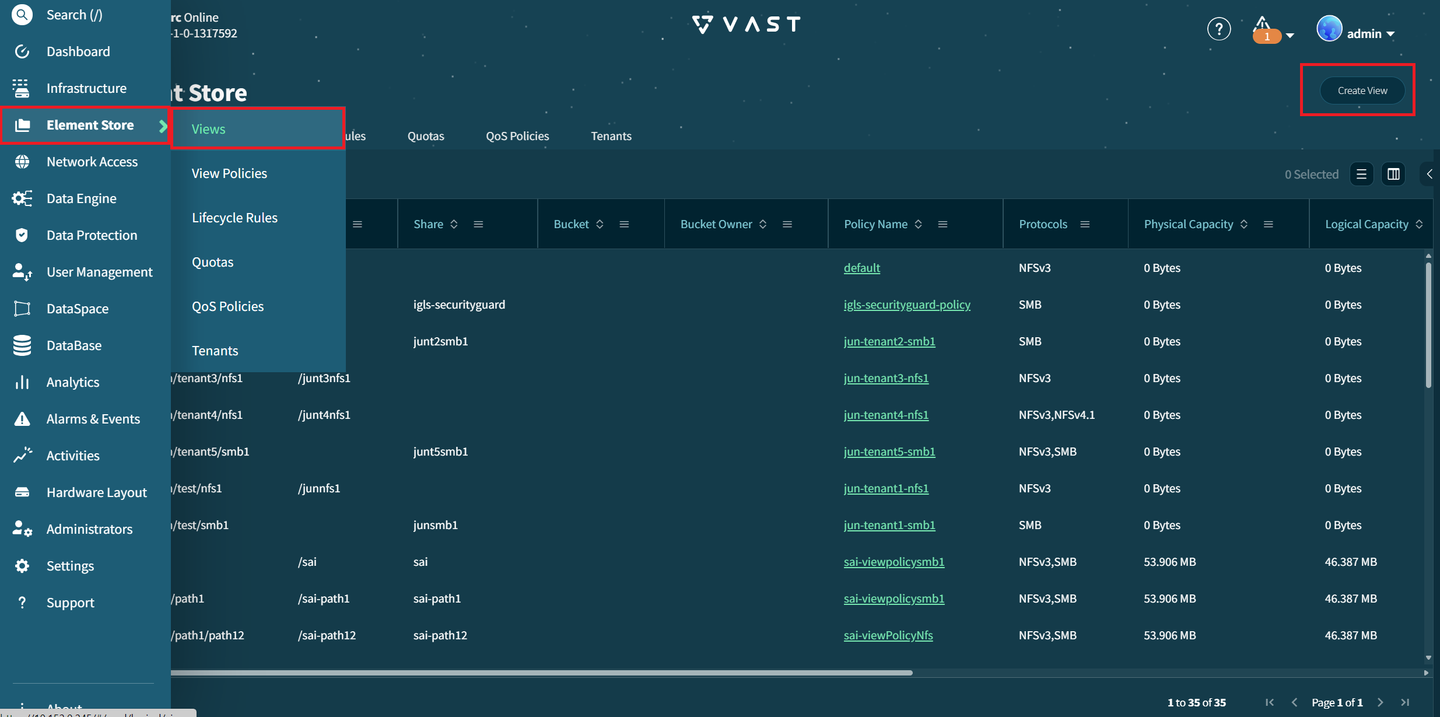
Go to Element Store > Views. Click Create View.
-
Complete the information in the Add View window.
Select the Tenant and Policy name you created earlier.
Enter names for the Path and SMB share name.
Select SMB from Protocols. Select the option Create new directory for the view.
Go to the Share-level ACL tab. Turn on the option Enable Share-level ACL
Select the Domain and Grantee type. Search and select the Name, then select + Add ACE. Add any other user(s) to be included.
-
Click Create to add the view and close this window.
Create a Replication Peer
Skip this step if your PROD and DR clusters are already connected.
On the PROD cluster,
-
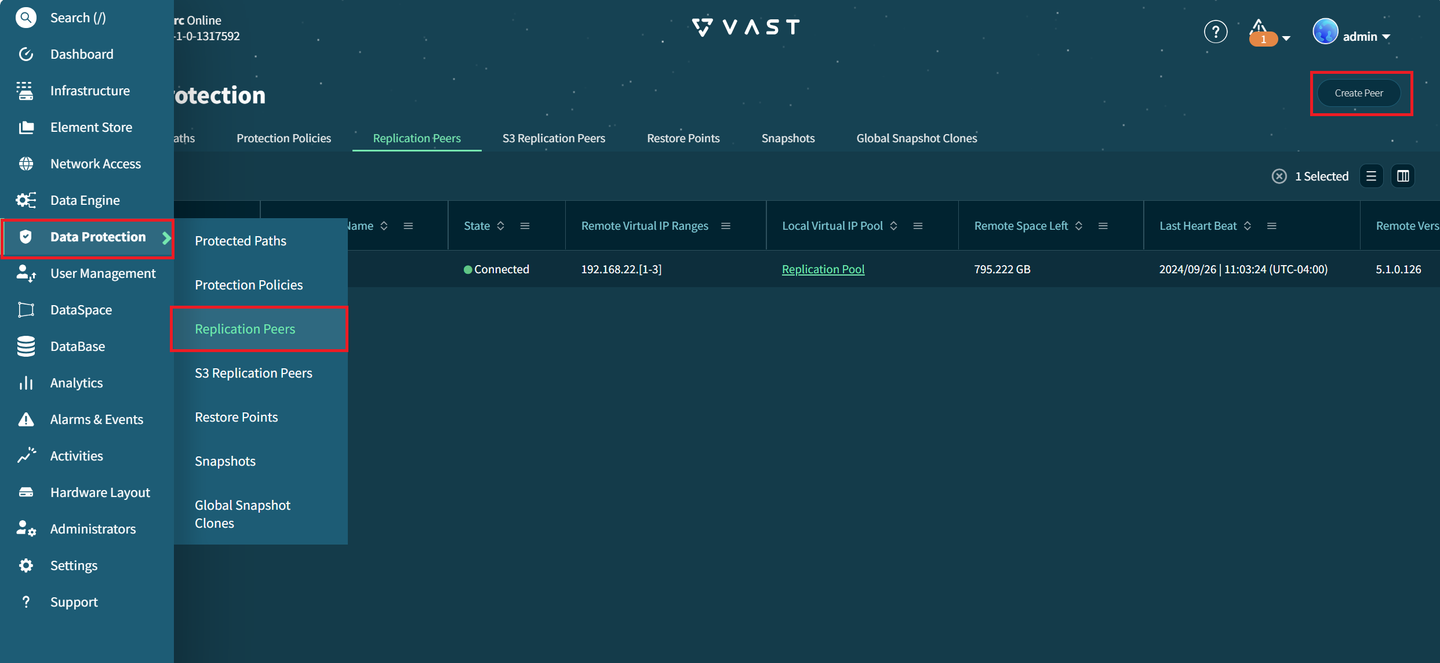
Go to Data Protection > Replication Peers. Click Create Peer.
-
Complete the information in the Add Native Replication Peer window.
Enter the Peer Name and Remote VIP IP value.
infoTo find the Remote VIP, log in to the
DRCluster. Go to Network Access > Virtual IP Pool and look for IPs of VIP Pool with a Role ofREPLICATION.Select Replication Pool for Local Virtual IP pool. Select None for Secure Mode.
-
Click Create to add the replication peer and close this window.
Create a Protection Policy
On the PROD cluster,
-
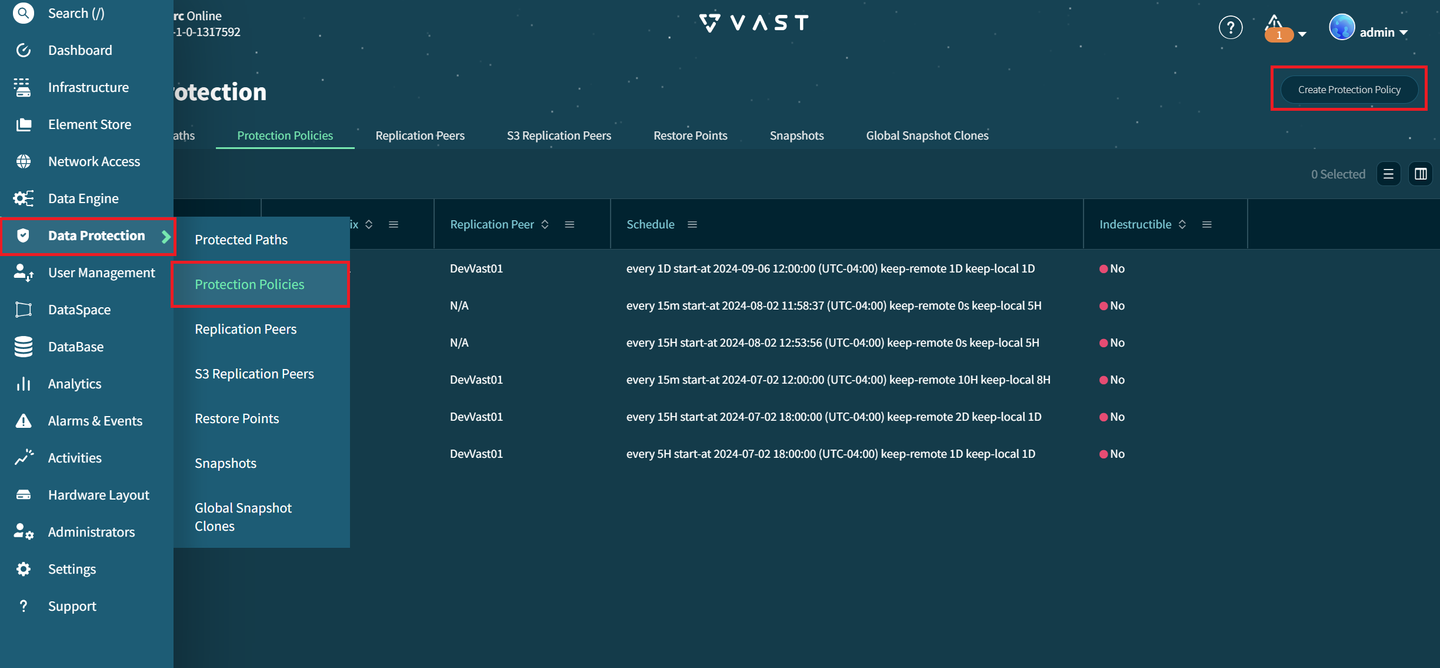
Go to Data Protection > Protection Policies. Click Create Protection Policy
-
Complete the information in the Add Protection Policy window.
Enter a Policy name and Snapshot prefix. For Peer, select the replication peer created earlier.
Set the snapshot schedule.
-
Click Create to add the protection policy and close this window.
This Protection Policy will automatically be created on the DR cluster.
Create a Protected Path
On the PROD cluster,
-
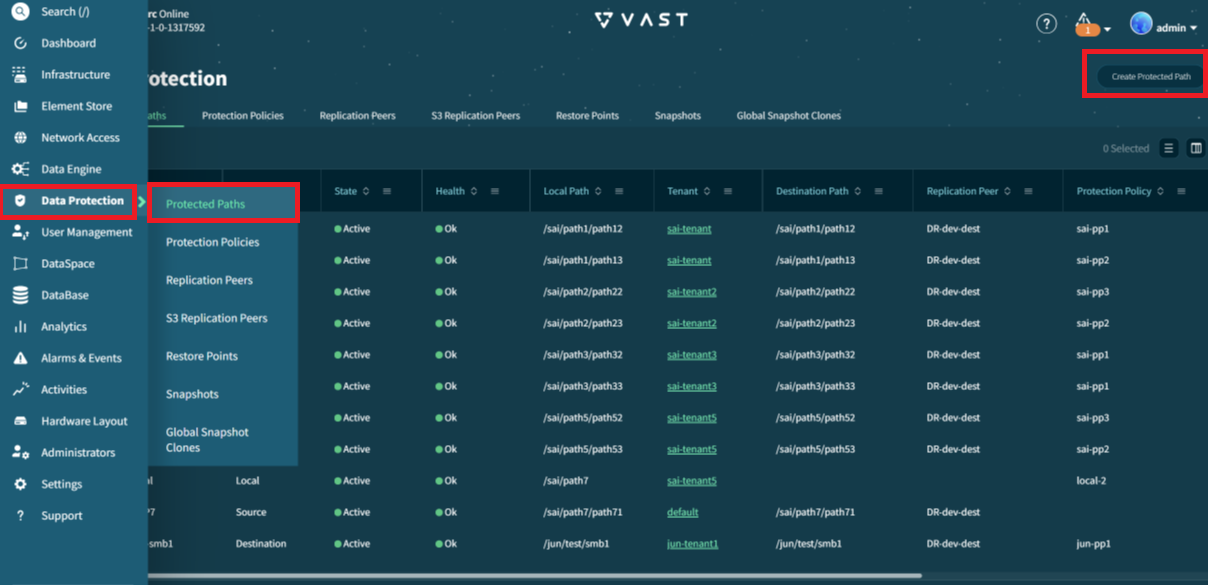
Go to Data Protection > Protected Paths. Click Create Protected Path
-
Complete the information in the Create a Protected Path window.
- Click the link to Create a Protected Path. This opens a new window.
- In this Source window, select the Tenant created before and enter a Name for the protected path. Enter the Path of the view created earlier.
- Select Save to make changes and return to the Create Protected Path window.
- Click the link to Add a Peer VIA Replication Or Global Access. This opens a new window.
- In this Create Destination window, complete the information requested. For Capability, select Replication. Select the Protection Policy created earlier. Select the Remote tenant, the tenant created on the
DRcluster. Select the Path - Click Create to make changes and return to the Create Protected Path window.
-
Click Create to save the protected path and close this window.
The Protected Path will automatically be created on the DR cluster.
Verify that the protected path appears in both the PROD and DR clusters under Protected Paths.
Eyeglass Operations
Log in to the Eyeglass UI.
Follow the instructions in Add Clusters to add the PROD and DR clusters to the Eyeglass appliance. Verify all clusters have proper licensing.
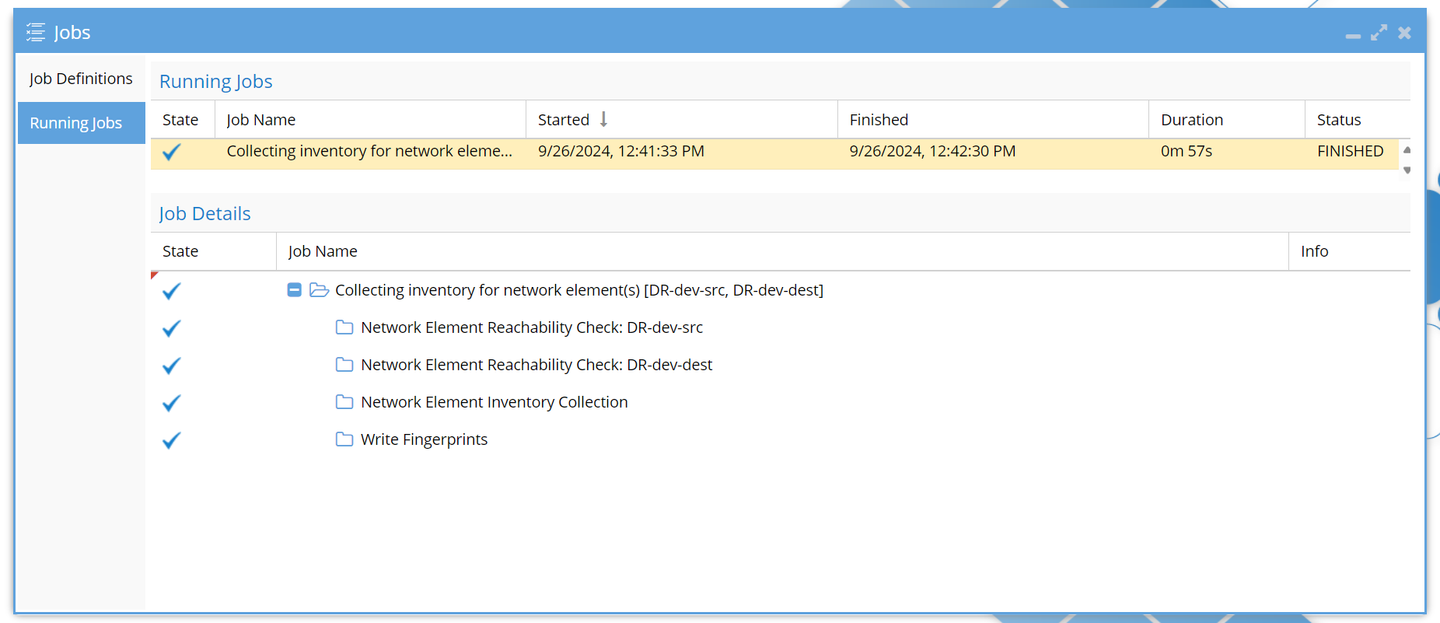
After adding new clusters to the Eyeglass appliance, the inventory collection job starts automatically. Monitor this job by opening the Jobs window and going to the Running Jobs tab. Wait for job completion before continuing.
Tenant/SMB Failover, Jobs and Readiness: Pre-Failover Steps
-
Open the Jobs window and go to the Job Definitions tab.
-
From under Configuration Replication: View replication (AUTOMATIC), select the Protected Path you created in VAST. Select the option to Select a bulk action, then select Enable/Disable.
-
Select Select a bulk action > Run Now to start the job. Go to the Running Jobs tab and expand the Configuration Replication Job for further details.
The details indicate that the job ran for the protected path and completed the creation of all View policies and Views on the
DRcluster. -
Close the Jobs window, and open DR Dashboard. Go to the Protected Path Readiness tab. Under the column DR Failover Status, select the status for the protected path. Here, you can find further details for protected path readiness for failover.
-
Close the DR Dashboard, and open the Jobs window. Under Tenant Failover Readiness (AUTOMATIC), select the Run Now symbol for the
TENANTREADINESSjob. This starts the job. Go to the Running Jobs tab and wait for the Tenant Readiness job to finish running before continuing. -
Close the Jobs window and open DR Dashboard. Go to the Tenant Readiness tab. Under the column DR Failover Status, select the status for the tenant. Here, you can find further details for tenant failover readiness.
-
Close the status details window. Under the column Network Mapping, select View Map for the tenant. Confirm that the VIP Pool configuration details here are correct.